
Whirlpool Top-Load Motor Replacement: Causes
Replacing the drive motor on a Whirlpool top-load washer is 60-90 minutes of work, and most of that is cabinet access rather than the motor itself. Part 285753A covers the direct-drive assembly on WTW machines. Before you order it, though, confirm the diagnosis: F7 E1 is the code people replace motors for, and it is…
Tools: Phillips #2, putty knife, 1/2-inch socket, needle-nose pliers. Unplug the machine, close the water valves and have towels ready for what is left in the hoses.
Confirm the code before you spend#
Find the tech sheet first. Whirlpool folds one into every machine — inside the console on a top-loader, or in the lower toe panel or taped to the rear panel on a front-loader — and it carries your model's wiring diagram, component locations and the diagnostic entry sequence, typically three buttons pressed within 4 seconds.
| Code | What it actually points at |
|---|---|
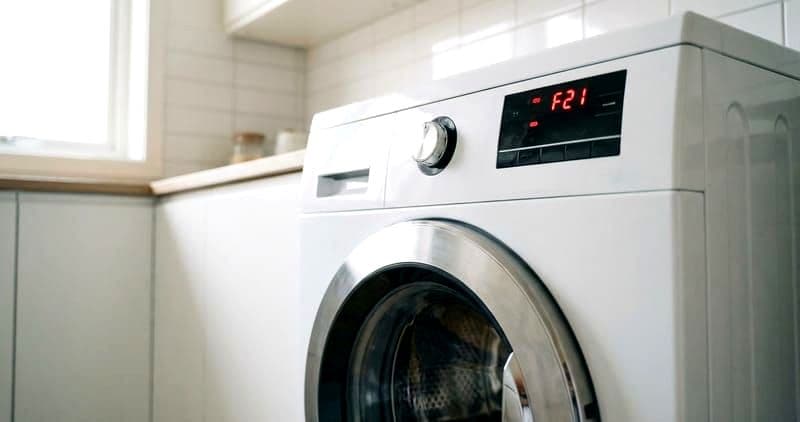
| F7 E1 | Shift actuator or motor sensing. The actuator is a 15-minute job; do not condemn the motor first |
| F5 E1 | Lid switch |
| F8 E1 | Water flow |
| F0 E2 | Oversuds |
Plenty of codes turn out to be wiring or a sensor rather than a major component, which is why the tech sheet cross-reference is worth the five minutes it costs.
Do You Have the Right Tools?
Bearing puller set ($120), drum spider wrench ($85), multimeter ($85), and diagnostic software. Our technician arrives with $3,000+ in professional tools — your diagnostic is free.
Licensed & Insured · 90-Day Warranty · Same-Day Service
Opening the machine#
Take the console off first: 2 Phillips screws at the ends, then flip it back. Release the cabinet spring clips by pushing a putty knife into the seam 2.5 inches in from each front corner — there are 3 clips in total — and lift the top panel on its rear hinges. For full access, remove the 2 lower rear screws and lift the whole cabinet straight up off the base frame.
Photograph every harness before you unplug anything. The connectors are colour-coded, but colours repeat across harnesses and one photo saves a long reassembly.
Removing and fitting#
Release each harness by pressing the locking tab and pulling the connector straight back, never by the wires. Note where mounting screws came from. Anything with a fluid connection wants a pan and towels underneath.
Fasteners here are Phillips #2 or Torx T20, and Whirlpool uses T20 extensively inside the machine — if a screw refuses a Phillips, reach for the Torx before you apply more force and round the head.
Look at the old part properly as it comes out. Burn marks, corrosion, mechanical damage or a connector that was already loose all tell you something, and occasionally the fault turns out to be a disconnected harness rather than the component you just bought.
Fit the new assembly in the original orientation, secure the mounting hardware first, then reconnect the harnesses and push each one until the locking tab clicks. A half-seated connector is the leading cause of a repair that fails within the hour, and it can take a control board with it.
Safety First — Know the Risks
High-voltage components and pressurized water lines create flood and shock risk. A single loose fitting can cause thousands in water damage. Our techs are licensed and insured — let them handle the risk.
Licensed & Insured · 90-Day Warranty · Same-Day Service
Test before you close it up#
With the machine still open, plug in briefly and enter diagnostic mode so you can exercise the new component on its own without committing to a full cycle. Confirm it responds, unplug, then reassemble.
For the cabinet, align the rear hooks first and push forward until the spring clips snap home. Then run a complete Normal cycle on warm with a small load and watch the whole thing through for the original symptom, leaks, noise and codes.
Things that go wrong right after#
- A code the moment it is back together. A harness is not fully seated. Recheck every connector you touched.
- Worse vibration than before. On a top-loader the cabinet has not reseated on its spring clips; on a front-loader a counterweight bolt was loosened during access.
- Fills then drains immediately. The drain hose was pushed further into the standpipe during the work. Reset it to 6-8 inches of insertion.
- Front-loader leaking at the door. The bellow was not seated properly — check the outer retaining band is fully engaged and the drain holes sit at the bottom.
Two platform quirks worth knowing: Adaptive Wash may need 2-3 cycles to recalibrate its load sensing after any sensor or board work, and if FreshHold or the Load and Go dispenser stops working after a repair, check the connector you were nearest — both are easy to knock loose.
Bearing rumble needs the tub split with special tools, and repeated failures suggest a misdiagnosis rather than a bad part. Either way, book a diagnostic.
Appliance Repair Technician · 11 years experience
Experienced technician with 11 years specializing in Frigidaire and Electrolux refrigerator and dryer repair with a focus on safety.


