How to Disassemble a Whirlpool Refrigerator#
A Whirlpool refrigerator opens with nut drivers plus one Torx bit: the attested set is a 5/16" hex nut driver, a 1/4" hex nut driver, a Phillips #2 screwdriver, a flat-blade screwdriver, pliers and a Torx T20 driver. Cut the power at the breaker first, then open whichever route reaches the component you are after — the rear panel, the interior evaporator cover, the top panel, a service access panel, the toe grille and the control panel are six alternatives chosen by the part, not six stages worked through in order. Allow 30 to 55 minutes, and stop where the sealed refrigerant circuit begins.
The Torx is the detail worth registering before anything comes apart, because it is the item on that list a general household toolkit is least likely to hold. Finding it missing with a panel already half free is how a fastener ends up gripped with pliers and a panel ends up levered instead of unfastened.
Before You Start#
Tools needed:
- Flat-blade screwdriver
- 5/16" hex nut driver
- 1/4" hex nut driver
- Phillips #2 screwdriver
- Pliers
- Torx T20 driver
Isolate first — every time:
- Cut power at the breaker or unplug the unit
Time required: 30-55 minutes Difficulty: Intermediate
Safety warning: The sealed refrigerant system is under pressure and is not a DIY boundary — opening a line vents refrigerant and needs EPA 608 certification. Condenser fan blades and sharp evaporator fins sit directly behind the panels being removed.
Do You Have the Right Tools?
Refrigerant gauges ($200+), vacuum pump ($250), leak detector ($150), and EPA-certified recovery equipment. Our technician arrives with $3,000+ in professional tools — your diagnostic is free.
Licensed & Insured · 90-Day Warranty · Same-Day Service
Ways Into a Whirlpool Refrigerator#
Which panel you take off depends on the component you are after. These are the access points a refrigerator repair reaches for, most-used first:
- Remove the rear panel
- Remove the interior cover (evaporator / liner panel)
- Lift the top panel
- Open the service access panel
- Drop the toe grille / kick plate
- Free the control panel
Where this procedure stops: Stop at the sealed system: compressor, condenser, evaporator coil and any brazed line are certification territory, not access work.
What Makes a Whirlpool Teardown Different#
Three drivers characterise this cabinet: a 5/16" hex nut driver, a 1/4" hex nut driver and a Torx T20. Two of those are nut drivers and one is not, and the mix is the whole story of what you will meet on the way in.
Two hex sizes, and why the wrong one is worse than no driver#
The hex sizes describe the distance across the flats of the head, not the length of the fastener or the gauge of its thread — the standard confusion for anyone buying a nut driver for the first time. The attested list carries both sizes rather than one, which means the cabinet genuinely mixes them, and that a driver which seats with a little play is not "close enough". A head that rattles inside a 1/4" driver is a 5/16" head, and turning it anyway rounds the flats until the correct driver no longer grips either.
A nut driver wraps the head rather than sitting in a slot cast across it, so the entire turn goes into the fastener. That is why the list names drivers and not a socket set: the runs beside a cabinet edge and inside a compressor compartment rarely give you the swing for a ratchet handle, and a nut driver can be started one-handed while the other hand supports a panel that is no longer held by anything.
The Torx T20 is the tool that decides how this job goes#
A Torx T20 is on the attested list, and a refrigerator brand carrying one is not the default. The neighbouring refrigerator teardown published here for LG names a flat blade, a 5/16" hex nut driver and a Phillips #2 — and no Torx at all. So this is a real brand trait rather than a generic caution, and it has a practical consequence: a T20 socket has six lobes and engages the whole head, which means it either fits or it does not. There is no partial engagement to work with and nothing to improvise from. A Phillips pushed into a T20 head touches at six points, carries almost no torque and chews the lobes out of the recess on the first firm turn, after which the correct bit spins in a rounded hole.
Buy or borrow the bit before you start. It is the cheapest item on the list and the only one with no substitute.
The flat blade is a sanctioned tool here, and that matters#
The attested set also carries a flat-blade screwdriver, which gives this teardown something a leaner list does not: a named tool for prying. Trim pieces, clip-retained covers and the toe grille come away against spring pressure rather than against a fastener, and having a blade on the list means releasing them is part of the job rather than an improvisation with whatever is in your hand.
It is not licence to lever a panel that is still screwed. Every route above is fastened first and clipped second, so the sequence within any one route is always the same: find and remove every fastener, then use the blade to release what remains. A panel that will not come once the screws are out is telling you either that a clip is holding or that a fastener was missed, and the flat blade only helps with the first of those. The pliers on the list are for spade terminals and hose clamps — not for a head you have already rounded, because that is the point at which a panel stops coming off cleanly at all.
Whirlpool is unusually well covered next door#
Four other Whirlpool teardowns are already published here — two for the dishwasher, one for the washing machine and one for the dryer. That is worth knowing because it is the opposite of the position on most brands: when a fastening style or a clip on this cabinet is unfamiliar, there are same-brand guides beside this one to read rather than a single lonely page.
What this page will not tell you#
There is no model number, no series split, no screw count and no panel weight anywhere on this page, and their absence is deliberate. None of them is attested for this brand-and-appliance combination, and a screw count carried over from a different configuration is actively harmful: it either sends you hunting for a fastener that was never there, or it convinces you that you have them all while one is still holding the panel you are about to pull. Count what is in front of you, and photograph a connector before you separate it.
Safety First — Know the Risks
Refrigerant (R-134a/R-600a) requires EPA certification to handle. Improper discharge is a federal violation and health hazard. Our techs are licensed and insured — let them handle the risk.
Licensed & Insured · 90-Day Warranty · Same-Day Service
Reassembly Notes#
Over-tightening is the characteristic damage on the way back together, and the tool list is the reason. Nut drivers and a Torx both give more torque than sheet metal can absorb, and neither gives much feel for the moment the fastener stops pulling and starts stripping. Bring every fastener to snug and leave it there. A screw that keeps turning under the driver has already pulled its thread out of the panel, and continuing to turn it never recovers the hole.
Keep the two hex sizes separated as they come out, and keep the Torx fasteners apart from both. Sorting hardware by the route it came from costs nothing while the panels are off and removes the guesswork entirely later; a fastener returned to the wrong hole is the commonest way a clean teardown turns into a repair of its own.
What has to be re-seated rather than merely refitted:
- The interior cover behind which the evaporator sits has to go back flat and fully fastened. Air moves along that surface, so a cover standing proud of its seat changes how the compartment behaves once the unit runs again — it is a functional part, not a lining.
- The toe grille sits in front of the condenser and directs air across it. Leaving it off, or clipped in at one end only, is a functional omission for the same reason.
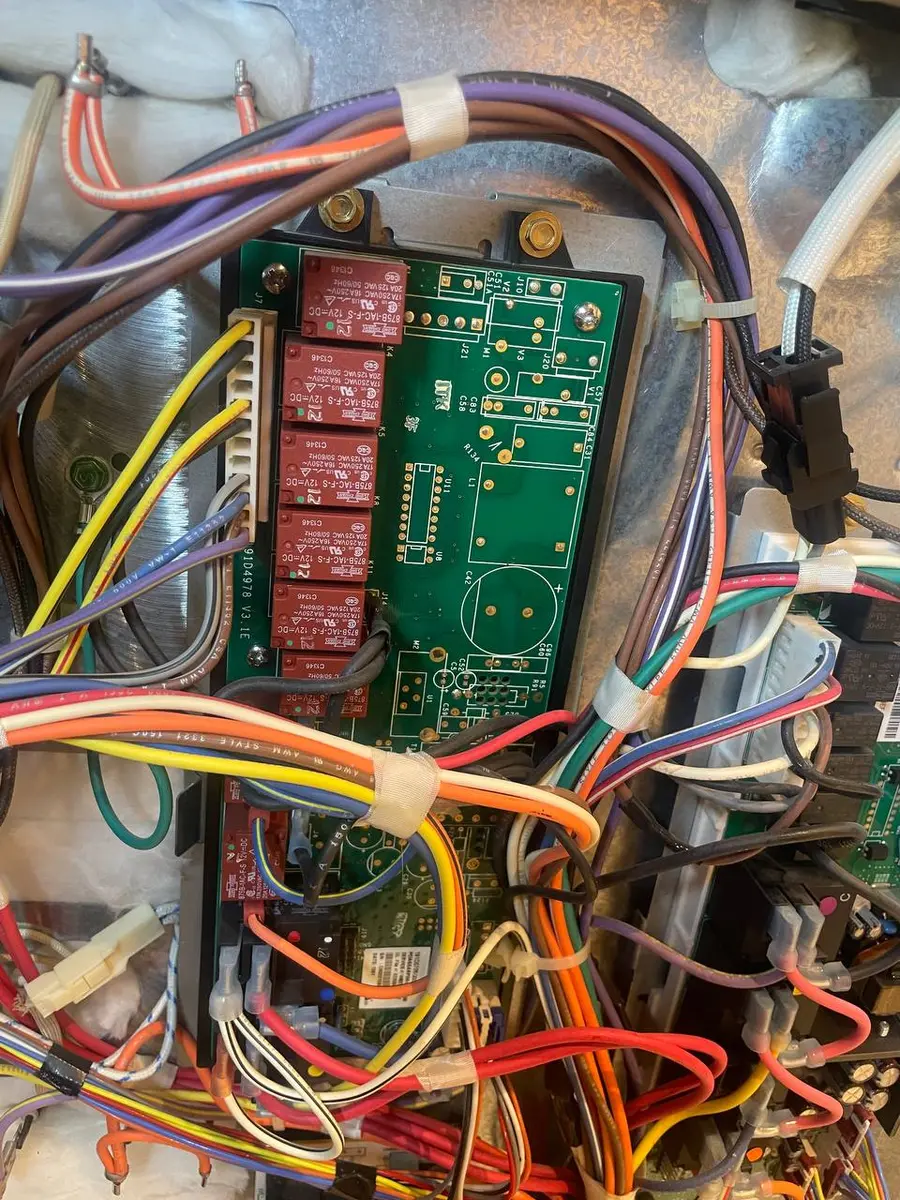
- Anything freed at the control panel goes back by its latch and its connector, not by pulling on the wire. Every connector wants pushing home until it seats, and every harness has to lie back along the path it came out of rather than pinched between a panel edge and the cabinet as that panel closes.
- Where a service access panel or the rear panel carries a gasket or a foam seal, it belongs back in its channel before the panel goes on. Rear panels in particular are part of how the compartment behind them handles air.
Re-test before the cabinet is closed and before power is restored, in that order. With the breaker still open, check every connector you disturbed with a light pull — a terminal that slides off without resistance will arc later — and turn the condenser fan by hand to confirm nothing you removed has been left where the blade sweeps. Then refit panels from the inside out, and put power back on last, once every route you opened is closed and both doors seal against the cabinet.
A refrigerator gives you no immediate feedback that the job went well; it simply starts a cycle. Give it time to run before deciding the repair is finished, and listen to it with the panels on rather than off.
When to Stop and Call a Technician#
Stop at the sealed system. The compressor, the condenser, the evaporator coil and any brazed line between them are certification territory, not access work, and that is a boundary rather than a caution to weigh up. The sealed refrigerant system is under pressure and is not a DIY boundary — opening a line vents refrigerant, and doing it legally requires EPA 608 certification. No tool on the attested list opens that circuit, which is itself the clearest statement of where this page ends.
The hazard and the work share a space, which is what makes this particular boundary easy to cross by accident. Condenser fan blades and sharp evaporator fins sit directly behind the panels being removed: the fan turns on thin blades in the compartment the rear panel opens, and the fins behind the interior cover will cut a hand that reaches in without looking first. You do not have to intend to touch the sealed system to be working right up against it — taking off the panel puts you there.
Call a technician rather than continuing when the work needs the sealed circuit opened, when a leak or an oily residue appears anywhere around the compressor or the coil, when wiring in the cabinet is melted or scorched, or when a component you are after can only be reached by going through the sealed system. Those are certified jobs and diagnosis, not access problems to work around.
Taking a panel off a Whirlpool cabinet is well within a careful owner's reach. What sits behind it often is not. EasyBear runs same-day appliance repair across Sacramento and the Bay Area, and our technicians hold the certification the sealed system requires.
EasyBear is an independent appliance repair company. We are not affiliated with or authorized by Whirlpool.
The Real Cost of DIY
Average DIY attempt: $150-400 in tools you may use once, plus the risk of further damage. Our diagnostic visit costs $0 — we find the problem and give you an honest quote.
Licensed & Insured · 90-Day Warranty · Same-Day Service
FAQ#
What tools do I need to take apart a Whirlpool refrigerator?#
A 5/16" hex nut driver, a 1/4" hex nut driver, a Phillips #2 screwdriver, a flat-blade screwdriver, pliers and a Torx T20 driver. That is the whole attested list, and it is a longer one than most refrigerator brands carry. The Torx is the item to check for before you start, because it is the least likely thing to be in a general household kit and the one tool on the list with no substitute.
What size hex driver does a Whirlpool refrigerator use?#
Both listed sizes: 5/16 inch and 1/4 inch. Those figures describe the distance across the flats of the hex head, not the length of the screw or the size of its thread. Since the attested list names both, own both before you start — a head that a smaller driver rattles inside is one you will round if you keep turning it.
Which panel do I take off to reach the part I need on a Whirlpool refrigerator?#
The one your component sits behind. The routes above are ranked by how often refrigerator repairs use each of them, not arranged into a procedure, so there is no first step to obey. The rear panel opens the compressor compartment, the interior cover reaches the evaporator side, the toe grille reaches the base of the cabinet and the condenser area, and the control panel reaches the electronics. Decide what you are actually going after before a single fastener comes out.
How do I know the power is really off before I start?#
Do not take silence as evidence. A refrigerator between cooling cycles is quiet and its compressor is still, so "it is not running" says nothing about whether the circuit is live. Isolate physically — unplug the unit if you can reach the cord, or open the breaker and keep the panel under your control if you cannot. The attested tool list contains no meter, so this guide gives you no way to confirm the circuit electrically; that needs an instrument outside the list.
How long does it take to open up a Whirlpool refrigerator?#
Budget 30 to 55 minutes. That figure is the average of the bands declared by the refrigerator disassembly guides already published here, so it is a planning estimate rather than a stopwatch reading for your machine. Getting a panel off is usually the quick part — clearing space around the unit and putting it back properly is where the time actually goes.
What should I stop and call a technician for?#
Anything involving the sealed system: the compressor, the condenser, the evaporator coil or the brazed lines running between them. Opening any of those vents refrigerant and legally requires EPA 608 certification. Add to that melted or scorched wiring anywhere in the cabinet, and any oily residue or leak around the compressor or coil — that is a sealed-system symptom and not something to chase further with a nut driver.
Do most refrigerator repairs start at the rear panel?#
The rear panel heads the ranked list because it is the most-used access point across refrigerator repairs in aggregate — but that is a statement about many jobs, not about yours. Removing it because it appears first is simply removing a panel you did not need to remove. Work out which component you are after, then take the route that reaches it.
Appliance Repair Technician & Diagnostics Specialist · 10 years experience
Electronics and diagnostics specialist with 10 years of experience in modern smart appliance repair, specializing in LG and Samsung.