
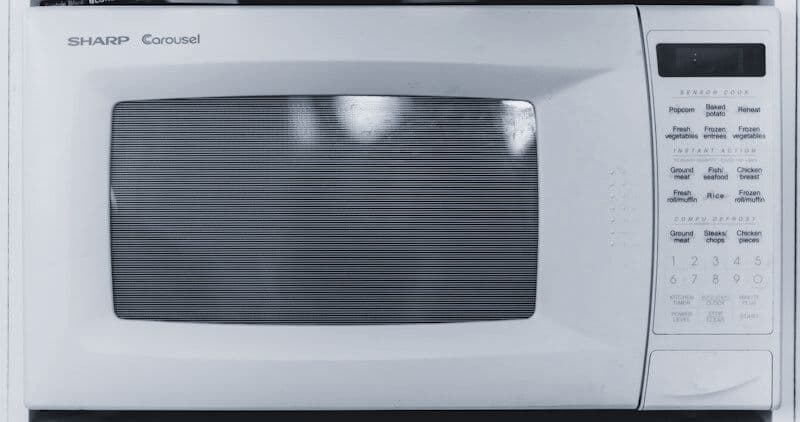
How to Disassemble a Bosch Oven#
Getting into a Bosch oven is a Torx job: T20 on the structural fasteners that hold the appliance and its outer panels, T15 on the door and the brackets behind it, with a Phillips #2 and a pair of pliers for captive screws and harness clips. On this brand the door usually comes off before anything else, because the fascia fasteners sit inside the door opening where a closed door hides them. Allow 30 to 55 minutes to reach most components, and treat the hinges as the one part of the job you do not improvise.
Before You Start#
Tools needed:
- Phillips #2 screwdriver
- Pliers
- Torx T15 driver
- Torx T20 driver
Isolate first — every time:
- Cut power at the breaker or unplug the unit
Time required: 30-55 minutes Difficulty: Intermediate
Safety warning: Wall ovens and ranges run on a 240 V circuit; the door alone can weigh 30-40 lb and its hinges are spring-loaded, so an unlatched hinge snaps shut hard enough to break fingers.
Do You Have the Right Tools?
Combustion analyzer ($300), igniter tester ($120), temperature calibrator ($150), and gas pressure manometer. Our technician arrives with $3,000+ in professional tools — your diagnostic is free.
Licensed & Insured · 90-Day Warranty · Same-Day Service
Ways Into a Bosch Oven#
Which panel you take off depends on the component you are after. These are the access points a oven repair reaches for, most-used first:
- Lift the top panel
- Free the control panel
- Remove the rear panel
- Empty the interior (racks, shelves, drawers, bins)
- Open the service access panel
Where this procedure stops: Stop at the door hinges unless both hinge locks are engaged first, and at any gas connection on a dual-fuel or gas range.
What Makes a Bosch Teardown Different#
Which oven this page is describing#
This guide covers a Bosch wall oven and the oven cavity of a slide-in range, running on electricity — including the electric cavity of a dual-fuel range, where the cooktop burns gas and the oven below it does not. It is not a gas-burner guide. If your range burns gas, the cavity work still applies, but the moment a step crosses the gas connection this page stops and so should you: shutting the supply and leak-checking the joint afterwards is licensed work, and a joint that was never leak-checked is not something you find out about later in a useful way.
Two more boundaries, said up front rather than buried at the end. If the top of your slide-in is bonded glass or an induction surface, lifting the top panel is not your route — the glass is bonded to its frame and levering it at the wrong point cracks it, and an induction board holds charge after the breaker is off. And if the door is locked because a self-clean cycle faulted, do not force it and do not start taking the door off: the latch motor is holding it shut, which is a fault to diagnose rather than a panel to get past.
The fastener tells you which half of the oven you are in#
Bosch runs Torx through the whole appliance line, and the useful part of that is the split between the two sizes. The convention across the brand's appliances is the larger bit on structural fasteners — the outer panels, the cabinet frame, the base — and the smaller one on the door and the internal brackets behind the fascia. Sort your removed screws by where they came from rather than into one tray: the two heads look nearly identical at arm's length, and driving the larger bit into the smaller socket rounds it out in one turn.
Do not substitute a Phillips for a Torx bit because it "nearly fits". It cams out under load, and a rounded Torx socket in a captive screw stops being a fastener and becomes a drill-out — which on a door bracket means the door is now a bigger job than the one you started. The Phillips #2 in the tool list earns its place on the odd pan-head screw and on cabinet-mount hardware, not as a Torx substitute. The pliers are for spade terminals and spring clips, never for a screw head.
The door comes off first, and it is the step with the least margin#
Bosch hangs the door on spring-loaded hinges with a lock lever on each arm, and those levers exist precisely because the springs do not care about your fingers. Open the door fully, flip both levers up until each one seats against the door frame, then close the door onto the locks — it will stop well short of shut, which is correct. Lift straight up and out with both hands and lay it glass-side down on something padded.
If a lever will not flip, stop. Either the hinge is out of adjustment or the spring has failed, and a hinge that lets go under load closes hard enough to break fingers. The door is also the heaviest single part you will handle here, and it is heaviest at the end of the lift when your arms are extended — get it clear of the opening before you change your grip, not during.
Behind the door: the fascia and the control module#
With the door off, look along the top of the door opening and up under the trim. This is the Bosch trait that reorders the whole job: the fascia fasteners are placed where the closed door conceals them, which is why the door leads and not the panel. They take the smaller Torx bit. Free them, and the fascia comes forward with the control module riding on it.
Photograph the connectors before you separate anything. Release each one at its latch rather than pulling on the wire — a ribbon that looks seated but is one notch out reads as a dead display, and you will have reassembled the whole front before you find out. If you cannot find fasteners in the door opening, do not start prying: on some configurations they sit under the top trim strip instead, and a pried fascia is a bent fascia.
The cavity, the top panel and the rear panel#
Emptying the interior first — racks, shelves, any drawer — is the free part of the job and it stops a rack from swinging into you while your hands are full. The rack rails are captive at the side wall and come out toward the door.
A wall oven has to come out of its cabinet before its top or rear panel means anything. The frame screws pass through the side trim inside the door opening into the cabinet stiles; those are the structural fasteners, they take the larger bit, and the appliance is free to slide the moment the last one is out. It is not a one-person lift, and the supply is behind it, so slack the cable before you pull rather than discovering its length at full extension. On a slide-in the maintop is the route to what sits under it, subject to the glass and induction boundary above.
The rear panel is where the element terminals and the convection fan live. Behind it, the cavity is packed in insulation cut to shape — photograph it before you disturb it and put it back the way it came out, because a gap over the cavity is a hot spot in a cabinet.
What this guide will not give you, and why#
You will notice there is no screw count anywhere on this page, and no series name. Bosch's oven line splits across configurations we cannot verify per unit from here, and a count that is wrong by two sends you hunting for a fastener that does not exist on your machine — or worse, leaves you satisfied that you have found them all when one is still holding. Count what is in front of you, and take the panel off only when it is genuinely loose.
Safety First — Know the Risks
Gas ovens involve live gas lines — a loose connection creates explosion and carbon monoxide risk. Electric ovens run on 240V circuits. Our techs are licensed and insured — let them handle the risk.
Licensed & Insured · 90-Day Warranty · Same-Day Service
Reassembly Notes#
Go back in the order you came out, and give the fasteners more thought than they got on the way out. Bosch drives a lot of screws into engineered plastic bosses, and those strip easily: snug the screw and stop, roughly an eighth of a turn past first contact. A stripped boss on a fascia bracket does not hold the control module square, and a control module that is not square puts load on the connectors you just re-seated.
Keep the two Torx sizes apart until the last screw is in. The single most common way to turn a clean teardown into a parts order is to drive a structural screw into a door bracket.
The insulation goes back exactly as it came out, filling the same space — do not compress it to make the rear panel sit flat, and do not leave any of it out because it seemed like packing material. Re-seat every connector until it latches audibly, and re-check the ones you disturbed on the way past rather than only the ones you meant to touch.
The door goes on last: seat it on the hinge arms, then flip both lock levers down before you open it fully. Opening a door with the locks still up is the same slam risk as removing it without them. Finish by closing the door and looking at the gap all the way round — square, gasket seated, nothing catching. Then, and only then, restore power at the breaker.
When to Stop and Call a Technician#
Stop at the door hinges unless both hinge locks are engaged first, and stop at any gas connection on a dual-fuel or gas range. Those two are not cautions, they are the boundary of this page.
The reason the breaker matters more here than on a plug-in appliance: wall ovens and ranges run on a 240 volt circuit, and the control panel going dark is not proof that both legs are open. A wall oven is frequently hard-wired, so there is no plug to pull as a second confirmation — the breaker is the isolation, and if you cannot identify the right breaker with certainty, that alone is a reason to stop. The door adds the other half of the hazard: it is heavy, its hinges are spring-loaded, and an unlatched hinge snaps shut hard enough to break fingers.
Call someone for a door that is locked out after a self-clean fault, for a bonded glass or induction top, for any gas fitting, and for burnt or melted wiring — the last is an electrical fault to diagnose, not an access problem, and reassembling over it just hides it. EasyBear runs same-day oven and range service across Sacramento and the Bay Area, and we are an independent repair company, not affiliated with Bosch.
The Real Cost of DIY
Average DIY attempt: $150-400 in tools you may use once, plus the risk of further damage. Our diagnostic visit costs $0 — we find the problem and give you an honest quote.
Licensed & Insured · 90-Day Warranty · Same-Day Service
FAQ#
Which Torx sizes does a Bosch oven actually need?#
Two: the larger T20 for structural fasteners — outer panels, cabinet frame, base — and the smaller T15 for the door and the internal brackets behind the fascia. That split is the brand's convention across its appliances rather than a per-model spec, so confirm the head before you drive it instead of assuming from position. Keep the removed screws separated by where they came from; the heads are hard to tell apart once they are in one tray.
Do I really have to take the door off first?#
On most Bosch configurations, yes, and not for safety reasons alone. The fascia fasteners are placed inside the door opening where the closed door hides them, so the door is genuinely in the way of the first useful route. It also gets a heavy, spring-hinged part out of your working space before your hands are full, which is worth doing on its own.
How do I know the power is really off?#
Kill the breaker, not the appliance's own controls — the clock and the panel can go dark while a leg of a 240 volt circuit is still live. Many wall ovens are hard-wired, so there is no cord to pull as a second check. If your panel is unlabelled and you cannot positively identify the circuit, that is the point to stop rather than the point to guess.
How long does it take to open up a Bosch oven?#
Budget 30 to 55 minutes to reach most components, which is the whole-corpus estimate for a disassembly of this kind rather than a stopwatch figure for your exact unit. The door and the fascia are the quick part; a wall oven that has to come out of its cabinet is the part that takes the time, and it wants a second pair of hands.
Can I use a Phillips screwdriver instead of a Torx bit?#
No. It will seem to fit and then cam out under load, and a rounded Torx socket turns a five-minute screw into a drill-out. Keep the Phillips #2 for the pan-head and cabinet-mount screws it is actually for.
My oven door is locked after a self-clean cycle — can I take the door off to get in?#
No. The latch motor is holding the door, and removing a door that a latch is still holding is how hinges and latch assemblies get destroyed together. A door locked out after a self-clean fault is a diagnosis — latch motor, its switch, or the control telling it to stay shut — and it belongs to a technician rather than to a teardown.
Mine is a gas range — does any of this apply?#
The oven cavity, the door and the fascia work the same way, and the isolation step still starts at the breaker. Everything that crosses the gas connection is outside this page: the supply has to be shut off and the joint leak-checked when it goes back, and that is licensed work rather than a step we would publish.
Appliance Repair Technician · 8 years experience
Experienced technician with 8 years specializing in dishwasher repairs and European appliance brands including Bosch and Thermador.


