KitchenAid Oven Error Codes: Complete Guide with Fixes
KitchenAid ovens are premium cooking appliances known for features like Even-Heat True Convection, the EasyConvect Conversion System, SatinGlide roll-out racks, and the Aqualift self-clean system. As a Whirlpool Corporation brand, KitchenAid ovens and ranges use the F#E# error code format on the digital display. This comprehensive guide covers every error code across KitchenAid Wall Ovens (KODE, KOSE, KOCE series), Double Ovens (KODE500E), Ranges (KSEG, KFEG, KSGB gas models), and Slide-In Ranges (KSEG700E) — with real part numbers, diagnostic steps, and repair costs.
How KitchenAid Oven Error Codes Work
KitchenAid ovens use an Electronic Oven Control (EOC) board that monitors temperature sensors, door lock mechanisms, and heating element circuits. When the EOC detects a condition outside normal parameters, it halts the oven operation and displays an alphanumeric error code. On double wall ovens, each cavity has its own sensor but shares the EOC — error codes may include a cavity identifier (upper or lower).
Important safety note: Many oven error codes involve high temperatures or electrical faults. Always turn off the circuit breaker before any oven repair work. Electric ovens operate on 240V, which is immediately dangerous.
Standard reset procedure:
- Turn off the oven at the circuit breaker for 5 minutes.
- Restore power and set the clock.
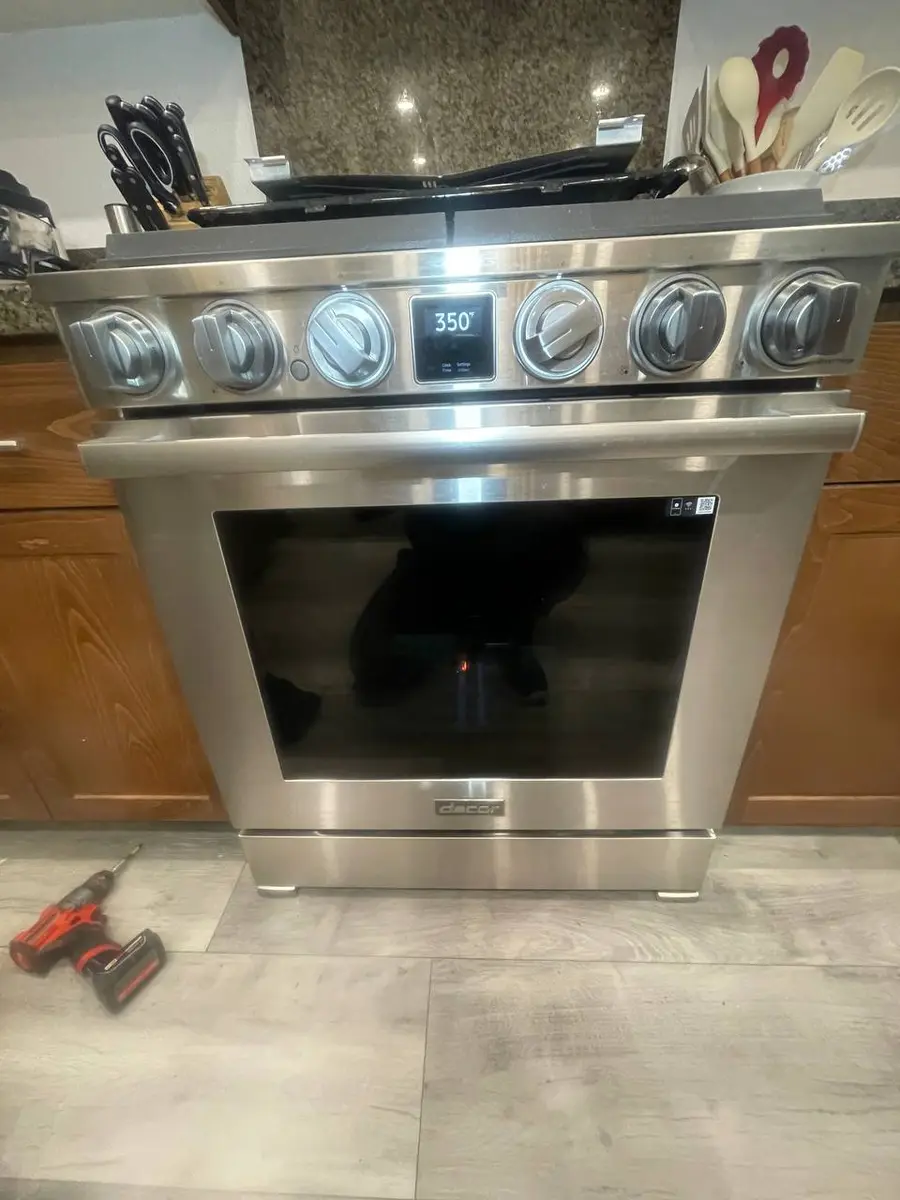
- Attempt a short Bake cycle at 350°F.
- If the error returns within 10 minutes of heating, proceed with specific troubleshooting.
Do You Have the Right Tools?
Combustion analyzer ($300), igniter tester ($120), temperature calibrator ($150), and gas pressure manometer. Our technician arrives with $15K+ in professional tools — your diagnostic is free.
Licensed & Insured · 90-Day Warranty · Same-Day Service
F1E0 — EEPROM Communication Error
The EOC (Electronic Oven Control) board cannot read its internal EEPROM memory chip. This stores calibration data and the oven's programming.
Common causes:
- Power surge corrupting the EEPROM data
- Failed EOC board (part W10837801 for wall ovens, W10839509 for ranges)
- Loose connector on the board from vibration during self-clean
- Momentary power interruption during firmware operation
How to fix:
- Turn off the breaker for 10 minutes — a longer reset gives the EEPROM circuit time to discharge fully.
- Restore power. If the oven successfully powers on and holds the clock, the EEPROM recovered. Run a test bake cycle to verify.
- If F1E0 returns immediately on power-up, the EEPROM data is permanently corrupted. The EOC board must be replaced — the EEPROM cannot be reprogrammed in the field on KitchenAid models.
- On KitchenAid wall ovens (KODE, KOSE), check if the error appeared after a self-clean cycle. The extreme heat (900°F+) can cause solder joint failure on the EOC board.
Part cost: EOC board for wall ovens (W10837801) costs $250–$450. EOC for ranges (W10839509) costs $200–$380. Professional repair runs $350–$550 total.
F1E1 — EOC Board Internal Error
The EOC board has detected an internal hardware fault — a failed component on the board itself, separate from the EEPROM issue.
Common causes:
- Failed relay, capacitor, or MOSFET on the EOC board
- Heat damage from self-clean cycle degrading board components
- Power surge causing component failure
- Age-related solder joint cracking (common on boards over 7 years old)
How to fix:
- Turn off the breaker for 5 minutes and restore power.
- If the code returns immediately, the board has a hardware-level failure.
- Inspect the EOC board (accessed by removing the oven's top trim panel or rear panel depending on model). Look for visible damage: burnt components, cracked solder joints, swollen capacitors, or discolored areas.
- Replace the EOC board. On KitchenAid KODE double wall ovens, the board controls both cavities — a single board failure affects the entire unit.
Part cost: EOC board (W10837801) costs $250–$450. Professional repair runs $350–$550 total.
Safety First — Know the Risks
Gas ovens involve live gas lines — a loose connection creates explosion and carbon monoxide risk. Electric ovens run on 240V circuits. Our techs are licensed and insured — let them handle the risk.
Licensed & Insured · 90-Day Warranty · Same-Day Service
F2E0 — Oven Over-Temperature (Shorted Keypad)
The touch panel is sending a continuous signal to the EOC, which the board interprets as a safety concern — the oven may be receiving a false "start" command.
Common causes:
- Touch panel membrane delaminating from heat exposure during self-clean
- Moisture behind the touch panel from steam cleaning or spills
- Physical damage to the membrane overlay
- Failed touch panel assembly (part W10837802)
How to fix:
- Turn off the breaker immediately — if the touch panel is sending a false start command, the oven could continue heating uncontrolled.
- Disconnect the ribbon cable between the touch panel and the EOC board. If the error clears with the touch panel disconnected, the panel is the faulty component.
- Inspect the touch panel overlay for bubbling, delamination, or moisture pockets. On KitchenAid wall ovens, the overlay is directly above the oven cavity and absorbs significant heat during self-clean.
- Replace the touch panel assembly. On KitchenAid ranges (KSEG, KFEG), the touch panel and EOC are sometimes integrated as a single assembly.
Part cost: Touch panel assembly (W10837802) costs $150–$350. Combined touch panel + EOC (varies by model) costs $300–$500. Professional repair runs $250–$500 total.
F2E1 — Stuck Keypad / Button Error
The EOC detects that a specific button on the control panel is continuously pressed or shorted.
Common causes:
- Physical button stuck from grease or food splatter buildup
- Touch panel membrane failure (less severe than F2E0 — single key rather than continuous signal)
- Ribbon cable partially disconnected
- EOC board input circuit failure
How to fix:
- Turn off the breaker for 2 minutes.
- Clean around all buttons/touch areas with a damp cloth and mild degreaser. Cooking grease accumulates on the control panel and can seep behind buttons.
- Restore power. If F2E1 appears only when a specific button is pressed, that section of the membrane overlay has failed.
- If F2E1 appears at power-up without touching anything, disconnect the touch panel ribbon cable at the EOC. Error clears = faulty touch panel. Error remains = faulty EOC board.
Part cost: Touch panel assembly (W10837802) costs $150–$350. Professional repair runs $250–$450 total.
The Real Cost of DIY
Average DIY attempt: $150-400 in tools you may use once, plus the risk of further damage. Our diagnostic visit costs $0 — we find the problem and give you an honest quote.
Licensed & Insured · 90-Day Warranty · Same-Day Service
F3E0 — Oven Temperature Sensor Open Circuit
The oven temperature sensor (RTD probe) is reading infinite resistance — an open circuit indicating the sensor wire has broken or the connector has disconnected.
Common causes:
- Failed RTD temperature sensor (part WPW10181986)
- Sensor wire broken inside the oven cavity from extreme heat during self-clean
- Disconnected sensor connector at the EOC board
- Corroded connector pins from heat cycling
How to fix:
- Locate the oven temperature sensor — a thin metal probe entering the oven cavity through the rear wall, secured by one or two mounting screws. On KitchenAid wall ovens (KODE, KOSE), the sensor is at the top rear of each cavity.
- Disconnect the sensor at its plug (either at the back of the oven or at the EOC board) and measure resistance with a multimeter. At room temperature (77°F), it should read approximately 1,080 ohms. An infinite/OL reading confirms an open circuit.
- Before replacing the sensor, check the wire harness along its path through the oven cavity. On self-cleaning models, the extreme heat degrades the wire insulation and the conductor can break at stress points. A wire repair may save a sensor replacement.
- Replace the RTD sensor if it reads open circuit. This is a 15-minute repair accessible from the front of the oven.
Part cost: RTD temperature sensor (WPW10181986) costs $20–$45. Professional repair runs $120–$200 total.
F3E1 — Oven Temperature Sensor Shorted
The oven temperature sensor is reading abnormally low resistance — a short circuit in the sensor element or wiring.
Common causes:
- Internally shorted RTD sensor (part WPW10181986)
- Sensor wire insulation melted and conductors touching each other or the oven wall
- Moisture in the sensor connector causing a partial short
- Sensor wire pinched during oven installation (common on slide-in ranges)
How to fix:
- Disconnect the sensor and measure resistance — it should be approximately 1,080 ohms at room temperature. A reading below 500 ohms confirms a short.
- Inspect the sensor wire where it runs through the oven cavity. On KitchenAid KSEG slide-in ranges, the wire can be pinched between the oven cavity and the cabinet during installation.
- Check for any spot where the sensor wire insulation has melted away and the bare conductor contacts the metal oven wall — this creates a ground fault that reads as a short.
- Replace the sensor and route the new wire carefully, securing it with the original clips.
Part cost: RTD temperature sensor (WPW10181986) costs $20–$45. Professional repair runs $120–$200 total.
Don't Void Your Warranty
Opening your appliance yourself may void the manufacturer warranty. Our repair comes with a 90-day guarantee, and we document everything for warranty compliance.
Licensed & Insured · 90-Day Warranty · Same-Day Service
F3E2 — Oven Temperature Sensor Out of Range
The sensor is connected and not fully open or shorted, but its readings fall outside the expected range for the current oven state — for example, reading 400°F at room temperature, or reading room temperature when the oven has been heating for 15 minutes.
Common causes:
- RTD sensor degrading (resistance drifting out of specification)
- Heating element not working (sensor reads correctly, but the oven is not actually heating)
- EOC board misinterpreting the sensor signal
- Intermittent wire harness connection
How to fix:
- Measure the sensor resistance at room temperature — 1,080 ohms ±10%. If it reads 1,000 or 1,200 ohms, the sensor is drifting and should be replaced.
- If the sensor reads accurately at room temp, start a bake cycle and check if the bake element glows. No glow means the element or its circuit has failed — the sensor is correctly reporting the oven is not heating.
- Wiggle the sensor wire harness connector while monitoring for erratic readings — an intermittent connection can cause F3E2.
Part cost: RTD temperature sensor (WPW10181986) costs $20–$45. Bake element (see F5E1 below) costs $30–$70. Professional repair runs $120–$250 total.
F5E1 — Door Latch Won't Lock
The oven door latch motor is running but the door latch is not reaching the fully locked position. This code typically appears when starting a self-clean cycle.
Common causes:
- Door latch motor with stripped plastic gears (part WPW10107820)
- Oven door misaligned, preventing the latch from engaging
- Foreign object near the latch slot
- Door hinge binding or broken, preventing full closure
- Latch position switch failure
How to fix:
- Inspect the latch slot at the top center of the oven opening for debris or food buildup.
- Check that the oven door closes fully and sits flush against the frame. On KitchenAid wall ovens with SatinGlide racks, a rack that is not fully pushed in can prevent the door from closing completely.
- Listen for the latch motor when starting self-clean — a buzzing without movement indicates stripped gears in the motor assembly.
- Access the latch assembly by removing the oven top trim panel. Inspect the motor gears and the latch arm mechanism for damage.
- Test the latch position switches with a multimeter — there are typically two switches (locked and unlocked position) that the EOC uses to verify latch state.
Part cost: Door latch assembly with motor (WPW10107820) costs $50–$120. Professional repair runs $180–$300 total.
Is It Worth Your Time?
Oven temperature issues require systematic testing of the igniter, gas valve, thermostat, and calibration. Average DIY: 4-6 hours. Our technician diagnoses the issue in about 30 minutes — same-day appointments available.
Licensed & Insured · 90-Day Warranty · Same-Day Service
F5E2 — Door Latch Won't Unlock
The oven door is stuck in the locked position after a self-clean cycle and will not unlock. This is one of the most stressful oven errors because the door cannot be opened.
Common causes:
- Door latch motor failed in the locked position
- Oven has not cooled below the unlock threshold (550°F) — the safety interlock prevents unlocking at high temperatures
- Broken latch return spring
- EOC board not sending the unlock command
How to fix:
- Wait at least 30-60 minutes after the self-clean cycle ends for the oven to cool below 550°F. The thermal interlock prevents unlocking above this temperature regardless of any commands.
- If the oven has cooled to room temperature and the door is still locked, turn off the breaker for 5 minutes and restore power. The EOC will attempt to verify latch position on startup and may send an unlock command.
- If the door remains locked, there is a manual release: on most KitchenAid wall ovens, remove the upper trim panel and manually move the latch arm to the unlocked position using a flat-head screwdriver. On ranges, access may be through the bottom drawer opening.
- Never force the door open without releasing the latch — the latch mechanism and door hinges will break.
- Replace the latch assembly if the motor has failed. Check the return spring as well.
Part cost: Door latch assembly (WPW10107820) costs $50–$120. Professional repair runs $180–$300 total.
Same-Day Appliance Repair
Fixed or It's Free
$89 → $0 Service Call & Diagnosis — offer ends May 25
F5E5 — Door Latch Inconsistency
The door latch position switches report conflicting states — one switch says locked while the other says unlocked, or the latch position does not match the expected state for the current cycle.
Common causes:
- One of the two latch position switches has failed
- Latch arm bent or out of alignment, partially engaging one switch
- Wire harness issue to the latch switches
- Mechanical wear in the latch mechanism
How to fix:
- Enter the diagnostic mode and run the door lock test. Observe the latch — it should move smoothly from unlocked to locked and back.
- If the latch moves mechanically but the error persists, one of the position switches is not activating. Inspect the switches with a multimeter — each should have clear open/closed states at the respective latch positions.
- Check the latch arm for bending or wear. The arm actuates both switches through a cam mechanism — if the arm is bent, it may not fully engage one switch.
Part cost: Door latch assembly (WPW10107820) costs $50–$120. Individual latch switches (WPW10195934 kit) cost $15–$30. Professional repair runs $150–$280 total.
The Risk of Getting It Wrong
A wrong diagnosis often turns a simple fix into a costly replacement. Without proper diagnostic tools, you might replace the wrong part — or cause additional damage. Our free diagnostic eliminates the guesswork.
Licensed & Insured · 90-Day Warranty · Same-Day Service
F6E0 — Bake Element Circuit Error / Return Line Open
The EOC cannot detect current flow through the bake element circuit. This specifically indicates a break in the return line from the element, not the element itself.
Common causes:
- Bake element burned through (part WPW10276482)
- Wire harness from the EOC to the bake element has an open connection
- Element connector pulled loose from thermal expansion/contraction cycling
- Element relay on the EOC board has failed open
How to fix:
- Visually inspect the bake element (the bottom element in the oven cavity). Look for visible breaks, holes, blistering, or bright spots where the element is burned through. On KitchenAid ranges with hidden bake elements (under the oven floor), remove the oven floor panel to inspect.
- Disconnect the oven from power and measure the bake element resistance. Should read 20-50 ohms depending on wattage. Infinite/OL reading confirms a burned-out element.
- Check the element for ground fault: measure between each terminal and the element sheath. Any continuity indicates a grounded element.
- If the element tests good, trace the wiring from the element connector to the EOC board, checking for breaks or loose connections.
Part cost: Bake element (WPW10276482) costs $30–$70. Professional repair runs $150–$260 total.
F6E1 — Broil Element Circuit Error
Same as F6E0 but for the broil element (the top element). The EOC cannot detect current flow through the broil circuit.
Common causes:
- Broil element burned through (part WPW10276483)
- Wire harness open in the broil element circuit
- Broil element relay failure on the EOC board
- Loose element connector
How to fix:
- Visually inspect the broil element at the top of the oven cavity. Look for visible breaks, holes, or burn-through spots.
- Disconnect power and measure resistance across the broil element — 15-40 ohms is typical. Infinite reading means the element is dead.
- Check for ground fault and wire harness continuity as described for F6E0.
- On KitchenAid wall ovens (KODE double ovens), the upper cavity broil element is used for both broiling and the convection roast mode — a failed broil element affects multiple cooking modes.
Part cost: Broil element (WPW10276483) costs $35–$80. Professional repair runs $150–$260 total.
Free Diagnostic Visit — Zero Risk
Our certified technician comes to your home, diagnoses the problem with professional tools, and gives you an honest quote — all at zero cost. No parts markup, no hidden fees. If you decide not to proceed, you pay nothing.
Licensed & Insured · 90-Day Warranty · Same-Day Service
F6E6 — Convection Fan Circuit Error
The EOC detects a failure in the convection fan motor circuit. This affects all Even-Heat True Convection cooking modes.
Common causes:
- Failed convection fan motor (part WPW10206585)
- Fan blade loose or detached from the motor shaft
- Wire harness disconnected at the fan motor or EOC
- Fan motor bearing seized from heat degradation
How to fix:
- Start a Convection Bake cycle and listen for the convection fan. It should spin up within 30 seconds of the cycle starting. Silence or a grinding noise indicates a fan problem.
- With the oven off and cool, try to spin the fan blade by hand (accessible from inside the oven behind the rear panel on wall ovens, or through the rear access panel on ranges). The blade should spin freely.
- Check the fan motor connector for secure contact. The motor is behind the rear wall of the oven cavity and is exposed to high heat.
- Test the motor electrically: measure resistance across the motor terminals — 20-60 ohms is typical. Infinite reading means the motor winding is open.
Part cost: Convection fan motor (WPW10206585) costs $50–$120. Professional repair runs $200–$350 total (labor-intensive due to rear panel access).
KitchenAid Oven Diagnostic Mode
Enter the diagnostic mode to systematically test each oven component:
- Wall ovens (KODE, KOSE, KOCE): Press Cancel, then press the Bake button and hold for 6 seconds. The display shows "tSt" to confirm entry.
- Ranges (KSEG, KFEG, KSGB): Press Cancel to clear any current state. Then press and hold Bake for 6 seconds until "tSt" appears.
- Test sequence: The oven cycles through sensor reading, element activation (bake, broil, convection), door lock, and fan tests. Each phase runs for a set time.
- Reading sensor values: In diagnostic mode, the display shows live temperature sensor resistance values. At room temperature, you should see approximately 1,080 ohms.
- Stored fault codes: Some models store the last 5 fault codes with compressor run-time stamps. Access by pressing a specific key sequence shown in the service manual.
4.9★ Rated — Free Consultation
Over 2,000 Bay Area and Sacramento homeowners rate us 4.9 out of 5 stars. Free consultation, transparent pricing, and a 90-day repair guarantee — see why customers trust EasyBear.
Licensed & Insured · 90-Day Warranty · Same-Day Service
Frequently Asked Questions
Q: Why does my KitchenAid oven show an error code after self-clean? A: Self-clean cycles reach 900°F+, which stresses every component: the door latch motor, temperature sensor, wire harness insulation, touch panel overlay, and the EOC board itself. The most common post-self-clean errors are F5E1/F5E2 (door latch — plastic gears strip from the heat), F3E0/F3E1 (temperature sensor — wire insulation degrades), and F1E0/F1E1 (EOC board — solder joints crack from thermal cycling). KitchenAid's Aqualift self-clean system (on newer models) uses lower temperatures (400°F) specifically to reduce these failures.
Q: Can I still use my KitchenAid oven for baking if it shows F5E1 (door latch error)? A: Yes, in most cases. F5E1 only prevents the self-clean cycle from starting — the door latch is not needed for normal baking or broiling operations. You can continue using the oven normally for cooking until you can schedule the latch repair. However, if the latch is stuck in a partially engaged position that prevents the door from closing fully, the oven may not heat efficiently.
Q: How do I know if my KitchenAid oven temperature sensor needs replacement vs the EOC board? A: The simplest test: disconnect the temperature sensor and measure its resistance with a multimeter. At room temperature (77°F), it should read 1,080 ohms. If it reads correctly, the sensor is good and the problem is likely the EOC board or wiring. If it reads open (OL/infinite), shorted (below 500 ohms), or drifted (more than 10% from 1,080), replace the sensor. The sensor is a $20-$45 part; the EOC board is $250-$450 — always test the sensor first.
Q: Is the convection fan supposed to run during every cycle? A: No. The convection fan runs only during Convection Bake, Convection Roast, and Convection Broil modes. It does not run during standard Bake or standard Broil. If you hear the fan running during all cycles, the fan relay on the EOC board may be stuck on. If the fan never runs during convection modes, check for F6E6 or run the diagnostic mode fan test.
Q: My KitchenAid double wall oven shows an error on the upper cavity but the lower works fine. Can I still use the lower oven? A: Generally yes. On KitchenAid KODE double wall ovens, each cavity has its own temperature sensor and heating elements, but they share the EOC board. An error specific to the upper cavity (like F3E0 pointing to the upper sensor) typically does not affect lower cavity operation. However, if the error is F1E0 or F1E1 (EOC board failure), both cavities may be affected since they share the control board.
When to Call a Professional
Some KitchenAid oven repairs require professional expertise due to safety risks:
- Any F2E0 code — Potential uncontrolled heating. Do not use the oven until diagnosed. Turn off the breaker.
- Bake or broil element replacement on hardwired wall ovens — Requires working with 240V connections inside the wall cavity. Only a licensed technician should handle hardwired oven installations.
- EOC board replacement — On KitchenAid wall ovens, the EOC is mounted behind a panel that requires partial removal of the oven from the cabinet. Improper handling can damage the cabinet cutout or the oven frame.
- Gas range error codes — KitchenAid gas ranges (KSGB series) add igniter and gas valve considerations. Never attempt gas valve repairs without proper training.
- Door hinge replacement — KitchenAid ovens use a hinge design with a locking tab that must be properly engaged. Incorrect hinge installation causes the door to drop suddenly.
A certified KitchenAid technician has the tools, training, and access to service documentation for safe and efficient oven repair.
Tired of dealing with KitchenAid oven error codes? EasyBear's certified technicians specialize in KitchenAid oven and range repair, including wall ovens, double ovens, and slide-in ranges. We carry the most common KitchenAid oven parts — temperature sensors, door latch assemblies, bake and broil elements, and convection fan motors — for same-visit repairs. We offer a free diagnostic visit where our technician identifies the exact cause, explains your repair options, and completes the work on the spot. Every repair is backed by our 90-day parts and labor warranty. Schedule your free diagnosis today.
Lead Appliance Repair Technician · 12 years experience
Experienced technician with 12 years specializing in washing machine and dryer repairs across all major brands.