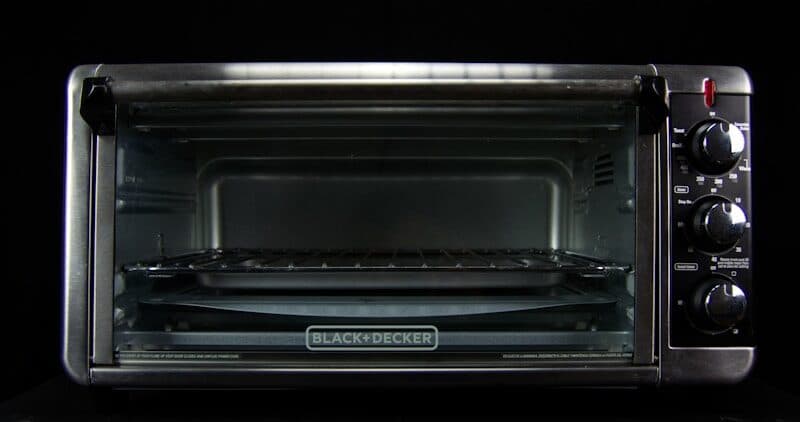
How to Replace the Main Fuse in a Whirlpool Microwave (250V Ceramic)
When your Whirlpool microwave is completely dead — no display, no light, no fan, zero response — the main line fuse is the most common and least expensive cause. This ceramic fuse protects the entire circuit from overcurrent. It costs under $5 and takes 15-20 minutes to replace. This is a beginner repair that avoids the high-voltage section entirely.
The fuse is in the low-voltage control section near the power cord entry, NOT in the high-voltage magnetron area. However, you will briefly see the HV capacitor during cabinet removal — avoid touching anything in that area. Whirlpool microwaves typically use 250V ceramic fuses at 15A or 20A (model-specific — check marking on existing fuse before purchasing).
Before You Start
- Tools needed: Torx T20 screwdriver, Phillips #2, 1/4" nut driver, multimeter, flashlight
- Parts needed: Ceramic fuse 250V, 15A or 20A (match existing) — approximately $3-$5
- Time required: 15-20 minutes
- Difficulty: Beginner
- Safety warning: Unplug the microwave. The fuse is in the low-voltage section. Do NOT touch the large capacitor or any wires in the magnetron area visible after cabinet removal. If the fuse blows again immediately after replacement, do NOT keep replacing — a component short requires professional diagnosis.
Do You Have the Right Tools?
High-voltage capacitor discharge tool ($90), magnetron tester ($200), microwave leakage detector ($150). Our technician arrives with $15K+ in professional tools — your diagnostic is free.
Licensed & Insured · 90-Day Warranty · Same-Day Service
Why Whirlpool Microwave Fuses Blow
The fuse never blows randomly. Specific causes:
- Door switch failure (most common): The monitor switch deliberately shorts to blow the fuse if the primary switch fails during magnetron operation — a designed safety feature preventing radiation leakage
- Power surge: Lightning or utility spike sends excess current
- Magnetron short: End-of-life internal short
- Capacitor short: Failed capacitor creates dead short through transformer
- Diode short: Creates excessive transformer current
Causes 1-2: simple fuse replacement resolves it. Causes 3-5: fuse blows again immediately — you must fix the root cause.
Step-by-Step Instructions
Step 1: Unplug and remove cabinet
Remove outer cabinet — Torx T20 screws on sides and rear top. Slide toward rear and lift.
Step 2: Locate the fuse
Follow the power cord internally — the fuse is inline between the cord and power distribution, near the power entry point. It is a ceramic tube (1.5" long, 3/8" diameter) in a clip holder or twist-lock cap. Usually near the noise filter board.
Step 3: Remove and test
Pull fuse from spring clips or turn twist-lock cap counterclockwise. Test with multimeter continuity — good fuse beeps/zero ohms. Blown fuse shows OL (open). Ceramic fuses often show no visual damage unlike glass fuses.
Step 4: Note the rating
Read markings on ceramic body. Common: WMH31017 = 20A, WMH53521 = 20A, WMH76719 = 15A. Using higher-rated fuse is dangerous (fire risk). Lower-rated causes nuisance blowing.
Step 5: Install replacement
Insert matching-rated fuse into holder. Push firmly into clips or turn twist-lock clockwise.
Step 6: Reassemble and test
Reinstall cabinet. Plug in. Display should illuminate immediately. Test door open/close (light), set time and start (turntable + magnetron), exhaust fan each speed.
Step 7: If fuse blows again
Unplug immediately. Do NOT keep replacing. Most likely:
- Blows with door closed = door switch failure (test all 3 switches with multimeter)
- Blows when cook starts = HV component short (professional diagnosis)
- Blows intermittently = loose connection (systematic testing needed)
Step 8: Check diagnostic codes
After successful replacement, enter diagnostic mode (3-button sequence). Check stored codes — F5E1 indicates door switch caused the blow, F6E1 indicates magnetron relay area.
Safety First — Know the Risks
Microwave capacitors store lethal voltage (4,000V+) even when unplugged. This is the single most dangerous DIY appliance repair. Our techs are licensed and insured — let them handle the risk.
Licensed & Insured · 90-Day Warranty · Same-Day Service
Prevention
- Install surge protector on microwave circuit
- Do not slam door (jars switches)
- Replace worn door switches proactively ($8-$15 each)
- Areas with power fluctuations: consider UPS on microwave circuit
Troubleshooting
- If display is dim/flickering after replacement: noise filter board near fuse may have been damaged by the overcurrent event ($15-$30 to replace)
- If starts but immediately shuts off: separate thermal fuse on magnetron housing (different from main fuse)
- If only clock works, buttons unresponsive: touchpad membrane failure (coincidental, not fuse-related)
- Burning smell after fuse replacement: inspect harness near fuse for scorched insulation
The Real Cost of DIY
Average DIY attempt: $150-400 in tools you may use once, plus the risk of further damage. Our diagnostic visit costs $0 — we find the problem and give you an honest quote.
Licensed & Insured · 90-Day Warranty · Same-Day Service
When This Fix Will Not Work
- Fuse blows again (shorted component — professional diagnosis required)
- Cannot locate fuse without reaching past HV components
- Fuse holder damaged (melted/scorched contacts)
- Burn marks on circuit board near fuse
- Problem is not the fuse (outlet has no power, cord damaged, or filter failed)
Same-Day Appliance Repair
Fixed or It's Free
$89 → $0 Service Call & Diagnosis — offer ends May 25
Cost Comparison: DIY vs Professional
| DIY | Professional | |
|---|---|---|
| Parts | $3-$5 | $3-$5 |
| Labor | $0 | $120-$200 |
| Time | 15-20min | 30min |
| Risk | Low (fuse area only) | Warranty included |
Don't Void Your Warranty
Opening your appliance yourself may void the manufacturer warranty. Our repair comes with a 90-day guarantee, and we document everything for warranty compliance.
Licensed & Insured · 90-Day Warranty · Same-Day Service
Need Professional Help?
FAQ
Q: Why does my Whirlpool microwave keep blowing fuses? A: Repeated blowing = component short. Most common: failed door monitor switch (designed safety feature). Stop replacing fuses and diagnose the root cause.
Q: What size fuse for a Whirlpool microwave? A: 250V ceramic, either 15A or 20A. Check your blown fuse marking or tech sheet. Never use higher rated.
Q: Can I use glass instead of ceramic? A: Whirlpool specifies ceramic for higher fault-current interruption capability. Glass may shatter during high-current events without clearing the circuit. Use ceramic always.
Q: My microwave is dead but outlet works — always the fuse? A: Usually yes (80%+ probability). First verify: door fully closed, cord fully seated, outlet GFCI not tripped. If confirmed — blown fuse is most likely.

