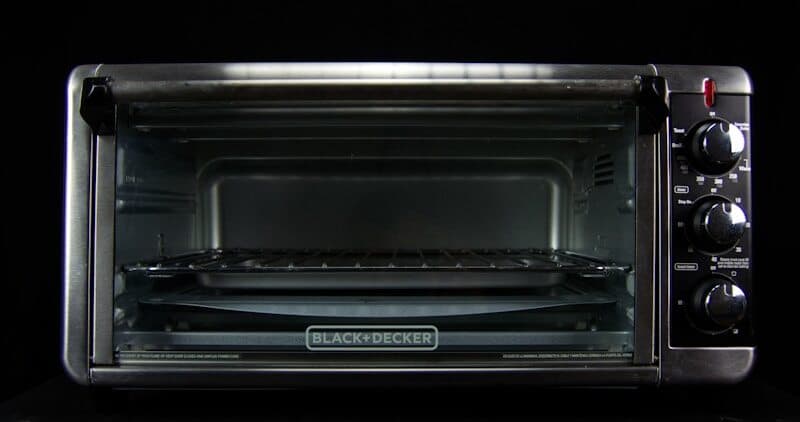
How to Replace the High-Voltage Capacitor in a KitchenAid Microwave
The high-voltage capacitor in your KitchenAid microwave works with the diode and transformer to double the voltage that powers the magnetron. A typical KitchenAid microwave capacitor is rated at approximately 0.95-1.05 uF at 2100VAC — these specifications are critical for proper magnetron operation. When this capacitor fails, symptoms include: no heating (microwave runs but food stays cold), loud buzzing or humming, tripping the circuit breaker immediately when START is pressed, or burning smell from the electrical compartment.
This is the most dangerous repair in any household appliance due to the lethal voltage stored in the capacitor. KitchenAid built-in and over-the-range microwaves use the same capacitor types as equivalent Whirlpool models. The component costs $15-$40, potentially saving you from replacing an $800-$2500 built-in unit.
Before You Start
- Tools needed: Phillips #2 screwdriver, Torx T20, 1/4" nut driver, insulated screwdriver (rated 5000V+) for capacitor discharge, multimeter with capacitance mode, insulated pliers
- Parts needed: High-voltage capacitor matching specifications — typically 0.95-1.05 uF at 2100VAC for KitchenAid models ($15-$40)
- Time required: 30-50 minutes
- Difficulty: Advanced (LETHAL VOLTAGE — experienced DIYers only)
- Safety warning: THE CAPACITOR STORES LETHAL VOLTAGE (2100-5000V DC) THAT PERSISTS FOR DAYS AFTER UNPLUGGING. You MUST discharge it before ANY work inside the microwave. This warning is not hypothetical — people have died from microwave capacitor shock.
Do You Have the Right Tools?
High-voltage capacitor discharge tool ($90), magnetron tester ($200), microwave leakage detector ($150). Our technician arrives with $15K+ in professional tools — your diagnostic is free.
Licensed & Insured · 90-Day Warranty · Same-Day Service
Step-by-Step Instructions
Step 1: Verify Symptoms Match Capacitor Failure
Capacitor failure presents differently depending on failure mode:
- Open circuit (most common): Microwave runs but won't heat. No loud hum. Identical to diode failure symptom.
- Shorted: Microwave immediately trips breaker when START pressed. May blow the internal fuse.
- Degraded (low capacitance): Weak heating — food gets warm but not hot. Magnetron operates at reduced power.
- Leaking (electrolyte visible): Oily substance on the capacitor can or on the chassis below it. May still work but is a fire hazard.
If your breaker trips immediately, check the internal fuse first (cheaper and simpler repair). A blown fuse with a shorted capacitor means both need replacement.
Step 2: Access Internal Components
Disconnect power completely. For KitchenAid built-in models, turn off the dedicated breaker. For countertop/OTR, unplug from wall.
Remove the outer wrapper/cabinet (screws around the back panel and sides). The high-voltage section is visible: transformer (large, heavy component), capacitor (metal cylinder or can with two terminals), and diode (small cylinder between capacitor and chassis).
Step 3: DISCHARGE THE CAPACITOR (Non-Negotiable)
Even though you disconnected power, the capacitor retains its charge. Using an insulated screwdriver (rated for high voltage with rubber/plastic handle):
- Identify the two capacitor terminals (metal tabs or posts on top)
- Place the screwdriver blade across BOTH terminals simultaneously
- Hold for 5 full seconds. You may hear a pop/spark — this is normal
- Then discharge between each terminal and the metal chassis (ground)
- Verify with multimeter on DC voltage mode: should read 0V terminal-to-terminal AND terminal-to-chassis
Some KitchenAid microwaves have a built-in bleeder resistor inside the capacitor that slowly self-discharges. NEVER rely on this — it may be failed or may not have had enough time to discharge. Always manually discharge.
Step 4: Remove the Old Capacitor
Disconnect wires from the capacitor:
- One terminal connects to the diode and magnetron circuit
- One terminal connects to the transformer secondary
- Some models have a third terminal that connects to chassis ground (safety discharge path)
Label each wire with its terminal position using tape.
Remove the capacitor mounting bracket (usually one or two screws to the chassis). Lift the capacitor out.
Note the specifications printed on the capacitor body:
- Capacitance (e.g., 0.95 uF)
- Voltage rating (e.g., 2100VAC)
- Any discharge resistor rating listed
Step 5: Install the New Capacitor
Verify the replacement matches:
- Capacitance: must be within 5% of original (0.95 uF original → 0.90-1.00 uF acceptable)
- Voltage rating: must MATCH or EXCEED original (2100VAC cap can be replaced with 2100VAC or higher — never lower)
- Physical size: must fit the mounting bracket and chassis space
Mount the new capacitor in the bracket position. Connect wires to the correct terminals per your labels. Ensure connections are tight — loose HV connections arc catastrophically.
If the new capacitor has a ground terminal (marked with a ground symbol), connect it to the chassis with the original grounding screw.
Step 6: Test
Replace the outer wrapper. Restore power. Test with a cup of water (8 oz) at HIGH for 60 seconds.
Expected results:
- Water should be hot (150-170°F) after 60 seconds at full power
- No abnormal humming from the transformer
- No sparking or arcing sounds
- Breaker should remain on
If the breaker still trips: the new capacitor may be defective (rare), or another component (diode, magnetron) has a secondary failure. If no heating but no breaker trip: verify all connections are tight and correctly placed.
Capacitor Specifications for Common KitchenAid Models
| Model Series | Typical Capacitor | Voltage | Notes |
|---|---|---|---|
| KMBS (built-in) | 0.95-1.0 uF | 2100VAC | Convection models have larger chassis |
| KMBP (built-in) | 0.95 uF | 2100VAC | Same HV circuit as KMBS |
| KMHS (OTR) | 0.95 uF | 2100VAC | Standard Whirlpool platform |
| KMCS (countertop) | 0.85-0.95 uF | 2100VAC | Smaller models may use lower capacitance |
All cross-reference to equivalent Whirlpool models. The most common replacement part number is W10850446 or equivalent.
Safety First — Know the Risks
Microwave capacitors store lethal voltage (4,000V+) even when unplugged. This is the single most dangerous DIY appliance repair. Our techs are licensed and insured — let them handle the risk.
Licensed & Insured · 90-Day Warranty · Same-Day Service
Troubleshooting After Replacement
- Microwave works for a few seconds then cuts off: the magnetron may be drawing excessive current due to end-of-life degradation. The new capacitor is providing correct voltage, but the magnetron can't handle it anymore. Professional magnetron replacement needed.
- Audible 60Hz hum louder than before: normal on new capacitors — they vibrate slightly at AC frequency. Should not be excessively loud. If extremely loud, verify capacitance value matches original.
- Burning smell persists: check for scorched wiring near where the old capacitor was mounted. A previously arcing connection may have damaged adjacent wire insulation.
When to Call a Professional
- You have ANY discomfort with the capacitor discharge procedure — lethal voltages require zero hesitation or uncertainty
- The capacitor appears physically swollen, leaking, or has burn marks suggesting it failed violently — adjacent components may be damaged
- Breaker continues tripping after capacitor replacement — deeper circuit fault requires oscilloscope-level diagnosis
- Your KitchenAid microwave is a built-in model requiring extraction from cabinetry that you cannot safely handle alone
Same-Day Appliance Repair
Fixed or It's Free
$89 → $0 Service Call & Diagnosis — offer ends May 25
The Real Cost of DIY
Average DIY attempt: $150-400 in tools you may use once, plus the risk of further damage. Our diagnostic visit costs $0 — we find the problem and give you an honest quote.
Licensed & Insured · 90-Day Warranty · Same-Day Service
Cost Comparison: DIY vs Professional
| DIY | Professional | |
|---|---|---|
| Parts | $15-$40 | $15-$40 |
| Labor | $0 | $150-$300 |
| Time | 0.5-0.8h | 0.3h |
| Risk | VERY HIGH (lethal voltage) | Warranty included |
Need Professional Help?
Don't Void Your Warranty
Opening your appliance yourself may void the manufacturer warranty. Our repair comes with a 90-day guarantee, and we document everything for warranty compliance.
Licensed & Insured · 90-Day Warranty · Same-Day Service
FAQ
Q: How do I safely discharge a KitchenAid microwave capacitor? A: Bridge both capacitor terminals simultaneously with an insulated screwdriver rated for 5000V+. Hold 5 seconds (you may see a spark). Then bridge each terminal to chassis ground individually. Verify 0V with multimeter before proceeding.
Q: Can I use a capacitor with different specifications? A: Capacitance must be within 5% of original. Voltage rating can be equal or HIGHER (never lower). Physical size must fit the space. Using significantly different capacitance alters the voltage output and can damage the magnetron.
Q: Why does my KitchenAid microwave blow fuses along with the capacitor failing? A: A shorted capacitor draws excessive current through the transformer, which trips the internal fuse before (hopefully) the breaker. Replace both the capacitor AND the fuse together. The fuse protected the transformer from damage.
Q: Are KitchenAid microwave capacitors the same as Whirlpool? A: Yes, when models share the same HV circuit platform. Match the capacitance (uF) and voltage (VAC) rating exactly. Physical mounting may differ slightly but the electrical component is interchangeable.
Need a certified technician? Book same-day repair →

