How to Repair a Bosch Microwave: Common Failures and Fix Procedures
Bosch microwaves — particularly the built-in models (BFL/BFR/HMT series) — are designed as integrated kitchen components with long service lives. When failures occur, they are typically well-defined: no heat, intermittent operation, display errors, or turntable malfunction. This guide covers diagnosis and repair for the most common Bosch microwave failures, with BSH-specific part references.
Bosch microwaves share internal architecture with Siemens models (same BSH parent company). Parts are often interchangeable between the two brands — always cross-reference the E/Nr number from your unit's rating plate for exact compatibility.
Before You Start
- Tools needed: Torx T15 and T20 drivers, Phillips PH2 screwdriver, multimeter (essential), insulated screwdriver for capacitor discharge, needle-nose pliers, flashlight
- Parts needed: Depends on diagnosis — see sections below
- Time required: 30-60 minutes
- Difficulty: Intermediate to Advanced
- Safety warning: CRITICAL — Microwave capacitors store lethal voltage (up to 4,000V) even when unplugged. You MUST discharge the capacitor before touching any internal component. After unplugging, use an insulated screwdriver across the capacitor terminals (or a proper capacitor discharge tool). If you are not comfortable with high-voltage electronics, stop here and call a professional.
Do You Have the Right Tools?
High-voltage capacitor discharge tool ($90), magnetron tester ($200), microwave leakage detector ($150). Our technician arrives with $15K+ in professional tools — your diagnostic is free.
Licensed & Insured · 90-Day Warranty · Same-Day Service
Step-by-Step Diagnostic and Repair
Step 1: Determine the Failure Mode
Match your symptom to narrow the component:
- Microwave runs but no heat: Magnetron, high-voltage diode, or capacitor failure
- Microwave dead — no display, no response: Thermal fuse, line fuse, or power supply board
- Microwave starts then stops after a few seconds: Door switch interlock (safety cutoff)
- Display works but microwave won't start: Door switch, control board relay, or touchpad membrane
- Turntable doesn't rotate: Turntable motor, coupler, or drive bushing
- Sparking inside cavity: See the companion guide on cavity rust repair; also check waveguide cover
Step 2: Safe Access to Internal Components
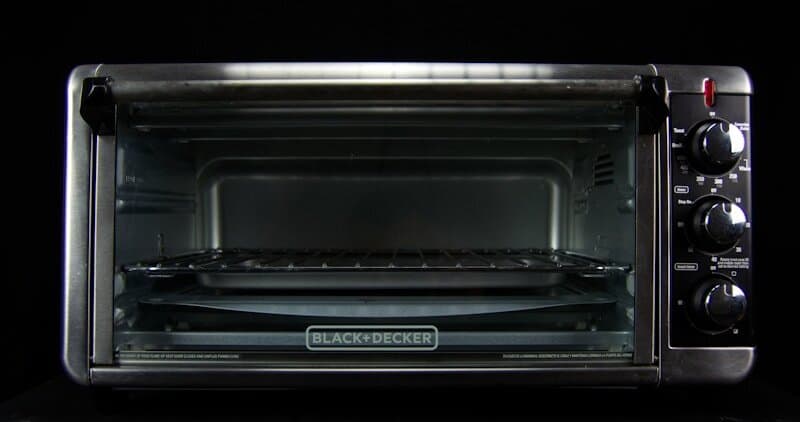
For built-in Bosch microwaves (BFL series): the unit must be pulled from its cabinet. Release the mounting screws (typically 4 Torx T20 through the sides or bottom of the cabinet cutout). Slide the unit forward. For countertop models: remove the outer cabinet — typically 1 screw on each side and 2-3 on the rear panel. The cabinet slides backward off the chassis.
Once open: immediately locate the high-voltage capacitor (cylindrical metal can, usually silver/grey, near the magnetron transformer). Discharge it before proceeding.
Step 3: Diagnose No-Heat Condition
The microwave heating circuit: transformer → capacitor → diode → magnetron. Test each:
- High-voltage diode: Disconnect one lead. Set multimeter to diode test. Forward: should show 50-200kV drop (meter may show OL due to high-voltage rating — this is normal for HV diodes). Reverse: must show OL (infinite). If shorted in both directions = failed diode.
- Capacitor: After discharge, disconnect leads. Set meter to capacitance mode if available — should read 0.9-1.1 uF (typical Bosch value). Alternatively, set to highest ohm range: needle should sweep up then return to OL (charging). No movement = open capacitor.
- Magnetron: Disconnect both leads from the magnetron terminals. Measure resistance between the two terminals: should read less than 1 ohm (nearly short). Measure each terminal to the magnetron body (ground): must read OL (infinite). If either terminal reads to ground = magnetron shorted internally, replace.
- Thermal cutoff on magnetron: Some Bosch models have a thermal fuse on the magnetron body. Test for continuity — if open, the magnetron overheated (may indicate ventilation problem as root cause).
Step 4: Diagnose Dead Unit (No Power)
If the microwave has no display and no response:
- Line fuse: Located inline with the power cord entry. Pull and test — should show continuity. Bosch uses ceramic fuses, typically 250V 8A or 250V 10A. A blown fuse often indicates a downstream short (door switch arcing or capacitor failure) — find root cause before replacing.
- Thermal fuse (TCO): Mounted on the magnetron or inside the cavity — a non-resettable fuse that blows at 150-180C. Test for continuity. If blown, the cavity overheated — check ventilation fan operation before replacement.
- Power supply board: Trace the AC input from fuse to the low-voltage power supply that feeds the control board. Verify 5V and 12V outputs with multimeter.
Step 5: Diagnose Door Switch Problems
Bosch microwaves use 3 door switches (primary, secondary, and monitor switch) as a safety interlock chain. All must be in correct state for the microwave to run. Symptoms of door switch failure: unit starts then immediately stops, runs only with door held in certain position, or blows the line fuse when door closes.
Access: remove the inner door panel (Torx T15 screws around perimeter). The switches are lever-actuated by the door latch hooks. Test each switch with multimeter for correct open/closed state corresponding to door open/closed position. A burnt or pitted switch contact is the most common microwave failure overall.
Bosch door switch assembly: BSH 00614767 (varies by model — confirm E/Nr).
Step 6: Turntable Motor Replacement
If the turntable does not rotate: first verify the coupler (plastic drive piece connecting motor shaft to turntable) is not cracked. Then test the motor: disconnect the 2-wire connector from the turntable motor (accessible from below or behind depending on model). Measure resistance: should read 2-5 kOhms. Apply 120VAC to the motor directly (using clip leads, carefully) — it should rotate slowly (~3 RPM). No rotation = replace motor.
Bosch turntable motor: BSH 00489688 (common across BFL/HMT series). The motor mounts with a single screw or clip and the shaft passes through the cavity floor.
Step 7: Control Panel and Touchpad
If the display works but buttons do not respond (or respond erratically): the membrane touchpad has failed. On Bosch built-in models, the touchpad is a flat ribbon cable bonded to the glass front panel. Replacement requires the entire front panel assembly (BSH model-specific). Before replacing: check the ribbon cable connection to the control board — reseat it. A corroded or dirty ribbon connector causes partial touchpad failure.
Troubleshooting After Repair
- Fuse blows immediately after replacement: A downstream short exists — usually a failed door monitor switch. The monitor switch is wired to intentionally blow the fuse if the primary switch fails (safety design). Test all door switches.
- Microwave heats intermittently (works sometimes): Failing door switch with burned contacts making intermittent connection. Replace all 3 switches as a set — they wear together.
- Burning smell after repair: Ensure all wire connectors are fully seated. A loose spade terminal arcs and burns. Also check that nothing is touching the magnetron antenna cap (top of the waveguide).
Safety First — Know the Risks
Microwave capacitors store lethal voltage (4,000V+) even when unplugged. This is the single most dangerous DIY appliance repair. Our techs are licensed and insured — let them handle the risk.
Licensed & Insured · 90-Day Warranty · Same-Day Service
When to Call a Professional
- You are not comfortable discharging a high-voltage capacitor
- Magnetron replacement is needed (requires handling high-voltage connections and proper mounting torque)
- The control board has visible burn damage or blown traces
- Built-in unit cannot be safely extracted from cabinetry without risking damage to surrounding kitchen
- Intermittent failures that do not reproduce during testing
Same-Day Appliance Repair
Fixed or It's Free
$89 → $0 Service Call & Diagnosis — offer ends May 25
Cost Comparison: DIY vs Professional
| DIY | Professional | |
|---|---|---|
| Parts | $15-$180 | $15-$180 + markup |
| Labor | $0 | $150-$300 |
| Time | 30-60 min | 30-45 min |
| Risk | HIGH (lethal voltage) | Warranty included |
The Real Cost of DIY
Average DIY attempt: $150-400 in tools you may use once, plus the risk of further damage. Our diagnostic visit costs $0 — we find the problem and give you an honest quote.
Licensed & Insured · 90-Day Warranty · Same-Day Service
Need Professional Help?
FAQ
Q: Is it worth repairing a Bosch microwave or should I replace it? A: Bosch built-in microwaves cost $600-$1500+ new and are designed for the specific cabinet cutout. Repair is almost always worthwhile unless the magnetron and control board have both failed. A $30 door switch or $15 fuse repair returns a $1000+ appliance to service.
Q: Can I use Siemens parts in my Bosch microwave? A: Often yes — BSH manufactured both brands on shared platforms. The BSH part number (00XXXXXX format) is universal across brands. Always confirm by E/Nr number rather than brand name.
Q: How do I discharge the high-voltage capacitor safely? A: After unplugging, use an insulated-handle screwdriver to bridge across both capacitor terminals simultaneously. You may see/hear a spark — this is normal. Alternatively, use a 10kOhm 10W resistor across the terminals for a controlled discharge. Never assume the capacitor is discharged — always verify with a multimeter afterward.
Q: Why does my Bosch microwave blow fuses repeatedly? A: The most common cause is a failed door monitor switch. This switch is a safety device that intentionally shorts the line (blowing the fuse) if the primary interlock switch fails while the microwave is running. Replace all three door switches as a set.
Need a certified technician? Book same-day repair →

