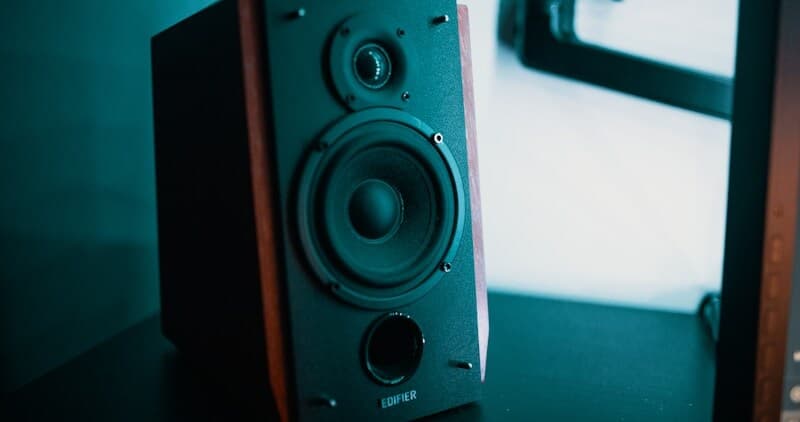
GE Dryer Control Board Replacement — Diagnosing Electronic Failures
The control board in your GE dryer manages every cycle parameter — temperature selection, tumble timing, moisture sensing, and motor control. When it fails, symptoms range from a completely unresponsive dryer to erratic behavior like stopping mid-cycle or ignoring temperature settings. GE dryers across the standard, Profile, and Cafe tiers use different board configurations, so identifying your exact model is the first step.
How GE Dryer Control Boards Fail
GE dryer control boards experience two primary failure patterns:
Sudden failure — typically from a voltage spike entering through the power cord. The dryer goes from working normally to completely dead between loads. No display, no response to buttons, no beep when pressing Start. Check the thermal fuse and breaker first — a tripped breaker or blown thermal fuse mimics a dead board and costs $5-$15 to fix.
Progressive failure — individual relays or components on the board degrade over time. One day the dryer skips the cool-down phase. Another day it runs on high heat regardless of the setting. Temperature control becomes unreliable. These symptoms worsen gradually over weeks or months.
GE dryers use model prefixes to identify the product tier: GTD (standard gas/electric), GFD (front-load standard), PTD (Profile), PFD (Profile front-load), CTD (Cafe). Each tier uses a different board with different firmware — a standard GTD board installed in a Profile unit will run the motor and heater but will not support Profile features like a steam cycle or WiFi diagnostics.
Do You Have the Right Tools?
Multimeter ($85), vacuum pump ($250), diagnostic software, and specialized hand tools. Our technician arrives with $15K+ in professional tools — your diagnostic is free.
Licensed & Insured · 90-Day Warranty · Same-Day Service
Confirming Board Failure Before Ordering
Several cheaper components produce symptoms identical to a bad board:
- Thermal fuse ($5-$12) — a one-time safety device on the blower housing that opens permanently when the dryer overheats. When blown, the dryer is completely dead. Test with a multimeter: should show continuity (closed circuit). No continuity = blown fuse. The thermal fuse is the single most common cause of a dead GE dryer.
- Start relay — on some GE models, the start relay is separate from the main board. A failed start relay prevents the motor from starting but the display and controls may still work.
- Power supply — GE electric dryers require two 120V legs (240V total). If one leg of the breaker trips, the motor may run but the heater will not work, or vice versa. Test voltage at the dryer outlet with a multimeter: you should see 240V across the two hot terminals.
Part Numbers and Pricing
| Component | Part Number | Cost |
|---|---|---|
| OEM control board (current) | WE04X28648 | $120-$280 |
| OEM board (pre-2018) | WE04X24470 | $90-$220 |
| Thermal fuse | WE04X29097 | $5-$12 |
| Aftermarket board | Varies | $55-$140 |
| Professional installation | — | $150-$280 |
Safety First — Know the Risks
Appliances involve high voltage (120-240V), pressurized water, gas lines, and chemical refrigerants. Over 400 DIY repair injuries are reported yearly. Our techs are licensed and insured — let them handle the risk.
Licensed & Insured · 90-Day Warranty · Same-Day Service
Tools Required
Phillips #2 screwdriver, 1/4-inch nut driver, Torx T20 (newer models), putty knife or flat-blade screwdriver for console release clips, multimeter, and a smartphone for photographing wire positions.
Step-by-Step Replacement
Preparation
Unplug the dryer from the wall outlet. For gas dryers, also shut off the gas supply valve behind the unit. Pull the dryer away from the wall for rear access.
Accessing the Board
The control board is located inside the console (the top panel with the controls). On top-control models (GTD, PTD): insert a putty knife into the seam between the console and the top panel at each end to release the spring clips, then flip the console back on its hinges. On front-control models (GFD, PFD): remove screws at each end of the console back panel and pull the console forward.
The board is mounted to a bracket inside the console, connected by multiple wire harnesses.
Removing the Old Board
Photograph all wire connections. GE dryer boards typically have 5-8 harness connectors of different sizes and colors. Each is keyed to prevent misconnection, but a photo guarantees correct reassembly. Disconnect each harness by pressing the locking tab and pulling straight out. Remove the 2-4 mounting screws securing the board to its bracket.
Installing the New Board
Mount the new board to the bracket. Reconnect all harness connectors, matching each to your photos. Verify every connector is fully seated — a partially inserted connector can cause intermittent operation or damage to the new board.
Testing
Reassemble the console. Plug in the dryer. Run a Timed Dry cycle on medium heat for 10 minutes. Verify the drum tumbles, heat is produced, and the timer counts down. On WiFi-equipped models, open the SmartHQ app to confirm the board is communicating.
Same-Day Appliance Repair
Fixed or It's Free
$89 → $0 Service Call & Diagnosis — offer ends May 25
The Real Cost of DIY
Average DIY attempt: $150-400 in tools you may use once, plus the risk of further damage. Our diagnostic visit costs $0 — we find the problem and give you an honest quote.
Licensed & Insured · 90-Day Warranty · Same-Day Service
Profile vs Standard Board Features
Profile (PTD/PFD) boards include additional functionality:
- Steam cycle control (governs the steam generator module)
- Sanitize cycle temperature monitoring (requires reaching 165 degrees F)
- WiFi module communication for SmartHQ app integration
- Enhanced moisture sensor calibration with adaptive algorithms
A standard board will not support these features. If your Profile dryer has a failed board and you install a standard board to save money, the dryer will dry clothes on basic cycles but steam, sanitize, and WiFi features will not function.
Gas vs Electric Board Differences
Gas and electric GE dryers within the same model series often use the same control board — the board sends a signal to either a gas valve solenoid or an electric heater relay depending on the configuration. The board determines the dryer type from the wiring harness configuration at initial startup. However, some newer models use fuel-specific boards, so always verify the part number against your complete model number, not just the series prefix.
Don't Void Your Warranty
Opening your appliance yourself may void the manufacturer warranty. Our repair comes with a 90-day guarantee, and we document everything for warranty compliance.
Licensed & Insured · 90-Day Warranty · Same-Day Service
When to Replace vs Repair the Board
Board-level repair (replacing individual relays or capacitors) is theoretically possible but rarely practical. GE control boards use surface-mount components that require specialized soldering equipment. The cost of professional board repair typically approaches or exceeds the cost of a new board. Replace rather than repair.
A dead dryer might be a $5 thermal fuse or a $280 control board — diagnosis before parts saves money. Our technicians test every component in the circuit before recommending a board replacement. Book a diagnostic