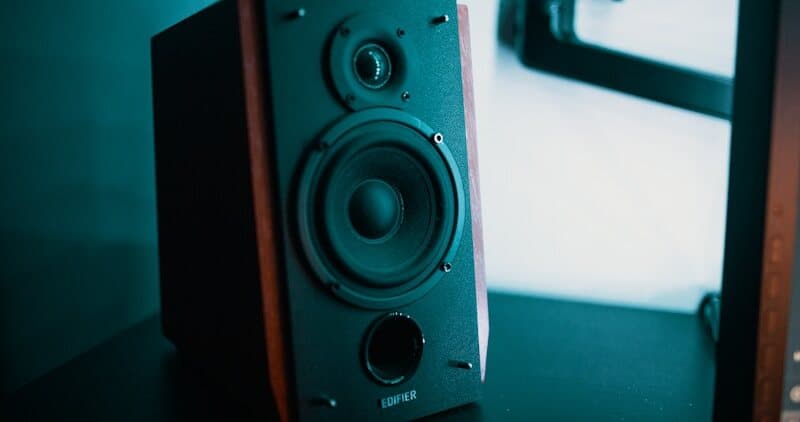
Electrolux Dryer Error Codes: Complete Troubleshooting Guide
Electrolux dryers — including the EFME617, EFME627, EFMG617, and EWMGD models — are equipped with advanced features like Perfect Steam wrinkle release, Predictive Dry moisture sensing, and the Instant Refresh steam cycle. When a fault occurs, the dryer communicates through alphanumeric error codes on the digital display. This guide covers every Electrolux dryer error code with real diagnostics, Electrolux part numbers, and cost estimates for models from 2018 through 2026.
Electrolux is the Swedish parent company of Frigidaire, and both brands share dryer control platforms. Most codes below also apply to Frigidaire dryers (FFRE, FFQE, FFRG prefixes). Differences are noted where relevant.
How Electrolux Dryer Error Codes Work
Electrolux dryers use the same systematic E-code format as their washers:
- E6x — Heating system (E61 heater relay, E64 element open, E68 gas valve)
- E4x/E5x — Thermistor and sensor issues
- EHx — Heater-related secondary faults
- EFx — Exhaust and airflow issues
- E9x — Communication and control faults
Universal reset:
- Press Cancel to end the current cycle.
- Unplug the dryer (or flip the breaker) for 60 seconds.
- Plug back in and run a Timed Dry on low heat for 5 minutes.
- If the error returns, use the specific troubleshooting below.
Safety note for gas dryers (EFMG, FFRG models): If you smell gas at any point, do not touch any electrical switches or plugs. Leave the house immediately and call your gas company's emergency line from outside. Gas leak repair is never a DIY job.
Do You Have the Right Tools?
Gas leak detector ($130), thermal fuse tester ($95), belt tension gauge, and vent inspection camera ($180). Our technician arrives with $15K+ in professional tools — your diagnostic is free.
Licensed & Insured · 90-Day Warranty · Same-Day Service
E61 — Heater Relay Failure
E61 indicates the control board's heater relay circuit has malfunctioned. The board either cannot send power to the heating element or is detecting a relay stuck in the closed position.
Common causes:
- Heater relay on the main control board burned out (the most common cause — relay contacts arc and weld over time)
- Wiring fault between the control board and heating element
- Control board TRIAC (electronic switch) failure
How to diagnose and fix:
- Visual inspection of the main control board. Remove the rear panel (electric models) or top panel to access the board. Look for darkened or burned areas around the relay components. Relay failure often shows visible scorch marks on the board.
- Test the relay. Using a multimeter, check for continuity across the relay contacts with the dryer unplugged. A relay stuck closed (showing continuity when it should be open) is a fire hazard — replace the board immediately.
- Check wiring from board to element. Inspect the high-current wiring for melted insulation, burned connectors, or loose terminals. The heater circuit carries 20–30 amps — any resistance in a connection generates heat.
- Measure heating element resistance. Electric models: the element should read 8–20 ohms. If the element is fine and wiring is sound, the control board needs replacement.
Parts and costs:
- Main control board (part 134557200): $130–$250
- Heating element (part 137038200 for electric models): $40–$80
- Professional repair total: $180–$400
Pro tip: E61 on Perfect Steam models can occur when the steam generator circuit shares the heater relay. If E61 appears only during steam cycles, the relay may be selectively failing under the additional load.
E64 — Heating Element Open Circuit
E64 means the control board sent power to the heating element but detected no current draw — the element circuit is broken (open). The dryer runs but produces no heat.
Common causes:
- Heating element burned out (the resistive wire breaks from age, creating an open circuit)
- Thermal fuse blown (a safety device in series with the element — trips from overheating)
- High-limit thermostat tripped (another safety device — resets on some models, one-time on others)
- Wiring terminal disconnected or burned
How to diagnose and fix:
- Test the heating element. Unplug the dryer, remove the rear panel (electric) or lower front panel (some configurations). Disconnect one wire from the element terminals. Measure resistance across the element — should read 8–20 ohms. OL means the element is burned out.
- Test the thermal fuse. Located on the exhaust housing or blower housing. Should show continuity (0 ohms). OL means blown — but before replacing, find why it blew: clogged vent is the number one cause.
- Test the high-limit thermostat. Located near the heating element housing. Should show continuity when cool. OL means it has tripped. Some models have a resetable type (small button on the thermostat body), but most Electrolux models use one-time fuses.
- Check the terminal connections. The spade connectors on the element can corrode or burn — especially in humid laundry rooms. If a terminal is blackened or loose, replace the connector.
Parts and costs:
- Heating element (part 137038200): $40–$80
- Thermal fuse (part 137032600): $8–$15
- High-limit thermostat (part 137060800): $15–$30
- Professional repair total: $120–$280
Critical: If the thermal fuse is blown, always check the dryer vent before replacing it. A clogged vent causes overheating that triggers the fuse. Simply replacing the fuse without clearing the vent means it will blow again — and repeated overheating is a fire hazard. Clean the entire vent run from the dryer to the exterior wall.
Safety First — Know the Risks
Gas dryers carry carbon monoxide and explosion risk. Even electric dryers involve 240V circuits that can deliver a fatal shock. Our techs are licensed and insured — let them handle the risk.
Licensed & Insured · 90-Day Warranty · Same-Day Service
E4A — Outlet Thermistor Error
E4A indicates the outlet (exhaust) temperature sensor is reading an abnormal value. This sensor monitors the air temperature leaving the drum and is essential for Predictive Dry moisture-sensing accuracy.
Common causes:
- Outlet thermistor failure (NTC sensor open or shorted)
- Thermistor wiring disconnected or damaged
- Lint buildup around the sensor affecting its reading
- Control board ADC (analog-to-digital converter) circuit failure
How to diagnose and fix:
- Locate the outlet thermistor. It is mounted in the exhaust path, typically on the blower housing or exhaust duct inside the dryer. Access varies by model — usually reachable from the rear panel.
- Measure sensor resistance. At room temperature (72°F), an Electrolux NTC thermistor should read approximately 10K–12K ohms. The resistance decreases as temperature increases. A reading of 0 (shorted) or OL (open) confirms failure.
- Clean the sensor area. Heavy lint accumulation around the sensor can insulate it, causing inaccurate readings that trigger the code intermittently.
- Check the wiring connector at the control board end. Reseat firmly and inspect for corrosion.
Parts and costs:
- Outlet thermistor (part 134587700): $12–$30
- Professional repair total: $80–$180
Predictive Dry impact: The Predictive Dry feature relies on the outlet thermistor to measure moisture by comparing inlet and outlet air temperatures. With E4A active, Predictive Dry cannot function — the dryer falls back to basic timed drying, often resulting in over-drying or under-drying.
E5A — Inlet Thermistor Error
E5A indicates the inlet temperature sensor has failed. This sensor measures the air temperature entering the drum, working with the outlet thermistor to calculate actual moisture content.
Common causes:
- Inlet thermistor failure (same NTC type as outlet)
- Wiring damage between sensor and board
- Lint obstruction around sensor
- Connector corrosion
How to diagnose and fix:
- Locate the inlet thermistor. Mounted in the air intake path, before the heating element. Access from the rear panel or lower front panel depending on model.
- Measure resistance. Same specs as outlet thermistor — approximately 10K–12K ohms at room temperature. 0 or OL confirms failure.
- Check for lint blocking the sensor mounting area. The inlet path collects less lint than the outlet, but buildup over years can affect readings.
- Inspect the wiring harness from sensor to board. The inlet sensor wire routes near the heating element and can suffer heat damage over time.
Parts and costs:
- Inlet thermistor (part 134587700): $12–$30
- Professional repair total: $80–$180
Note: E4A and E5A use the same thermistor part number on many Electrolux models. If both codes appear simultaneously, the issue is likely in the control board's sensor reading circuit rather than both sensors failing at once.
The Real Cost of DIY
Average DIY attempt: $150-400 in tools you may use once, plus the risk of further damage. Our diagnostic visit costs $0 — we find the problem and give you an honest quote.
Licensed & Insured · 90-Day Warranty · Same-Day Service
E68 — Gas Valve Error (Gas Models Only)
E68 appears exclusively on gas Electrolux dryers (EFMG, FFRG models) and indicates the gas ignition system has failed to light the burner within the allowed time.
Common causes:
- Gas valve solenoid coils burned out (the coils weaken with age and fail to open the valve against spring pressure)
- Igniter failure (the glow-bar igniter cracks or loses resistance)
- Flame sensor malfunction (sensor cannot confirm ignition)
- Gas supply pressure issue (low gas pressure at the appliance valve)
- Gas supply shut off
How to diagnose and fix:
- Verify gas supply. Check that the gas shutoff valve (usually a lever-handle valve behind or next to the dryer) is in the open position. If you have other gas appliances, confirm they are working.
- Watch the igniter through the observation window. Most Electrolux gas dryers have a small viewport at the bottom-front. Start a heated cycle and watch: the igniter should glow bright orange within 15–30 seconds. If it glows but gas does not ignite, the gas valve solenoids are the problem. If it does not glow at all, the igniter has failed.
- Test the igniter. Resistance should read 50–400 ohms. OL means it is cracked/broken. Very high resistance (above 400 ohms) means it has weakened and may glow but not reach ignition temperature.
- Test gas valve solenoid coils. Each coil should read 1000–2000 ohms. OL on any coil means that solenoid is burned out. Gas dryers typically have 2–3 solenoid coils that work in sequence.
Parts and costs:
- Gas valve solenoid kit (part 5303931775): $15–$35
- Igniter (part 5303937186): $25–$50
- Flame sensor (part 5303937183): $10–$25
- Professional repair total: $150–$320
Safety warning: Never bypass or jump gas valve solenoids for testing. If you smell gas at any point during diagnosis, stop immediately, ventilate the area, and call a professional.
EH0 — Heater Circuit Fault
EH0 is a secondary heating error that differs from E61 and E64. It indicates the control board detects an abnormal condition in the overall heater circuit — it may be a ground fault, an overcurrent condition, or an intermittent connection.
Common causes:
- Heating element partially grounded to the housing (insulation breakdown)
- Wiring insulation damaged by heat exposure
- Control board sensing circuit malfunction
- Loose or corroded high-current connections generating intermittent resistance
How to diagnose and fix:
- Test for ground fault. With the dryer unplugged, measure resistance from each heating element terminal to the dryer chassis (ground). Should read OL (infinite). Any reading under 100K ohms indicates the element insulation is breaking down and the element must be replaced.
- Inspect all high-current wiring. Look for melted insulation, discolored connectors, or wires that have shifted and are touching the chassis.
- Check the element housing. The heating element is mounted inside a metal can. If the element coil has sagged from heat cycles, it may be intermittently touching the can wall — especially during tumbling vibration.
- Test with a clamp ammeter if available — measure current draw during the heating cycle. Normal is 18–24 amps for a 5400W element on 240V. Higher readings indicate a partial short.
Parts and costs:
- Heating element (part 137038200): $40–$80
- Wiring harness, heater circuit (part 134394400): $25–$50
- Professional repair total: $130–$300
Same-Day Appliance Repair
Fixed or It's Free
$89 → $0 Service Call & Diagnosis — offer ends May 25
Don't Void Your Warranty
Opening your appliance yourself may void the manufacturer warranty. Our repair comes with a 90-day guarantee, and we document everything for warranty compliance.
Licensed & Insured · 90-Day Warranty · Same-Day Service
EF0 — Exhaust Flow Restriction
EF0 is a ventilation warning indicating the dryer is detecting restricted exhaust airflow. This is a safety-critical code — restricted airflow is the leading cause of dryer fires in the United States.
Common causes:
- Clogged dryer vent duct (lint buildup over months or years)
- Crushed or kinked flex duct behind the dryer
- Bird nest or debris blocking the exterior vent hood
- Excessively long vent run (over 25 feet equivalent) or too many elbows
- Lint screen not installed or clogged solid
How to fix:
- Clean the lint screen. Remove it and wash with warm soapy water if you use dryer sheets — fabric softener residue forms an invisible film that blocks airflow. Hold the screen under running water; if water pools on the surface instead of passing through, it needs cleaning.
- Disconnect and clean the vent duct. Pull the dryer away from the wall. Disconnect the duct from the dryer exhaust port. Use a dryer vent brush kit (available at any hardware store) to clean the entire run from the dryer to the exterior vent hood.
- Check the exterior vent hood. Go outside and confirm the flap opens when the dryer runs. Remove any debris, bird nests, or lint accumulation from the hood.
- Evaluate the vent run. Electrolux dryers perform best with straight, smooth vent runs under 25 feet. Each 90-degree elbow adds the equivalent of 5 feet. If your run exceeds 35 feet equivalent, consider a booster fan or rerouting the vent.
- Replace foil flex duct with rigid metal. If you have the accordion-style foil duct, replace it with smooth rigid aluminum duct. Foil duct traps lint in its ridges and crushes easily behind the dryer, dramatically restricting airflow.
Parts and costs:
- Usually $0 (cleaning only)
- Rigid vent duct (4" aluminum, 8-foot section): $12–$20
- Professional vent cleaning: $100–$200
- Professional repair total: $0–$200
Fire safety: The U.S. Fire Administration reports dryers cause an estimated 2,900 house fires per year, with failure to clean the vent as the leading factor. EF0 is your dryer actively warning you about this risk. Do not ignore it or disable the sensor.
Additional Electrolux Dryer Error Codes
- E91 / E92 — Communication error between the UI board and main control board. Similar to refrigerator SY CF — check the ribbon cable and wiring harness. Power-cycle first; if persistent, replace the UI board (part 134557200 or model-specific).
- E93 — Configuration error. The control board settings do not match the installed hardware (gas vs electric, 240V vs 120V). Usually occurs after a board replacement with the wrong part number. Verify the correct board for your specific model.
- E95 — Power supply voltage error. The board detects abnormal line voltage. Check the outlet with a multimeter — should read 240V AC (+/- 10%) for electric, 120V AC for gas. Loose connections at the outlet or breaker can cause voltage drops.
- PF — Power failure. The dryer lost power during a cycle. Press Start to resume. If recurring without actual outages, check for a loose plug or weak circuit breaker.
Is It Worth Your Time?
A dryer not heating could be the element, thermal fuse, gas valve, igniter, or timer. Average DIY diagnosis: 3-4 hours with no guarantee of finding the issue. Our technician diagnoses the issue in about 30 minutes — same-day appointments available.
Licensed & Insured · 90-Day Warranty · Same-Day Service
Electrolux Dryer Diagnostic Mode
- Enter diagnostic mode: With the dryer off, press and hold the Temperature and Dryness buttons simultaneously for approximately 3 seconds until the display changes.
- Test sequence: The dryer cycles through motor test, heater test, and sensor readings. Watch each stage for the failure point.
- Stored errors: Diagnostic mode displays the error history with the most recent code first. Write down all codes before clearing.
- MyElectrolux app: Wi-Fi models (2022+) support app-based diagnostics with error code descriptions and repair suggestions.
Frequently Asked Questions
Q: My Electrolux dryer runs but does not heat — there is no error code. What is wrong? A: The most common cause is a blown thermal fuse — it cuts power to the heating element silently without triggering an error code. Test the thermal fuse (part 137032600) for continuity. If blown, check the vent for blockage before replacing it. Also verify the 240V outlet has power on both legs — if one leg trips, the dryer motor runs on 120V but the 240V heating element cannot energize.
Q: How do I know if my Electrolux dryer is electric or gas? A: Check the model number prefix. EFME = electric, EFMG = gas. Or look at the plug: electric dryers use a large 240V 4-prong plug (NEMA 14-30), gas dryers use a standard 120V 3-prong plug plus a gas line connection. The error code E68 (gas valve) only appears on gas models.
Q: What is Predictive Dry and how does it affect error codes? A: Predictive Dry uses both the inlet (E5A) and outlet (E4A) thermistors to calculate actual fabric moisture content instead of relying on time alone. If either sensor fails, Predictive Dry deactivates and the dryer falls back to timed drying. Clothes may come out over-dried or damp. Replace the failed sensor to restore intelligent drying.
Q: How often should I clean my dryer vent? A: At minimum once per year, more often if your vent run is long (over 15 feet) or has multiple elbows. If you use your dryer daily, clean every 6 months. The EF0 code means your dryer is already detecting restriction — clean immediately when it appears.
Q: My Electrolux dryer makes a squeaking noise but no error code appears. Is this a problem? A: Yes. Squeaking usually indicates worn drum support rollers, a stretched drum belt, or dry idler pulley bearings. These do not trigger error codes because they are mechanical wear items, not sensor-monitored faults. Address the squeak before it becomes a seized roller that stalls the drum and triggers an E-code.
The Risk of Getting It Wrong
A wrong diagnosis often turns a simple fix into a costly replacement. Without proper diagnostic tools, you might replace the wrong part — or cause additional damage. Our free diagnostic eliminates the guesswork.
Licensed & Insured · 90-Day Warranty · Same-Day Service
When to Call a Professional
- E68 on gas models — Gas valve and igniter repairs involve gas-line components. Improper repair creates explosion and carbon monoxide risks.
- EH0 with a ground fault — A partially grounded heating element can energize the dryer chassis, creating an electrocution hazard.
- E61 with a stuck relay — A heater relay welded shut means the element could run continuously without control, creating a fire hazard.
- Repeated thermal fuse failures — If the fuse blows again after replacement and vent cleaning, the heating element may be cycling abnormally, requiring load testing.
- Any burning smell or visible sparking — Unplug immediately and do not attempt repair until a professional inspects the unit.
Frustrated with your Electrolux dryer? EasyBear technicians carry the most common Electrolux dryer parts — heating elements, thermistors, thermal fuses, gas valve solenoid kits, and control boards — on every truck. We offer free diagnostic visits: our tech will identify the exact problem, explain the repair options, and fix it on the spot in most cases. Every repair includes our 90-day parts and labor warranty. Schedule your free Electrolux dryer diagnosis today.
Lead Appliance Repair Technician · 12 years experience
Experienced technician with 12 years specializing in washing machine and dryer repairs across all major brands.

