Samsung Oven Sensor Replacement — Easy DIY Guide
Samsung ovens and ranges (NE/NX/NY model series) include features like Flex Duo smart dividers, Rapid Boil burners (22K BTU on gas models), and Wi-Fi connectivity via SmartThings. The sensor uses Samsung's DG part prefix. This guide details the specific replacement process for Samsung ovens — access procedures, the correct OEM part, and what Samsung-specific considerations apply to this repair.
Symptoms That Indicate Sensor Failure
- Samsung displays error code F-3 or SE — oven temperature sensor circuit fault detected
- Oven temperature does not match the set temperature — test with an oven thermometer. 50F+ variance indicates sensor drift
- Oven does not heat at all — the sensor reads an impossibly high value, and the board thinks the oven is already at temperature
- Oven overheats past the set temperature — the sensor reads falsely low, causing the board to run the element past cutoff
- Self-clean cycle will not start — the board cannot get a valid temperature baseline from the sensor
Samsung oven error codes appear on the display panel. Write down the exact code before resetting — the code identifies the specific failed circuit.
Do You Have the Right Tools?
Multimeter ($85), vacuum pump ($250), diagnostic software, and specialized hand tools. Our technician arrives with $15K+ in professional tools — your diagnostic is free.
Licensed & Insured · 90-Day Warranty · Same-Day Service
Samsung Part Identification
OEM part number: DG32-00002B — Samsung uses the DA/DC/DD/DG/DE prefix system where the first two letters identify the appliance division (DA = refrigerator, DC = washer/dryer, DD = dishwasher, DG = range/oven, DE = microwave). Find your model number (NE/NX/NY series) on the rating plate inside the oven cavity upper rear and verify the exact part at samsung.com/us/support/. Samsung frequently revises parts across production runs — always cross-reference with your specific model number rather than relying on a generic part number.
Where to find your model number: Open the oven door and check the frame behind the door, or pull the oven away from the wall to check the rear panel. Model numbers start with NE/NX/NY.
Cost Breakdown
| Component | Price |
|---|---|
| OEM part | $15-$50 |
| Aftermarket part | $8-$30 |
| Professional labor | $60-$120 |
| Total (DIY) | $15-$50 |
| Total (professional) | $75-$170 |
OEM parts are available at samsung.com/us/support/, Amazon, and major appliance parts retailers.
Safety First — Know the Risks
Appliances involve high voltage (120-240V), pressurized water, gas lines, and chemical refrigerants. Over 400 DIY repair injuries are reported yearly. Our techs are licensed and insured — let them handle the risk.
Licensed & Insured · 90-Day Warranty · Same-Day Service
Step-by-Step Replacement
Turn off breaker. The sensor probe is visible inside the oven at the top rear. Remove 1-2 Phillips screws holding the sensor bracket to the rear wall, then disconnect the wire connector from outside.
- Turn off the breaker. Allow the oven to cool.
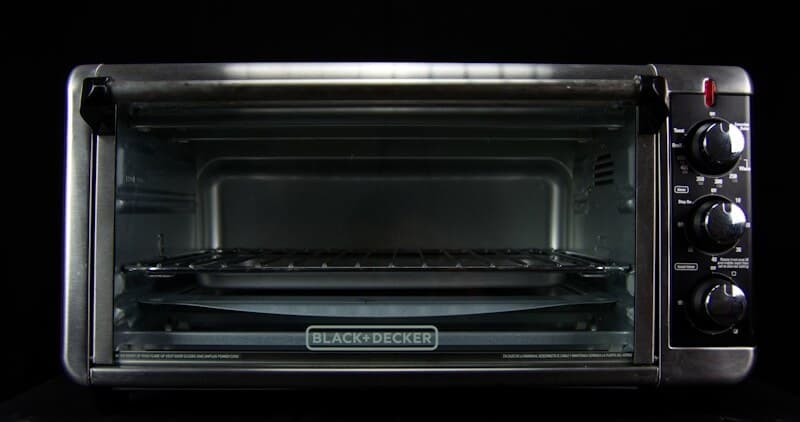
- Open the oven door. Locate the sensor — a thin metal probe extending horizontally from the upper rear wall.
- Remove 1-2 Phillips screws holding the sensor bracket to the rear wall.
- Gently pull the sensor probe forward. The wire connector is on the other side of the rear wall — you may need to access it from behind the range.
- Disconnect the wire connector. Remove the old sensor.
- Install the new sensor (DG32-00002B), feed the connector through the rear wall, and reconnect.
- Mount the sensor bracket with the original screws. The probe should extend freely into the oven cavity without touching racks or walls.
- Restore power. Test: set oven to 350F. Using an oven thermometer, verify the actual temperature matches within 25F.
Safety note: Verify the breaker is off with a multimeter before touching any wiring. Gas models require gas supply shutoff in addition to electrical disconnection.
Tools Required
- Phillips #2 screwdriver — for sensor mounting bracket
- Multimeter — test sensor resistance: at room temperature (75F), Samsung RTD sensors read approximately 1,080-1,100 ohms. At 350F, approximately 1,500-1,600 ohms
- Oven thermometer — for verifying actual vs. displayed temperature after replacement
The Real Cost of DIY
Average DIY attempt: $150-400 in tools you may use once, plus the risk of further damage. Our diagnostic visit costs $0 — we find the problem and give you an honest quote.
Licensed & Insured · 90-Day Warranty · Same-Day Service
Samsung-Specific Tips and Common Mistakes
- Samsung oven sensors are RTD (Resistance Temperature Detector) type, not NTC thermistors like refrigerator sensors. RTD resistance INCREASES with temperature (opposite of NTC). At room temperature, the Samsung oven sensor should read ~1,080 ohms.
- Before replacing, test the sensor: disconnect and measure resistance with a multimeter. ~1,080 ohms at room temp is good. OL (open) or 0 (shorted) confirms failure. A reading significantly off (800 or 1,500 ohms at room temp) indicates drift.
- Samsung allows oven temperature calibration through the control panel — if the sensor tests good but temperature is off by 20-30F, calibration may fix it. Check your user manual for the calibration procedure.
DIY or Professional?
This is a beginner-friendly repair. This is a beginner-friendly repair — 1-2 screws, and the sensor pulls out from inside the oven. The wire connector is behind the rear wall and may require minor rear access.
When to call a professional:
- The rear wire connector is inaccessible without pulling the range out of the installation — especially in tight kitchen layouts
- Temperature is still inaccurate after sensor replacement — the control board may need calibration or replacement
- The oven overheats dangerously — this should be addressed immediately by a professional
Same-Day Appliance Repair
Fixed or It's Free
$89 → $0 Service Call & Diagnosis — offer ends May 25
Don't Void Your Warranty
Opening your appliance yourself may void the manufacturer warranty. Our repair comes with a 90-day guarantee, and we document everything for warranty compliance.
Licensed & Insured · 90-Day Warranty · Same-Day Service
What Happens If You Delay This Repair
A sensor reading too low causes the oven to overheat — food burns and the oven may trigger the hi-limit thermostat safety cutoff. A sensor reading too high prevents the oven from heating. An open sensor circuit prevents all oven operation.
How Long Does a Samsung Oven Sensor Last?
A typical Samsung oven sensor lasts 10-15 years under normal residential use. Samsung's build quality and smart diagnostics help you catch declining performance before complete failure — set up SmartThings notifications if your model supports it.
Is It Worth Your Time?
The average DIY appliance repair takes 4-6 hours of research, troubleshooting, and parts ordering — with no guarantee of a correct diagnosis. Our technician diagnoses the issue in about 30 minutes — same-day appointments available.
Licensed & Insured · 90-Day Warranty · Same-Day Service
Factors That Shorten Sensor Life
- Self-clean cycles — extreme temperatures stress the sensor element
- Physical contact — the sensor probe can be bent or broken when sliding in oven racks
- Thermal cycling — each bake/cool cycle stresses the sensor element
Maintenance Tips to Extend Sensor Life
- Be careful not to bump the sensor probe when loading oven racks
- If you notice baking results changing over time (food underdone or overdone), test the sensor before adjusting recipes
- Samsung allows temperature calibration via the control panel — try this before replacing the sensor
The Risk of Getting It Wrong
A wrong diagnosis often turns a simple fix into a costly replacement. Without proper diagnostic tools, you might replace the wrong part — or cause additional damage. Our free diagnostic eliminates the guesswork.
Licensed & Insured · 90-Day Warranty · Same-Day Service
FAQ
How much does it cost to replace a Samsung oven sensor?
OEM part costs $15-$50. Professional installation adds $60-$120, totaling $75-$170.
Can I replace the sensor in my Samsung oven myself?
This is a beginner-friendly repair — 1-2 screws, and the sensor pulls out from inside the oven. The wire connector is behind the rear wall and may require minor rear access.
How long does a Samsung oven sensor last?
Typical lifespan is 10-15 years under normal residential use. Regular maintenance and proper use are the biggest factors in reaching that lifespan. Samsung appliances with SmartThings can proactively alert you to declining component performance before complete failure occurs.
What Samsung part number do I need for my oven sensor?
The primary OEM number is DG32-00002B. Samsung uses the DA/DC/DD/DG/DE prefix system — the first two letters identify the appliance division. Always verify against your specific model number (NE/NX/NY series) at samsung.com/us/support/, as Samsung frequently revises parts across production runs. Using the wrong part can cause fit issues or void warranty coverage.
Is it worth repairing my Samsung oven or should I replace it?
If your Samsung oven is under 8 years old and the sensor is the only issue, the repair at $75-$170 is typically worthwhile. If the unit is over 10-12 years old or has multiple failing components, compare the total repair cost against a new Samsung oven and choose accordingly.
Need help with your Samsung oven sensor? Our certified technicians work on Samsung appliances daily and carry common Samsung OEM parts on their trucks for same-day service. Every repair includes a 90-day warranty. Book a technician →