Maytag Washer Door Boot Seal Replacement Guide
The door boot seal (gasket) on a Maytag front-load washer is a large, flexible rubber bellows that creates a watertight connection between the stationary outer tub and the rotating door opening. It flexes with every spin cycle, contains pressurized wash water, and prevents leaks at the door interface. This is the most commonly replaced gasket on front-load washers because it is subject to constant mechanical stress, water exposure, and is prone to mold growth in its inner folds. Top-load Maytag washers use a simpler tub-to-cabinet seal that rarely needs replacement.
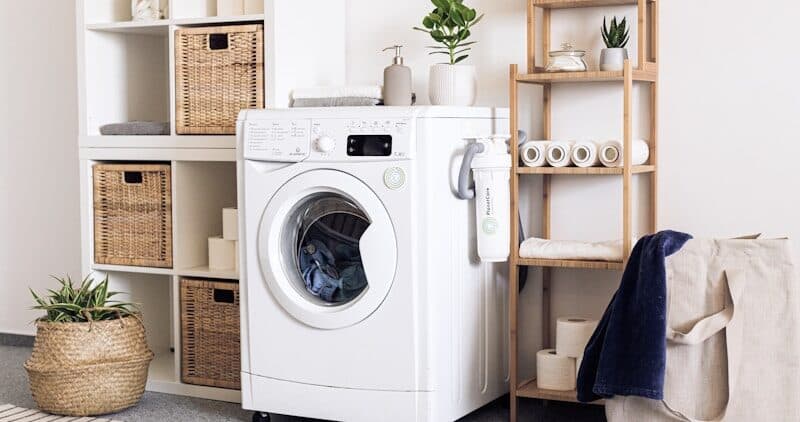
Front-Load Boot Seal Construction
The boot seal is a complex molded rubber component with multiple features: an outer ring that clamps to the front panel opening, an inner ring that clamps to the outer tub, bellows folds that allow the tub to move during spin, drain holes at the bottom to channel water back into the tub, and inner folds that trap moisture and create a breeding ground for mold and mildew if not maintained.
The seal contains a spring-loaded wire retaining band on each end — one clamps to the front panel and one to the outer tub. These bands keep the seal in position against water pressure during fill and wash cycles.
Do You Have the Right Tools?
Multimeter ($85), vacuum pump ($250), diagnostic software, and specialized hand tools. Our technician arrives with $15K+ in professional tools — your diagnostic is free.
Licensed & Insured · 90-Day Warranty · Same-Day Service
Signs the Boot Seal Needs Replacement
- Water leaking from the front door area — tears, holes, or punctures in the boot seal allow water to escape during fill and wash cycles
- Black mold visible on the seal surface — mold growth in the seal folds; while cleanable early on, severe mold penetrates the rubber and cannot be removed
- Musty smell from the washer that persists after cleaning — mold inside the seal folds has penetrated the rubber material
- Small items disappearing during wash — socks and small garments can slip between the seal and the drum edge if the seal has pulled away from the tub ring
- Visible tears or cuts in the rubber — often caused by sharp objects in pockets (keys, coins, zippers) contacting the seal during tumbling
Cost Breakdown
| Component | Typical Range |
|---|---|
| OEM boot seal | $50-$150 |
| Whirlpool cross-reference seal | $40-$130 |
| Spring wire retaining bands (if needed) | $5-$15 |
| Professional labor | $100-$200 |
| Total DIY | $50-$165 |
| Total professional | $100-$350 |
This is a moderately difficult DIY repair — the seal is heavy rubber and the retaining bands require significant force to stretch into position. Many homeowners attempt this repair and call a professional partway through due to the retaining band difficulty.
Safety First — Know the Risks
Appliances involve high voltage (120-240V), pressurized water, gas lines, and chemical refrigerants. Over 400 DIY repair injuries are reported yearly. Our techs are licensed and insured — let them handle the risk.
Licensed & Insured · 90-Day Warranty · Same-Day Service
Step-by-Step Replacement
- Unplug the washer
- Open the door and locate the front retaining band — a wire spring band clamped around the outer lip of the seal where it meets the front panel
- Release the front retaining band — find the spring end and pry it off using a flat screwdriver or pliers; the band springs loose and the seal lip pulls free from the front panel
- Peel the seal lip away from the front panel all the way around
- Remove the front panel (screws inside the top panel area and at the bottom) to access the rear retaining band on the outer tub
- Release the rear retaining band and peel the seal off the outer tub ring
- Clean the tub ring and front panel lip thoroughly — remove mold, residue, and old seal material
- Install the new seal onto the outer tub first — stretch the inner lip over the tub ring and secure with the rear retaining band
- Pull the outer lip over the front panel opening once the panel is repositioned, and secure with the front retaining band — this step requires significant hand strength or a specialized band installation tool
- Verify drain holes in the new seal are positioned at the bottom (6 o'clock position)
- Run a short wash cycle and inspect for leaks at both retaining band locations
Tools needed: Flat screwdriver, pliers, retaining band tool (optional but recommended), Phillips #2.
Mold Prevention
The boot seal is the number one source of front-load washer odor. After every load, wipe the inner folds of the seal with a dry cloth and leave the door open to allow the interior to dry. Run the Self Clean cycle monthly with a washer cleaning tablet. Avoid using excess detergent — only HE (High Efficiency) detergent is appropriate for front-load washers, and using too much creates residue that feeds mold growth.
The Real Cost of DIY
Average DIY attempt: $150-400 in tools you may use once, plus the risk of further damage. Our diagnostic visit costs $0 — we find the problem and give you an honest quote.
Licensed & Insured · 90-Day Warranty · Same-Day Service
Top-Load Tub Seal
Top-load Maytag washers use a tub seal between the outer tub and the tub bearing housing. This seal prevents water from leaking down the bearing shaft. Unlike the front-load boot seal, the top-load tub seal is an internal component that requires significant disassembly to access and is typically replaced only when the tub bearing itself is being replaced ($200-$500 combined repair).
Maytag Washer Platform and Parts Cross-Reference
Maytag washers are built on the Whirlpool Corporation platform with approximately 80 percent parts commonality. Parts cross-reference to Whirlpool W10/WP part numbers — the identical components from the same factories. Search both Maytag and Whirlpool part numbers when ordering for the best price.
Maytag washers with the Commercial Technology badge include heavier-duty suspension springs (top-load) or shock absorbers (front-load), larger tub capacities, and additional cycle options like the PowerWash agitator or Extra Power pre-soak. These features differentiate Maytag from standard Whirlpool washers on the same platform.
Same-Day Appliance Repair
Fixed or It's Free
$89 → $0 Service Call & Diagnosis — offer ends May 25
Don't Void Your Warranty
Opening your appliance yourself may void the manufacturer warranty. Our repair comes with a 90-day guarantee, and we document everything for warranty compliance.
Licensed & Insured · 90-Day Warranty · Same-Day Service
Warranty Coverage
Maytag offers extended warranty coverage on select washer components — check your model's warranty documentation before purchasing parts. The Maytag warranty on the wash motor, stainless steel wash basket, and drive components is typically longer than equivalent Whirlpool coverage.
Error Code Retrieval
Enter diagnostic mode using the Whirlpool-platform button sequence documented on the tech sheet inside the washer (behind the console panel on top-load, behind the lower front panel on front-load). Diagnostic mode displays stored F-number/E-number fault codes and runs component tests for precise diagnosis. Clear stored codes after repair by pressing the appropriate reset sequence in diagnostic mode.
Is It Worth Your Time?
The average DIY appliance repair takes 4-6 hours of research, troubleshooting, and parts ordering — with no guarantee of a correct diagnosis. Our technician diagnoses the issue in about 30 minutes — same-day appointments available.
Licensed & Insured · 90-Day Warranty · Same-Day Service
Front-Load Washer Maintenance
Front-load Maytag washers require regular door boot seal cleaning and monthly Self Clean cycles to prevent mold and odor. After every load, wipe the inner folds of the door boot seal with a dry cloth and leave the door open to allow interior drying. Use only HE (High Efficiency) detergent in the amount specified for your load size — excess detergent feeds mold growth.
FAQ
How much does a Maytag Washer Boot Seal cost?
OEM boot seal costs $50-$150. Professional installation adds $100-$200. This is a moderately difficult DIY repair due to the retaining band tension.
Why does my front-load washer smell like mold?
Mold in the door boot seal folds. Wipe the folds after every load, leave the door open, and run Self Clean monthly. If mold has penetrated the rubber, replace the seal.
Can I clean the mold off my washer seal instead of replacing it?
Early surface mold can be cleaned with a bleach solution. If mold has penetrated the rubber (black staining that won't come off), the seal needs replacement.
How long does a washer door boot seal last?
Typically 8-12 years with proper maintenance. Neglecting moisture management (not wiping folds, keeping door closed) can cause mold-related replacement in as few as 3-4 years.