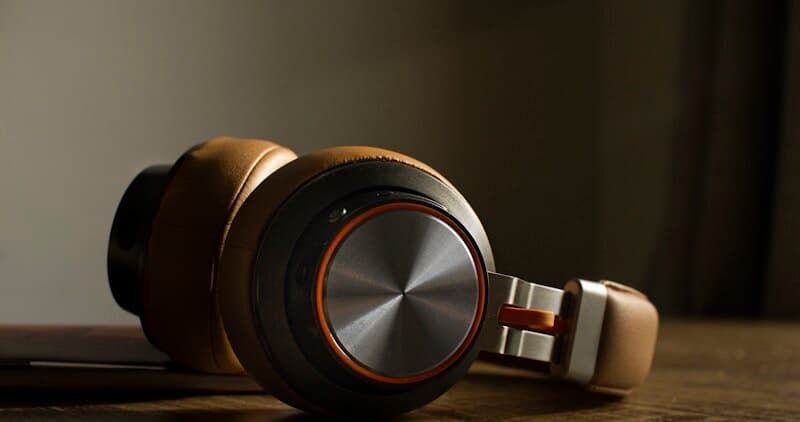
LG Dishwasher Wash Motor Not Starting: Capacitor, Inverter Board, and Stall Diagnosis
When your LG dishwasher fills with water but the wash motor never starts (no spray sound, dishes untouched), the problem lies in the motor starting circuit. On LG's Inverter Direct Drive dishwashers, the motor starting process is controlled by an inverter board that ramps up voltage and frequency to get the motor spinning. Unlike older single-speed motors that use a start capacitor to kick-start rotation, LG's inverter system uses electronic ramping — but some older LG models and the variable-speed pump motors do have capacitors in the circuit. This guide covers diagnosing motor start failures across all LG dishwasher generations.
The LE error code appears when the motor does not reach expected speed within the startup window. The nE (inverter error) code appears when the inverter board itself detects a fault in its own circuitry. Both result in the motor not starting, but they point to different components.
Before You Start
- Tools needed: Phillips #2 screwdriver, Torx T15, multimeter (with capacitance measurement for older models), flashlight, towels
- Parts needed: Depends on diagnosis — inverter board ($80-150), motor capacitor ($15-40 for older models), or pump-motor assembly ($150-250)
- Time required: 30-60 minutes for diagnosis and repair
- Difficulty: Advanced
- Safety warning: Disconnect power at the circuit breaker AND unplug. Capacitors store energy that can shock you even after power is disconnected. After unplugging, wait 5 minutes for capacitors to discharge. If you need to discharge a capacitor manually, use an insulated screwdriver across its terminals (expect a spark).
Do You Have the Right Tools?
Water pressure gauge ($60), spray arm tester, float switch multimeter ($85), and drain inspection camera. Our technician arrives with $15K+ in professional tools — your diagnostic is free.
Licensed & Insured · 90-Day Warranty · Same-Day Service
Understanding LG Motor Starting Systems
Newer models (2015+) with Inverter Direct Drive: No start capacitor. The inverter board controls motor startup electronically, ramping voltage and frequency. If the motor does not start, the problem is either the inverter board, the motor winding, or a jammed impeller.
Older models (pre-2015) with single-speed AC motor: May use a start capacitor (typically 6-10 microfarad) to provide the phase shift needed to start the motor. If this capacitor fails, the motor hums but cannot start rotating. A failed capacitor is cheap and easy to replace.
How to tell which type you have: Check the model number. LDF/LDT models from 2015+ are Inverter Direct Drive. Older LD- models (like LD-2131SH) may have conventional motors with capacitors. Look under the tub — an inverter board is a distinct PCB near the motor. A capacitor is a small cylindrical component with two wires, often mounted near the motor or on the frame.
Step-by-Step Instructions
Step 1: Rule Out Impeller Jam First
Before electrical diagnosis, check for a mechanical blockage. Remove racks and the pull-up filter. Remove the lower spray arm (clockwise to loosen — reverse thread). Look into the pump intake. Can you see the impeller? Try to rotate it manually. If jammed, extract the debris (glass, bone, labels). A jammed impeller triggers LE because the motor stalls on startup. Clearing the jam often resolves the issue without any electrical work.
Step 2: Check Motor Wiring Connector
Disconnect power. Remove the lower access panel (4 Phillips screws). Locate the motor/pump assembly at the tub center-bottom. Find the multi-pin motor connector. Push it firmly together — vibration can work it loose over years. Check for corrosion, bent pins, or melted plastic on the connector. A poor connection causes intermittent LE because the motor receives insufficient current to start.
Step 3: Test Motor Winding Continuity
Disconnect the motor connector from the inverter board side. Using your multimeter on ohms, measure across the motor winding pins. On 3-phase IDD motors: measure between each pair of the 3 motor wires. All three pairs should read similar resistance (typically 5-30 ohms). If any pair reads OL = open winding (motor dead). If any pair reads near zero = shorted winding. If readings are wildly different between pairs = failing motor.
Step 4: Test the Start Capacitor (Older Models Only)
If your model has a separate start capacitor (cylindrical component, usually labeled with microfarad rating like 6uF or 10uF): disconnect its wires. Set your multimeter to capacitance (uF) mode. Measure across the capacitor terminals. The reading should be within 10% of the labeled value (e.g., a 6uF cap should read 5.4-6.6uF). Significantly lower = weak capacitor. OL or zero = dead capacitor. Replace with same microfarad rating and voltage rating.
Step 5: Inspect the Inverter Board (Newer IDD Models)
The inverter board is a PCB mounted near the motor (often on the underside of the tub or on the frame near the pump assembly). It has power transistors (large components with heatsinks) that drive the motor. Inspect visually for:
- Burnt or blackened power transistors
- Swollen electrolytic capacitors on the board
- Solder joints with cracks or cold joints
- Connector pins melted or discolored
- Burn marks on the PCB traces
Any visible damage = board replacement needed.
Step 6: Replace the Failed Component
Capacitor replacement (older models): Note the wire positions. Remove the old capacitor from its bracket. Install the new one with correct microfarad and voltage rating. Reconnect wires. Secure in bracket.
Inverter board replacement: Disconnect power. Photograph all connector positions. Remove mounting screws (2-4). Disconnect all connectors. Mount new board. Reconnect all connectors per photographs. Verify every connector is fully seated.
Motor assembly replacement (if winding is dead): See the circulation pump service guide for full procedure.
Step 7: Reassemble and Initial Test
Reinstall all panels. Restore power. Start a Normal cycle. The motor should engage within 30-60 seconds of filling (you will hear the whooshing spray sound). If the motor starts and runs smoothly, let the cycle complete to verify LE/nE does not reappear.
Step 8: 48-Hour Monitoring
Motor starting issues can be intermittent — a weak capacitor or thermal-sensitive inverter board may work when cool but fail after warming up. Run the dishwasher daily for 2 days and verify no errors return. If LE/nE appears only during long hot cycles, the component may have a thermal failure mode that only manifests at operating temperature.
Safety First — Know the Risks
Live 120V wiring in a wet environment is one of the most dangerous DIY scenarios. Water + electricity = serious shock risk. Our techs are licensed and insured — let them handle the risk.
Licensed & Insured · 90-Day Warranty · Same-Day Service
Troubleshooting Patterns
| Pattern | Likely Cause |
|---|---|
| Motor hums, does not spin (older model) | Start capacitor failed |
| Complete silence, LE error | Motor winding open OR connector disconnected |
| Motor starts then immediately stops, LE | Jammed impeller or overcurrent from short |
| nE error code | Inverter board fault (transistor or driver IC) |
| Works cold, fails after 30 min | Thermal failure in inverter transistor or motor winding |
| LE after power outage | Inverter board damaged by surge — check for visible damage |
When to Call a Professional
- Inverter board replacement on a unit under 10-year motor warranty — LG may cover the board
- Motor winding tests indicate failure on a unit under warranty — free repair through LG
- You see burnt/melted wiring in the motor area — fire hazard assessment needed
- nE error persists after board replacement — possible motor-board compatibility issue
- Capacitor exploded (rare but possible) — requires safety inspection of surrounding components
Same-Day Appliance Repair
Fixed or It's Free
$89 → $0 Service Call & Diagnosis — offer ends May 25
The Real Cost of DIY
Average DIY attempt: $150-400 in tools you may use once, plus the risk of further damage. Our diagnostic visit costs $0 — we find the problem and give you an honest quote.
Licensed & Insured · 90-Day Warranty · Same-Day Service
Cost Comparison: DIY vs Professional
| DIY | Professional | |
|---|---|---|
| Parts | $15-$250 (capacitor to full assembly) | Same |
| Labor | $0 | $150-$300 |
| Time | 30-60 min | 30-45 min |
| Risk | Moderate (capacitor discharge hazard) | Warranty included |
Need Professional Help?
Don't Void Your Warranty
Opening your appliance yourself may void the manufacturer warranty. Our repair comes with a 90-day guarantee, and we document everything for warranty compliance.
Licensed & Insured · 90-Day Warranty · Same-Day Service
FAQ
Q: Does my LG dishwasher have a start capacitor? A: Most LG dishwashers made after 2015 (LDF/LDT series) use Inverter Direct Drive with no start capacitor — starting is controlled electronically by the inverter board. Older models (pre-2015, like LD-2131SH) may have a start capacitor. Check under the tub for a cylindrical component labeled with microfarad rating.
Q: What is the difference between LE and nE error codes? A: LE means the motor did not reach expected speed — could be motor, impeller, connector, or inverter. nE specifically means the inverter board detected an internal fault in its own circuitry. nE always points to the inverter board; LE has broader causes.
Q: Can I bypass the start capacitor to test if the motor itself works? A: Not safely on an AC motor — running without the start capacitor can burn the main winding. The proper test is to check capacitance with a meter and replace if out of spec. Capacitors are cheap ($15-40) — just replace if in doubt.
Q: Is the inverter board covered by LG's 10-year motor warranty? A: This depends on the model and the specific failure. LG's warranty language covers the "Direct Drive Motor and components" — some interpret this to include the inverter board, others do not. Contact LG warranty service with your model number to confirm coverage before paying out of pocket.
Need a certified technician? Book same-day repair →

