How to Replace the Door Seal (Gasket) on a Frigidaire Dishwasher
Water leaking from around the dishwasher door during a cycle almost always points to a failed door gasket. The perimeter seal on a Frigidaire dishwasher is a flexible rubber gasket that presses against the tub opening when the door closes, creating a watertight barrier. Over time, the gasket hardens, cracks, deforms, or accumulates mineral deposits that prevent a complete seal. On Frigidaire models, the door gasket is a press-fit design that sits in a channel around the tub opening. Unlike some brands that require adhesive or screw-down retainers, the Frigidaire gasket simply pushes into a groove and friction holds it in place.
This makes replacement remarkably simple compared to other dishwasher repairs. In most cases, you can complete this job without any tools beyond a new gasket and warm water to soften the replacement rubber. The entire process takes 15-25 minutes.
Before You Start
- Tools needed: None required for gasket itself. Optional: flat-blade screwdriver (if old gasket is stuck), clean cloth, bowl of warm water
- Parts needed: Door perimeter gasket ($20-$45)
- Time required: 15-25 minutes
- Difficulty: Beginner
- Safety warning: While this repair does not involve electrical components, disconnect power at the breaker as a precaution. You will be working inside the tub opening near the door switch mechanism.
Do You Have the Right Tools?
Water pressure gauge ($60), spray arm tester, float switch multimeter ($85), and drain inspection camera. Our technician arrives with $15K+ in professional tools — your diagnostic is free.
Licensed & Insured · 90-Day Warranty · Same-Day Service
Step-by-Step Instructions
Step 1: Identify the Leak Location
Before replacing the gasket, confirm the leak is actually from the door seal and not from another source. Run a cycle and watch where water appears. Door gasket leaks typically show water dripping from the front bottom edge of the door, or pooling on the floor directly in front of the dishwasher. If water comes from underneath the unit, the problem is more likely a pump seal, hose connection, or the inlet valve fitting, not the door gasket.
Also inspect the bottom door seal, which is a separate piece from the perimeter gasket. The bottom seal (a narrow rubber flap at the bottom edge of the door) deflects water away from the door bottom. If this piece is torn or missing, replace it along with the perimeter gasket.
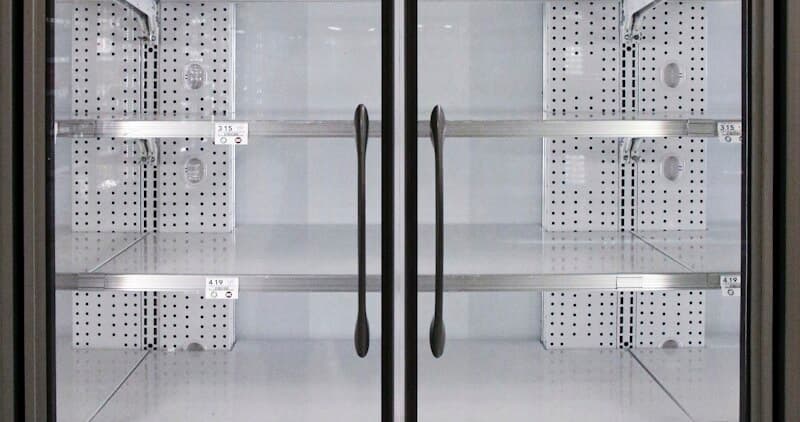
Step 2: Open the Door and Inspect the Existing Gasket
Open the dishwasher door fully. The perimeter gasket is the rubber seal that runs around the entire rectangular opening of the tub where the door mates to the body. Examine it closely. Look for cracks (especially at the corners where the gasket bends 90 degrees), hardened or compressed sections that no longer spring back when pressed, visible gaps between the gasket and the channel it sits in, or mineral deposits that have built up on the sealing surface. If the gasket has simply shifted out of its channel in one section, you may be able to push it back without replacement.
Step 3: Remove the Old Gasket
Starting at one corner (either top corner is easiest), grip the old gasket and pull it out of the channel. The gasket is held by friction in a groove that runs around the tub opening. Pull slowly and steadily. On older Frigidaire models where the gasket has been in place for many years, it may be stuck from mineral deposits or adhesion from dried detergent residue. If so, use a flat-blade screwdriver to gently pry the gasket away from the channel. Work your way around the entire perimeter: top, both sides, and bottom. The gasket comes out as a single piece.
Step 4: Clean the Gasket Channel
With the old gasket removed, inspect the channel (groove) in the tub opening. Use a clean cloth dampened with warm water and white vinegar to wipe out the channel completely. Remove all old residue, mineral deposits, and any debris. The channel must be clean for the new gasket to seat properly and create a complete seal. Pay extra attention to the corners where residue accumulates the most. If you see mold in the channel, clean it with a solution of one part bleach to ten parts water (for plastic tub models only; use vinegar for stainless steel Gallery models).
Step 5: Prepare the New Gasket
Remove the new gasket from its packaging. It may be folded or coiled for shipping, which can create stiff spots or kinks. Soak the gasket in a bowl of warm water for 5-10 minutes. This softens the rubber, making it more pliable and easier to press into the channel. It also helps the gasket conform to the corners without springing back. While the gasket soaks, identify the top center of the gasket (some have a small mark or slightly different profile at the top).
Step 6: Install the New Gasket Starting at the Top Center
Begin installation at the top center of the tub opening. Press the gasket lip into the center of the channel groove. Work outward from center toward each top corner, pressing the gasket into the groove as you go. The key to a good installation is keeping the gasket evenly seated in the channel as you work around the perimeter. Do not stretch the gasket. If you find you are running out of gasket length before completing the perimeter, you have stretched one section too much. Pull it out and start again, being careful to maintain even tension.
Continue down each side and finish at the bottom. The bottom is the most critical sealing surface because water pools there during operation. Ensure the gasket is fully pressed into the channel along the entire bottom run with no lifting or gaps.
Step 7: Verify the Seal
Close the dishwasher door and check the gasket compression. The door should close with a slight resistance from the gasket pressing against the tub face. Open the door again and look at the gasket: you should see a uniform compression mark (slightly flattened area) around the entire perimeter where the door face pressed against it. If any section does not show compression, the gasket is not seated deeply enough in the channel at that point. Press it in further.
Step 8: Test with a Water Cycle
Restore power and run a short cycle (use the Rinse Only or 30-Minute Clean option). Watch the door perimeter from outside during the wash phase when spray arms are active. Look for any water seeping from the front of the door or dripping from the bottom edge. If you see a leak at a specific point, cancel the cycle, open the door, and re-seat the gasket at that location. A single poorly-seated section of 2-3 inches is enough to cause a visible leak.
Choosing the Right Replacement Gasket
Frigidaire gaskets are available in two main profiles:
- Magnetic gasket (newer Gallery and Professional models): Contains a magnetic strip that pulls the gasket tight against the tub face for a stronger seal. These are model-specific and cost $35-$55.
- Friction-fit gasket (base Frigidaire and older models): Relies solely on rubber-to-metal contact for sealing. These are more universal and cost $20-$35.
Order by your exact model number (found on the sticker inside the door or on the left side of the tub). Frigidaire model numbers starting with FGID (Gallery) or FFID (base) will help narrow the correct gasket. Because Electrolux owns Frigidaire, many Electrolux EI24ID model gaskets are cross-compatible.
Safety First — Know the Risks
Live 120V wiring in a wet environment is one of the most dangerous DIY scenarios. Water + electricity = serious shock risk. Our techs are licensed and insured — let them handle the risk.
Licensed & Insured · 90-Day Warranty · Same-Day Service
When to Call a Professional
- The tub opening is warped or damaged, preventing a new gasket from seating evenly. This can happen after years of door-slam force or if the unit was improperly installed with excessive cabinet pressure on the sides.
- Water continues leaking after gasket replacement. The leak may be from the bottom door seal (separate piece), from the tub itself (hairline crack), or from the door hinge area.
- The door does not close fully against the gasket due to worn hinges or a broken door latch mechanism. The door must press evenly against the entire gasket perimeter for a seal.
- You notice the tub itself is rusted through at the gasket channel area (more common on older base models with plastic-wrapped metal tubs).
Same-Day Appliance Repair
Fixed or It's Free
$89 → $0 Service Call & Diagnosis — offer ends May 25
Cost Comparison: DIY vs Professional
| DIY | Professional | |
|---|---|---|
| Parts | $20-$55 | $20-$55 |
| Labor | $0 | $85-$175 |
| Time | 15-25 min | 15-20 min |
| Risk | Minimal (no electrical work) | Warranty included |
The Real Cost of DIY
Average DIY attempt: $150-400 in tools you may use once, plus the risk of further damage. Our diagnostic visit costs $0 — we find the problem and give you an honest quote.
Licensed & Insured · 90-Day Warranty · Same-Day Service
Need Professional Help?
FAQ
Q: How do I know if my Frigidaire dishwasher door gasket needs replacement? A: Check for visible cracks (especially at corners), hardened rubber that does not spring back when pressed, gaps between the gasket and the channel, or water leaking from the front of the door during a cycle. A healthy gasket is soft and flexible with no visible damage. If the rubber feels hard like plastic, it has lost its elasticity and cannot seal properly.
Q: Do I need any tools to replace the Frigidaire dishwasher door gasket? A: In most cases, no. The Frigidaire gasket is a press-fit design that pushes into a groove without screws or adhesive. The only scenario where you might need a flat-blade screwdriver is if the old gasket is bonded to the channel from years of mineral buildup. A bowl of warm water to soften the new gasket is helpful but optional.
Q: Is the bottom door seal the same as the perimeter gasket? A: No. The bottom door seal is a separate narrow rubber flap that attaches to the bottom edge of the door itself. The perimeter gasket is the larger seal around the tub opening. They serve different functions: the perimeter gasket is the primary water barrier, while the bottom seal deflects splash water that reaches the door bottom. If you are getting leaks from the very bottom only, the bottom seal may be the issue rather than the perimeter gasket.
Q: Can I use silicone sealant instead of replacing the gasket? A: This is not recommended. Silicone creates a rigid bond that prevents the door from opening easily and will crack over time from the repeated open/close cycle. The proper repair is always a new gasket. A new gasket costs $20-$45 and takes 15 minutes to install, making sealant workarounds unnecessary.
Need a certified technician? Book same-day repair →

