How to Replace a Bosch Dishwasher Control Panel and Decorative Strip
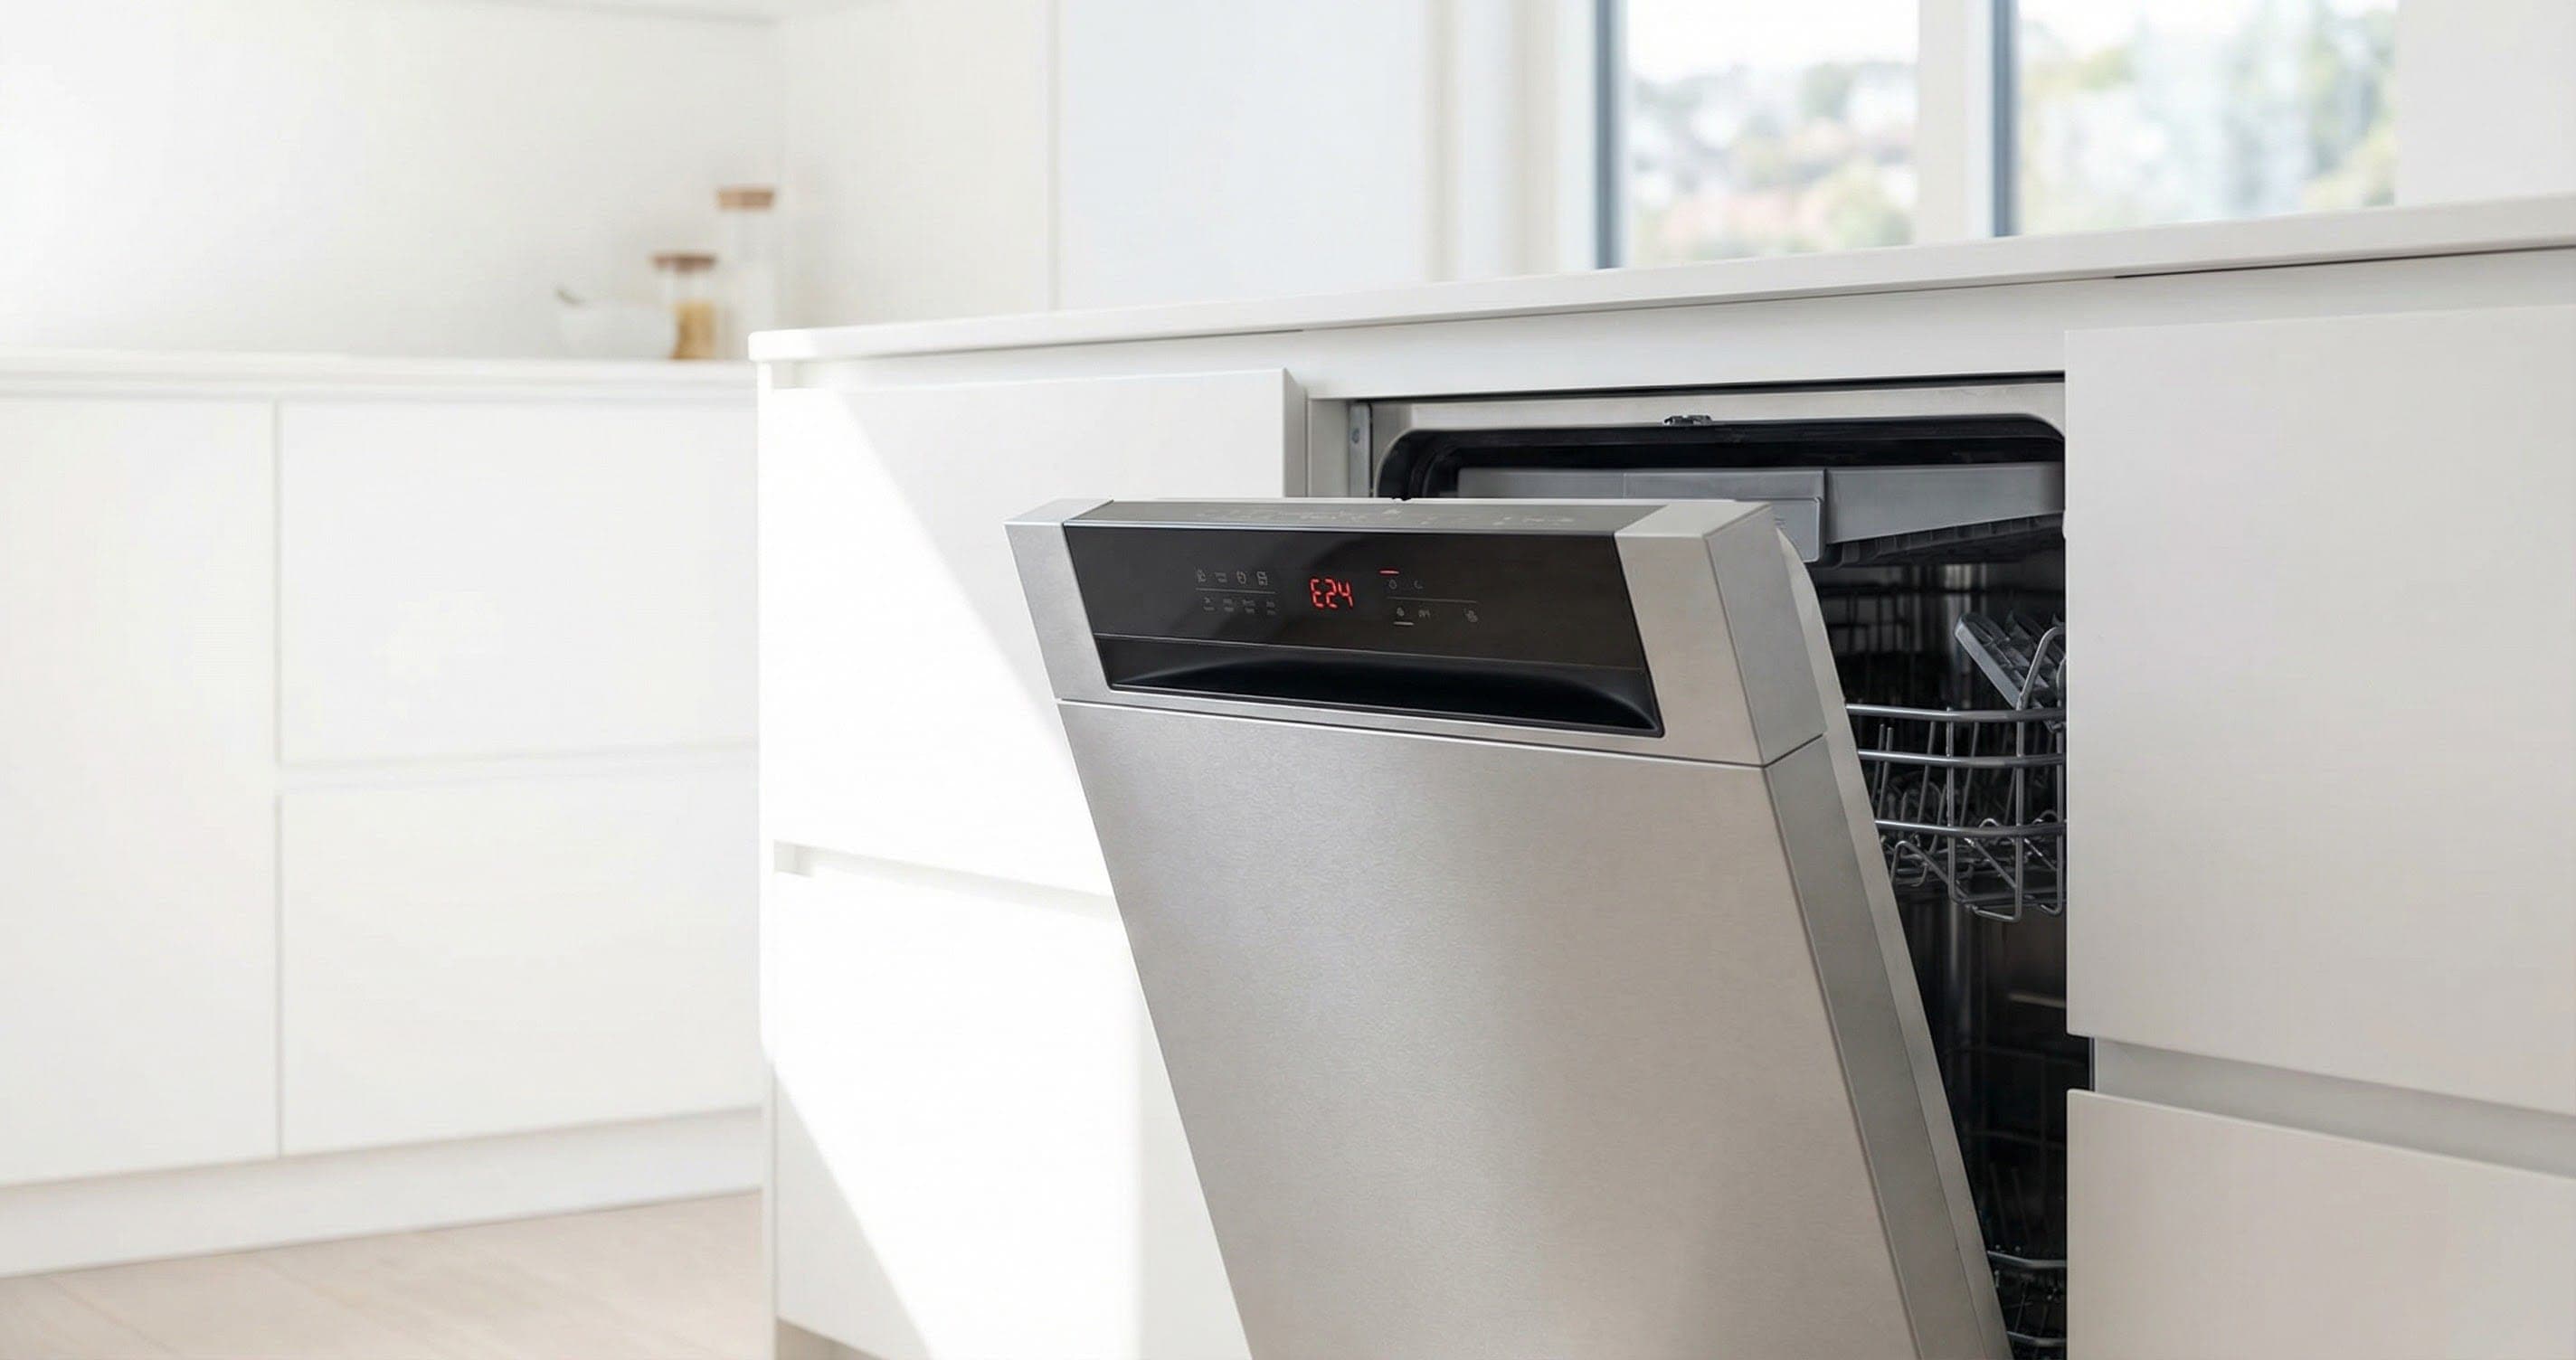
The control panel decorative strip on a Bosch dishwasher is the narrow trim piece at the top of the door that covers the control board housing and provides the surface for touch buttons or physical buttons. Over time, this strip can become damaged (cracked, warped from heat, or delaminated) causing buttons to become unresponsive or the panel to look unsightly. On integrated panel-ready Bosch models, this strip also serves as the mounting point for the custom cabinet panel bracket.
Replacing the decorative strip is relatively straightforward since it is held by clips and does not require disconnecting electrical components unless you are also replacing the touch membrane beneath it.
Before You Start
- Tools needed: Torx T15 driver, plastic spudger or trim removal tool, microfiber cloth, isopropyl alcohol
- Parts needed: Decorative trim strip (model-specific, ~$30-$80) and/or button membrane overlay (if touch buttons unresponsive, ~$25-$50)
- Time required: 20-35 minutes
- Difficulty: Beginner to Intermediate
- Safety warning: Disconnect power at the circuit breaker before working on the control panel area. Although the strip itself is cosmetic, the control board directly beneath it carries 120V. If you need to replace the touch membrane, you will be working adjacent to live-capable circuitry.
Do You Have the Right Tools?
Water pressure gauge ($60), spray arm tester, float switch multimeter ($85), and drain inspection camera. Our technician arrives with $15K+ in professional tools — your diagnostic is free.
Licensed & Insured · 90-Day Warranty · Same-Day Service
Step-by-Step Instructions
Step 1: Disconnect Power and Open the Door
Switch off the circuit breaker for the dishwasher. Open the door to the fully horizontal (flat) position. This gives you access to the top edge of the door where the decorative strip meets the control panel housing.
Step 2: Identify the Strip Mounting Method
Bosch uses two attachment methods depending on the series: clip-on (most 300/500 series) or screw-retained (some 800 series and panel-ready models). Look at the top edge of the inner door — if you see small Torx T15 screws along the top that clearly attach the trim, it is screw-retained. If you see no screws but see thin seam lines at the edges of the strip, it is clip-mounted.
Step 3: Remove the Clip-Mounted Strip
For clip-mounted strips: start at one end. Insert a plastic spudger between the decorative strip and the door frame, working from the bottom edge of the strip. Gently pry outward — you should feel the clips releasing with soft pops. Work progressively along the length of the strip, releasing each clip in sequence. Do NOT use metal tools — the stainless finish scratches easily. The strip should come free as a single piece once all clips release.
Step 4: Remove the Screw-Retained Strip
For screw-retained models: open the door fully. The retaining screws are visible from above (looking down at the top edge of the door) or from inside the door opening. Remove 3-5 Torx T15 screws. The strip may also have alignment pins that require the strip to slide sideways before lifting off. Check for a small arrow indicating slide direction.
Step 5: Inspect the Touch Membrane (If Buttons Are Unresponsive)
With the strip removed, the touch membrane (a thin flex circuit with printed button contacts) is visible adhered to the inner surface of the strip or to the control board housing. If buttons were unresponsive, check for: delamination (membrane peeling from the surface), moisture trapped behind the membrane, or visible cracks in the membrane traces. If damaged, carefully peel the old membrane off and clean the surface with isopropyl alcohol.
Step 6: Install New Touch Membrane (If Replacing)
Align the new membrane precisely — the button contact pads must align with the touch sensors on the control board beneath. Most Bosch membranes have alignment marks (small triangles or dots) that match marks on the housing. Peel the adhesive backing and apply from one end to the other, pressing firmly to eliminate air bubbles. Misalignment by even 2mm can make buttons unresponsive.
Step 7: Install the New Decorative Strip
For clip-mounted: align the strip at the correct starting position and press firmly along its length until each clip snaps into place. You should hear/feel positive clicks at each clip location. For screw-retained: position the strip, slide into alignment (if applicable), and install the Torx T15 screws — snug but not overtightened (the clips and screw holes are plastic).
Step 8: Test Button Response
Restore power. Without running a cycle, press each button on the control panel. Each should respond with the appropriate indicator light or display change. If some buttons work but others do not, the membrane may be slightly misaligned — remove the strip and reposition the membrane. If NO buttons work, check that the ribbon cable from the touch sensor to the control board is properly seated.
Step 9: Check the Door Close and Seal
Close the dishwasher door and verify it latches properly. The decorative strip should sit flush with the door surface — no gaps, no sections that protrude. If the strip was installed slightly off-position, the door latch alignment can shift, causing the door to not close completely. Readjust if needed.
Common Issues After Strip Replacement
- Buttons respond inconsistently: Moisture between membrane and housing. Remove strip, dry the area completely, and reinstall
- Display flickers: Ribbon cable partially unseated during work. Open the door panel and reseat the display ribbon cable
- Door doesn't close flush: Strip positioned 1-2mm too low, interfering with the door latch geometry. Remove and reposition higher
- Gap visible between strip and door surface: Not all clips engaged. Press firmly at each clip location
Safety First — Know the Risks
Live 120V wiring in a wet environment is one of the most dangerous DIY scenarios. Water + electricity = serious shock risk. Our techs are licensed and insured — let them handle the risk.
Licensed & Insured · 90-Day Warranty · Same-Day Service
When to Call a Professional
Consider professional help if:
- You have a panel-ready 800 series with a custom cabinet panel — removing the decorative strip requires first removing the cabinet panel, which involves the custom mounting bracket
- The control board itself shows damage (visible through the opening once the strip is removed) — board replacement requires more extensive work
- The touch membrane is fine but specific buttons still do not respond — the touch controller IC on the board may have failed
- Your model has an LCD/TFT display that is not illuminating — the display backlight or driver may need replacement beyond just the membrane
Same-Day Appliance Repair
Fixed or It's Free
$89 → $0 Service Call & Diagnosis — offer ends May 25
Cost Comparison: DIY vs Professional
| DIY | Professional | |
|---|---|---|
| Parts | $30-$80 (strip) + $25-$50 (membrane) | Same |
| Labor | $0 | $100-$180 |
| Time | 20-35 min | 15-25 min |
| Risk | Low | Warranty included |
The Real Cost of DIY
Average DIY attempt: $150-400 in tools you may use once, plus the risk of further damage. Our diagnostic visit costs $0 — we find the problem and give you an honest quote.
Licensed & Insured · 90-Day Warranty · Same-Day Service
Need Professional Help?
FAQ
Q: Why are some buttons on my Bosch dishwasher unresponsive while others work fine? A: This is almost always a touch membrane issue, not a control board failure. The membrane's conductive traces crack or delaminate at specific button locations while others remain intact. Replacing the $25-50 membrane is the fix, not a $120-350 control board. Less commonly, moisture trapped behind the membrane causes selective button failure — drying it out may restore function.
Q: Can I use the Bosch dishwasher without the decorative strip? A: Technically yes, but it is not recommended. The strip protects the control board housing from moisture and provides the touch surface for button inputs. Running without it exposes the board to steam and splashing water, which accelerates corrosion. Cosmetically, the door also looks unfinished.
Q: How do I find the correct decorative strip part number for my Bosch model? A: The strip is model-specific because different models have different button layouts, colors, and finishes (stainless, black stainless, white, custom panel). Find your model number inside the door (left side label). Search the BSH parts catalog or enter the model number at boschparts.com to find the exact strip.
Q: Is the decorative strip the same as the outer door panel? A: No. The outer door panel is the large flat surface that forms the exterior face of the door. The decorative strip is the narrow trim piece (1-2 inches tall) at the very top of the door that houses the control buttons and display. They are separate parts that install independently.
Need a certified technician? Book same-day repair →

