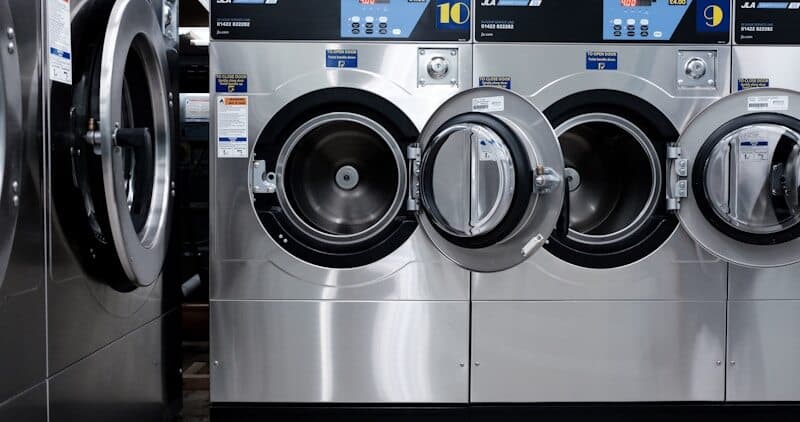
How to Fix Maytag Dryer Front Drum Bearing and Roller Noise
A thumping, rumbling, or squealing noise from your Maytag dryer typically indicates worn drum support components. Maytag dryers feature commercial-grade drum rollers rated for higher cycle counts than standard models, but these components still wear over time — especially in households running 8-10 loads per week. This guide walks you through identifying whether the noise comes from the front drum glides or the rear drum rollers, and how to replace each component.
Maytag MED (electric) and MGD (gas) dryers share identical drum support systems with the Whirlpool platform. The same parts, same access procedures, and same tools apply. The repair typically takes under an hour and costs $20-$50 in parts.
Before You Start
- Tools needed: Phillips #2 screwdriver, 5/16-inch nut driver, putty knife, flathead screwdriver, work gloves
- Parts needed: Drum roller kit (2 or 4 rollers + retaining clips) ~$20-$40, front drum glides ~$10-$20 (depending on diagnosis)
- Time required: 45-60 minutes
- Difficulty: Intermediate
- Safety warning: Unplug the dryer completely. For gas models, also shut off the gas supply valve behind the unit.
Do You Have the Right Tools?
Gas leak detector ($130), thermal fuse tester ($95), belt tension gauge, and vent inspection camera ($180). Our technician arrives with $15K+ in professional tools — your diagnostic is free.
Licensed & Insured · 90-Day Warranty · Same-Day Service
Identifying the Noise Source
Before disassembly, identify where the noise originates:
- Rhythmic thumping from the rear — worn rear drum rollers (flat spots on roller surface)
- Scraping or squealing from the front — worn front drum glides (plastic/felt pads)
- Continuous rumble increasing with load weight — roller shaft wear (metal-on-metal after bearing grease depletes)
- Noise only when drum is loaded — rollers that pass inspection empty but deform under weight
Open the dryer door and rotate the drum by hand. Rough rotation, wobble, or audible grinding confirms worn support components. A drum that spins freely by hand but makes noise under heat load suggests the issue manifests only with thermal expansion and weight.
Step-by-Step Instructions
Step 1: Open the Top Panel
Remove the lint screen and take out the two 5/16-inch hex screws inside the lint trap cavity. Use a putty knife at each front corner to release the spring clips. Lift the top panel and prop it back or remove it completely.
Step 2: Remove the Front Panel
Disconnect the door switch wire harness (press the locking tab). Remove the lower kick panel (spring clips or screws). Remove the front panel mounting screws — typically 2 at the top (visible with top panel raised) and 2 at the bottom. Disconnect the moisture sensor wiring if routed along the front panel. Tilt the front panel forward and lift off.
Step 3: Inspect the Front Drum Glides
With the front panel removed, look at the front bulkhead where the drum rim rides. The drum glides (also called drum slides or bearing pads) are semi-circular plastic or Teflon strips that the drum front rim rotates against. Check for:
- Worn-through pads (bare metal showing)
- Uneven wear pattern (one side thinner than the other)
- Melted or glazed surface
- Missing pad sections
Worn glides cause a scraping or squealing noise and can leave dark marks on clothes from metal contact. Replace both glides as a set — peel off the old adhesive-backed pads and press new ones into position, or remove screw-mounted pads depending on your model year.
Step 4: Release the Belt and Remove the Drum
Reach under the drum and push the idler pulley toward the motor to release belt tension. Slip the belt off the motor shaft. Lift the drum up and forward out of the cabinet. Set it aside on a soft surface to avoid scratching the finish.
Step 5: Inspect and Replace Rear Drum Rollers
With the drum removed, the rear bulkhead is fully exposed. The two (sometimes four) drum rollers are mounted on stationary shafts with tri-ring or C-clip retainers.
Inspect each roller:
- Spin it by hand — it should rotate freely and quietly
- Check the surface for flat spots (the roller has a worn flat area rather than being perfectly round)
- Look for wobble indicating a worn bearing core
- Check the shaft for grooving (a visible channel worn into the metal)
To replace: pry off the retaining clip with a flathead screwdriver, slide the roller off the shaft, and inspect the shaft surface. If the shaft is grooved, replace it too (some kits include new shafts). Apply a thin coating of high-temperature bearing grease to the new shaft before installing the new roller. Push on the new retaining clip until it seats in the shaft groove.
Maytag's commercial-grade rollers have a heavier bearing core than standard Whirlpool replacements. When ordering parts, specify your exact model number to get the correct duty rating. Both OEM and aftermarket rollers work — OEM provides the longest service life.
Step 6: Check the Idler Pulley While Accessible
Since you already have the drum out, inspect the idler pulley. Spin it — it should rotate silently on its bearing. Any grinding, roughness, or side-to-side play means the bearing is worn. A seized idler puts excessive stress on the belt and motor. Replace it now to prevent a callback repair later ($10-$15 for the part).
Step 7: Reassemble
- Position the drum back into the cabinet, seating the rear rim onto the rollers
- Route the belt around the drum (ribbed side against the drum)
- Loop the belt under the idler pulley and around the motor shaft (Z-pattern)
- Release the idler to apply tension
- Spin the drum by hand — it should rotate smoothly and quietly
- Reinstall the front panel, reconnect all wire harnesses
- Replace the top panel, secure with lint trap screws
Step 8: Test Operation
Restore power (and gas for MGD models). Run a timed cycle for 10-15 minutes with a load of towels inside (weight helps confirm the repair). Listen for any remaining noise. The drum should tumble smoothly without thumping, scraping, or rumbling. The Wrinkle Prevent feature (up to 150 minutes of intermittent tumble) will activate if enabled — this is normal.
If noise persists after roller and glide replacement, the issue may be the belt (glazed surface causing vibration) or the motor bearings (rare on Maytag's commercial-grade motors, which are designed for extended service life).
Safety First — Know the Risks
Gas dryers carry carbon monoxide and explosion risk. Even electric dryers involve 240V circuits that can deliver a fatal shock. Our techs are licensed and insured — let them handle the risk.
Licensed & Insured · 90-Day Warranty · Same-Day Service
Preventive Maintenance
To extend drum roller and glide life on your Maytag dryer:
- Do not overload beyond rated capacity — excess weight accelerates roller wear
- Keep the exhaust vent clean — restricted airflow causes higher operating temperatures that degrade roller bearings faster
- Avoid running the dryer with an empty drum for extended periods (the Extra Power extended tumble without fabric creates direct roller-to-drum contact without cushioning)
- Level the dryer properly — an unlevel machine causes uneven drum loading and premature wear on one side
When to Call a Professional
- If noise persists after replacing rollers and glides, the rear drum shaft bearings (pressed into the rear bulkhead) may need replacement — this requires specialized tools
- Motor bearings producing a high-pitched whine under load require motor replacement
- If the drum has worn through the front glide support and damaged the bulkhead metal, the entire front bulkhead assembly needs replacement
- Any repair where you are unsure of proper belt routing — an incorrectly routed belt can damage components
Same-Day Appliance Repair
Fixed or It's Free
$89 → $0 Service Call & Diagnosis — offer ends May 25
The Real Cost of DIY
Average DIY attempt: $150-400 in tools you may use once, plus the risk of further damage. Our diagnostic visit costs $0 — we find the problem and give you an honest quote.
Licensed & Insured · 90-Day Warranty · Same-Day Service
Cost Comparison: DIY vs Professional
| DIY | Professional | |
|---|---|---|
| Parts | $20-$50 | $20-$50 |
| Labor | $0 | $150-$250 |
| Time | 0.75-1.0h | 30-45 min |
| Risk | Low | Warranty included |
Need Professional Help?
Don't Void Your Warranty
Opening your appliance yourself may void the manufacturer warranty. Our repair comes with a 90-day guarantee, and we document everything for warranty compliance.
Licensed & Insured · 90-Day Warranty · Same-Day Service
FAQ
Q: How long do Maytag dryer drum rollers last? A: Maytag's commercial-grade drum rollers typically last 8-12 years under normal use (5-7 loads per week). Heavy use households may see wear at 5-7 years. Standard Whirlpool rollers on the same platform typically last 5-8 years, so the Maytag duty-rated components offer meaningful longevity improvement.
Q: Should I replace 2 or 4 drum rollers? A: Most Maytag dryer models have 2 rear drum rollers. Some models also have 2 front support rollers. Always replace in pairs — if one is worn, the other is close behind. Kits that include all rollers, clips, and the idler pulley provide the best value and prevent callback repairs.
Q: Can I use generic drum rollers in my Maytag dryer? A: Yes — aftermarket rollers that match the Whirlpool part number will physically fit. However, Maytag-specified OEM rollers may use a heavier-duty bearing core matched to the commercial-grade rating. For longest service life, use OEM parts ordered by your specific model number.
Q: Why does my Maytag dryer squeal only when cold? A: Cold-start squealing that disappears after 5-10 minutes of operation typically indicates dried-out front drum glides. The heat softens the glide material and the noise stops. While not immediately critical, this indicates the glides are nearing end of life and should be replaced before they wear through completely.
Need a certified technician? Book same-day repair →

