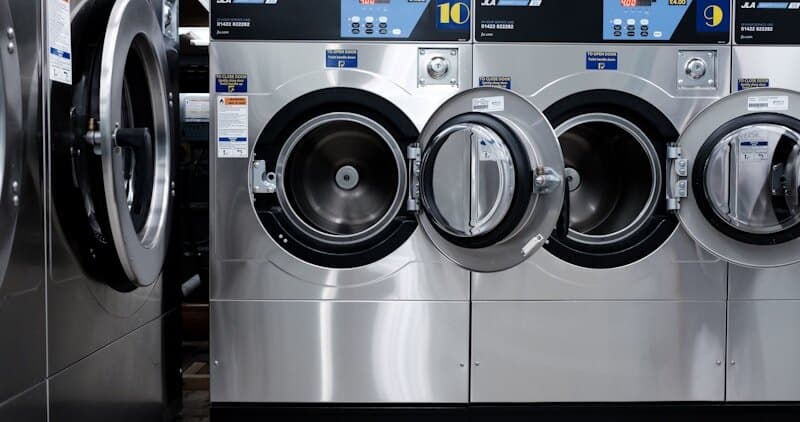
How to Disassemble a Samsung Dryer: Complete DV/DVE Teardown Guide
Samsung DV and DVE series dryers are designed with a modular internal layout that allows access to different components through different panels. The front panel provides drum, belt, and roller access. The rear panel provides heating element and thermal protection access. Full drum extraction requires front panel removal and belt disconnection. This guide covers the complete disassembly sequence for Samsung dryers, noting which level of teardown each repair requires.
Samsung dryers use a thin multi-rib belt that is notably more fragile than belts used by other manufacturers. Understanding the belt routing is critical during reassembly — an incorrectly routed belt will break on first operation or will not tension properly.
Before You Start
- Tools needed: Phillips #2 screwdriver, putty knife (for top panel clips), 5/16 inch nut driver, needle-nose pliers, flashlight, support block (wood block or paint can)
- Parts needed: None for disassembly (have replacement belt ready if the current belt broke)
- Time required: 30-60 minutes depending on depth of teardown
- Difficulty: Intermediate
- Safety warning: Unplug the dryer and wait 5 minutes before beginning (discharge time for capacitors). For gas models, shut off the gas valve and verify with a combustible gas detector.
Do You Have the Right Tools?
Gas leak detector ($130), thermal fuse tester ($95), belt tension gauge, and vent inspection camera ($180). Our technician arrives with $15K+ in professional tools — your diagnostic is free.
Licensed & Insured · 90-Day Warranty · Same-Day Service
Step-by-Step Instructions
Step 1: Preparation and Safety
Unplug the dryer from the electrical outlet. For gas Samsung dryers (DVG models), turn off the gas supply valve and use a combustible gas detector at the valve connection to verify no leak exists. Pull the dryer away from the wall to provide rear access.
Remove the lint screen from the top of the dryer. Remove any remaining laundry from the drum.
Step 2: Remove the Top Panel
Locate two Phillips screws at the rear edge of the top panel (some models use one screw and two spring clips). Remove the screws. Slide a putty knife between the top panel and front panel at the corners to release the spring clips if present. Slide the top panel toward the rear approximately one inch, then lift it up and back.
With the top panel removed, you can see the drum surface from above, the belt running around the drum circumference, the front panel mounting hardware, and the multi-wire harnesses running to the control board in the rear console.
Step 3: Disconnect the Door Switch Wires
Locate the door switch connector(s) on the inside top of the front panel — typically one or two wire connectors with release tabs. Disconnect them by pressing the tabs and pulling straight apart. This allows the front panel to be removed without damaging the door switch wiring.
Step 4: Remove the Front Panel
With the top panel removed, locate two Phillips or 5/16 hex-head screws at the top of the front panel (they were hidden by the top panel). Remove both. Some models also have two screws accessible from the front at the very bottom of the panel, behind the lower kick plate area.
Before removing the last mounting screw, place a support block (wood block, paint can, or similar sturdy object) under the drum inside the cabinet. The drum rests on the front panel bearing slides — when you remove the front panel, the drum will fall forward and down without support.
With the support in place, remove the final screws. The front panel lifts slightly and pulls straight forward. Set it aside carefully — the glass door adds weight.
Step 5: Understand the Belt and Drum Relationship
With the front panel removed, you can see the drum sitting on its rear bearing shaft at the back and resting on the front support block. The thin multi-rib belt wraps around the drum circumference (about two-thirds up from the bottom), routes down and under the spring-loaded idler pulley arm (right side of the cabinet when facing the front), and wraps around the motor shaft (lower right).
Samsung dryer belts are thinner than belts used by most other manufacturers. This means they wear and break more easily. Stock a spare belt whenever performing service — discovering a worn belt during reassembly saves a second disassembly.
Step 6: Remove the Belt and Extract the Drum
To remove the drum, you must first release belt tension. Reach under the drum to the idler pulley arm. Push the idler arm toward the motor (releasing tension on the belt) and slip the belt off the motor shaft. Release the idler arm. The belt is now slack and can be lifted off the drum.
Lift the drum straight up and forward out of the cabinet. It will slide off the rear bearing shaft. The drum weighs approximately 30-40 pounds depending on the model. Set it on a padded surface to avoid scratching the drum surface.
Step 7: Access Motor, Idler Pulley, and Drum Rollers
With the drum removed, all remaining mechanical components are accessible. The motor is mounted at the lower right. The idler pulley arm and spring are adjacent to the motor. The rear drum support rollers (if your model has them) are mounted on the rear bulkhead.
The motor is secured with mounting screws or a clip bracket. The blower wheel attaches to the rear of the motor shaft — remove it by holding the wheel and turning the motor shaft nut (reverse-threaded on some models).
Step 8: Access the Heating Element (Rear Panel — Separate Access Path)
Samsung electric dryers allow heating element access through the rear panel without full front disassembly. Remove 4-6 Phillips screws from the rectangular heating element cover plate on the upper rear of the dryer. Pull the cover and the element housing slides out as a complete assembly.
The element housing contains the heating coil, the high-limit thermostat, and the thermal fuse. All can be tested with a multimeter while the assembly is extracted. This rear-access design means element testing and replacement does not require drum removal — a significant time savings for the most common Samsung dryer repair.
Belt Routing Guide for Reassembly
Correct belt routing is critical on Samsung dryers. The belt path is:
- Belt wraps around the drum with the flat (smooth) side against the drum surface and the ribbed side facing outward
- Belt routes down from the drum and wraps under the idler pulley wheel (the ribbed side contacts the pulley)
- From the idler pulley, the belt wraps around the motor shaft (ribbed side contacts the motor pulley)
- Tension is maintained by the spring-loaded idler arm pushing the pulley into the belt
When reinstalling: place the belt around the drum first, then lower the drum into the cabinet onto its rear shaft. Reach under the drum, push the idler arm toward the motor to create slack, loop the belt under the idler pulley and around the motor shaft, then release the idler arm. The spring tension will take up slack automatically.
Safety First — Know the Risks
Gas dryers carry carbon monoxide and explosion risk. Even electric dryers involve 240V circuits that can deliver a fatal shock. Our techs are licensed and insured — let them handle the risk.
Licensed & Insured · 90-Day Warranty · Same-Day Service
Troubleshooting Disassembly Issues
- Top panel clips will not release: Insert the putty knife further (2 inches) and push toward the rear while lifting. Some models require the blade to push a specific release tab rather than just spreading the clip
- Front panel screws stripped: Samsung uses soft steel screws in some models. Use a quality Phillips #2 with firm downward pressure. If already stripped, use a screw extractor
- Belt broke during removal: Order replacement before reassembly. Samsung belt part numbers are model-specific — locate your model number plate (inside the door frame) and cross-reference
- Drum will not slide off rear shaft: Light corrosion on the shaft binds the drum. Spray penetrating oil around the shaft where it enters the rear drum bearing and wait 10 minutes. Rock the drum gently while pulling forward
- Blower wheel stuck on motor shaft: The nut may be reverse-threaded. Try turning clockwise to loosen. If the wheel spins with the shaft, grip the motor shaft from the rear with pliers while turning the nut
When to Call a Professional
Consider professional service for your Samsung dryer if:
- The gas supply line needs disconnection and you are not comfortable working with gas connections. Gas connections require proper torque, thread sealant, and leak testing after reconnection
- The motor shaft bearing is seized and the motor must be replaced. Motor replacement requires proper wiring and ground connection to prevent electrical hazards
- You need heating element access on a gas model — gas dryer element access involves working near the gas valve assembly and burner, which requires understanding gas safety protocols
- The rear bearing shaft is damaged or corroded beyond what penetrating oil can free. Forced extraction can damage the rear bulkhead bearing housing
Same-Day Appliance Repair
Fixed or It's Free
$89 → $0 Service Call & Diagnosis — offer ends May 25
The Real Cost of DIY
Average DIY attempt: $150-400 in tools you may use once, plus the risk of further damage. Our diagnostic visit costs $0 — we find the problem and give you an honest quote.
Licensed & Insured · 90-Day Warranty · Same-Day Service
Cost Comparison: DIY vs Professional
| DIY | Professional | |
|---|---|---|
| Parts | Varies by repair | Varies by repair |
| Labor | $0 | $150-300 |
| Time | 30-60 min teardown | 20-40 min |
| Risk | Medium — belt routing critical | Warranty included |
Need Professional Help?
Don't Void Your Warranty
Opening your appliance yourself may void the manufacturer warranty. Our repair comes with a 90-day guarantee, and we document everything for warranty compliance.
Licensed & Insured · 90-Day Warranty · Same-Day Service
FAQ
Q: What tools do I need to disassemble a Samsung dryer? A: Phillips #2 screwdriver handles 95% of fasteners. You also need a putty knife for top panel clips, a 5/16 inch nut driver for some front panel screws, and needle-nose pliers for belt routing.
Q: How do I support the drum when removing the front panel? A: Place a block of wood or paint can under the drum before removing the last front panel screws. Without front support, the drum drops and can bend the rear bearing shaft.
Q: How does the Samsung dryer belt route around the idler pulley? A: Belt wraps around the drum (flat side to drum), loops under the idler pulley, then wraps around the motor shaft. Ribbed side contacts both the pulley and motor shaft.
Q: Can I access the heating element without full disassembly? A: Yes. On Samsung electric dryers, remove 4-6 Phillips screws from the rear heating element cover plate. The element housing slides out without front panel or drum removal.
Need a certified technician? Book same-day repair

