How to Disassemble a Maytag Dryer: Complete Access Guide for MED and MGD Models
Disassembling a Maytag dryer gives you access to the drive belt, drum rollers, heating element, blower wheel, motor, and thermal safety devices. Maytag dryers share the Whirlpool Corporation platform, so the disassembly procedure is identical in layout and fastener types. However, Maytag's commercial-grade drum rollers and higher-rated belt are engineered for extended service life, which is part of the brand's durability positioning.
This guide covers both the MED (electric) and MGD (gas) Maytag dryer series. The primary difference is the heat source: electric models have a heating element accessed from the rear, while gas models have a burner assembly accessed from the front lower panel. All other disassembly steps are the same.
Before You Start
- Tools needed: Phillips #2 screwdriver, 5/16-inch nut driver, 1/4-inch nut driver, putty knife or plastic trim tool, flathead screwdriver, work gloves
- Parts needed: None (disassembly procedure only)
- Time required: 30-60 minutes depending on depth of access needed
- Difficulty: Intermediate
- Safety warning: Unplug the dryer completely. For gas models (MGD), shut off the gas supply valve. Electric dryers operate on 240V — even unplugged, verify no power with a voltage tester at the terminal block if working near the power connection.
Do You Have the Right Tools?
Gas leak detector ($130), thermal fuse tester ($95), belt tension gauge, and vent inspection camera ($180). Our technician arrives with $15K+ in professional tools — your diagnostic is free.
Licensed & Insured · 90-Day Warranty · Same-Day Service
Step-by-Step Instructions
Step 1: Remove the Lint Screen and Top Panel
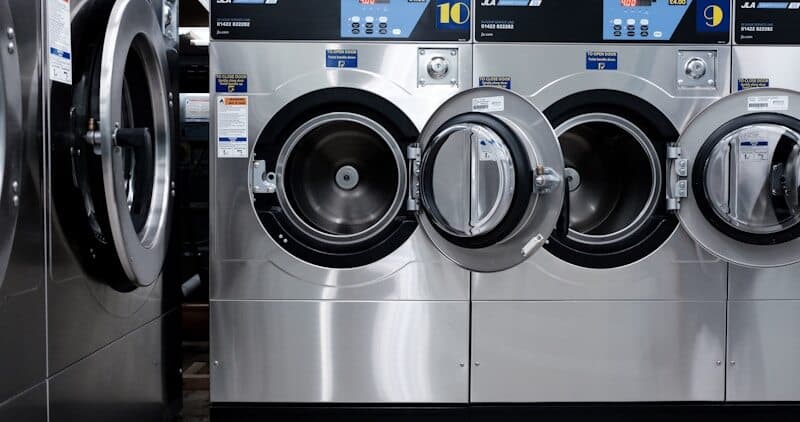
Pull out the lint screen from the housing. This gives you access to the two 5/16-inch hex-head screws inside the lint trap cavity that secure the top panel. Remove both screws. Then use a putty knife at each front corner (about 2 inches from the edge) to release the spring clips holding the top panel to the front frame. Insert the putty knife into the seam and push toward the rear — you will feel the clip release. Lift the top panel up from the front and prop it back on its hinges, or remove it completely by sliding it forward off the rear hinge tabs.
With the top panel open, you can see the drum, the top of the front bulkhead, the door switch wiring, and the support framework.
Step 2: Disconnect the Door Switch
Locate the door switch at the top of the front panel (near the door opening). Unplug the wire harness connector by pressing the locking tab. This allows the front panel to be removed without straining the wires. Some model years have a second connector for the moisture sensor wiring routed along the front panel — disconnect this as well.
Step 3: Remove the Front Panel
The front panel is secured by two screws at the top (now visible with the top panel raised) and typically two screws at the bottom (accessed by removing the lower kick panel first). Remove the lower kick panel — it is held by spring clips or two screws depending on model year. Then remove the front panel mounting screws.
The front panel supports the front drum glide (a plastic or felt ring the drum rotates against). Tilt the front panel forward from the top and disconnect any remaining wires (door switch if not already disconnected, or interior drum light). Lift the panel off and set it aside.
You now have full access to the drum, belt, idler pulley, motor, blower wheel, and (on electric models) the path to the heating element housing.
Step 4: Release the Belt and Remove the Drum
The drum sits on rear drum rollers and rotates via a flat belt that wraps around the drum circumference, under the idler pulley, and around the motor shaft. To remove the drum, reach under the drum and push the idler pulley toward the motor to release belt tension. Slip the belt off the motor shaft and idler.
With the belt released, lift the drum straight up and forward out of the cabinet. The drum is heavy but manageable for one person if you grip the rear edge and walk it out. Maytag drums use the same diameter and mounting as Whirlpool, but the commercial-grade drum rollers may last 2-3x longer than standard before requiring replacement.
With the drum removed, you have access to: the rear drum rollers (mounted on the rear bulkhead), the idler pulley assembly, the motor and blower wheel, the heating element housing (electric) or burner assembly (gas), and all thermostats and thermal fuses.
Step 5: Access the Heating Element (Electric MED Models)
The heating element is housed in a metal duct on the rear bulkhead (some models) or inside a separate heater box accessible from the rear panel. For rear-access models: remove the rear panel screws (typically 6-8 Phillips screws around the perimeter). The element housing is a rectangular metal box with two wires connected to the element terminals and wires to the high-limit thermostat and thermal fuse mounted on its housing.
Disconnect the wires (note positions — photograph first). Remove the mounting screws holding the element housing to the rear bulkhead. The element slides out as a complete assembly. Inspect the coils for breaks, sagging, or contact with the housing walls (which causes grounding and trips the breaker).
Step 6: Access the Gas Burner Assembly (Gas MGD Models)
On gas Maytag dryers, the burner assembly is at the front bottom of the machine, accessible once the lower kick panel and front panel are removed. The assembly includes: the gas valve (two solenoid coils), the igniter (flat silicon carbide or round silicon nitride), the burner tube, and the flame sensor.
Disconnect the gas valve wire harness and igniter wires. Remove the mounting screws securing the burner assembly to the base frame. The entire assembly lifts out for inspection or igniter replacement. Never use open flame to test gas connections — use a soap-and-water solution to check for leaks after reassembly.
Step 7: Remove the Motor and Blower Wheel
The motor is secured to the base frame with mounting clips or bolts. Disconnect the motor wire harness. The blower wheel is threaded onto the motor shaft (right-hand thread on most Maytag/Whirlpool dryers — turns counter-clockwise to remove). Hold the blower wheel with one hand and the motor pulley with the other, then turn the blower wheel to unthread it.
If the blower wheel is seized on the shaft (common after years of heat cycling), spray penetrating oil on the shaft threads and let it soak for 15 minutes. A blower wheel removal tool (clamp-style) provides leverage if hand removal fails.
Step 8: Access Drum Rollers and Shaft
The rear drum rollers (typically 2) are mounted on the rear bulkhead on stationary shafts. Each roller has a retaining clip (tri-ring or C-clip) that holds it on the shaft. Pry off the retaining clip, slide the roller off, and inspect both the roller surface and the shaft for wear grooves. Maytag's commercial-grade rollers are rated for higher cycle counts, but they still wear — flat spots and wobble indicate replacement is needed.
Always replace drum rollers in pairs. If one has worn, the other is close behind. Replace the shaft if grooved. Lubricate the new shaft lightly with high-temperature bearing grease before installing the new roller.
Reassembly Sequence
- Install drum rollers and rear components
- Position the drum back into the cabinet onto the rollers
- Route the belt around the drum (ribbed side against drum surface)
- Loop the belt under the idler pulley and around the motor shaft (creating a Z-pattern)
- Release the idler pulley to apply tension
- Spin the drum by hand to verify the belt tracks correctly and the rollers spin freely
- Reinstall the front panel and reconnect all wire harnesses
- Replace the top panel and secure with lint trap screws and spring clips
- Restore power and run a timed cycle to verify operation
Safety First — Know the Risks
Gas dryers carry carbon monoxide and explosion risk. Even electric dryers involve 240V circuits that can deliver a fatal shock. Our techs are licensed and insured — let them handle the risk.
Licensed & Insured · 90-Day Warranty · Same-Day Service
Diagnostic Mode After Reassembly
Maytag dryers use the same diagnostic mode as all Whirlpool Corporation dryers. Enter by pressing a specific 3-button sequence (varies by control type — check the tech sheet stored inside the console or behind the rear panel). Diagnostic mode tests each component individually: motor, heater, gas valve, thermistors, moisture sensor, and door switch. Run the full diagnostic sequence after any major disassembly to verify all connections are correct.
When to Call a Professional
- Gas dryer reassembly with gas line reconnection — if you are not confident testing for leaks, a professional should verify the gas connection
- Drum bearing noise that requires rear bulkhead/bearing replacement (not just roller replacement)
- Motor shaft with severe wear that prevents blower wheel threading
- Any situation where error codes persist after reassembly and component replacement
- If the dryer is within Maytag's warranty period and you suspect a manufacturing defect in the motor or drum
Same-Day Appliance Repair
Fixed or It's Free
$89 → $0 Service Call & Diagnosis — offer ends May 25
The Real Cost of DIY
Average DIY attempt: $150-400 in tools you may use once, plus the risk of further damage. Our diagnostic visit costs $0 — we find the problem and give you an honest quote.
Licensed & Insured · 90-Day Warranty · Same-Day Service
Cost Comparison: DIY vs Professional
| DIY | Professional | |
|---|---|---|
| Parts | $0 (disassembly only) | $0 |
| Labor | $0 | $120-$250 |
| Time | 0.5-1.0h | 20-30 min |
| Risk | Low-moderate if organized | Warranty included |
Need Professional Help?
Don't Void Your Warranty
Opening your appliance yourself may void the manufacturer warranty. Our repair comes with a 90-day guarantee, and we document everything for warranty compliance.
Licensed & Insured · 90-Day Warranty · Same-Day Service
FAQ
Q: Is a Maytag dryer harder to disassemble than other brands? A: No — Maytag dryers use the identical internal platform as Whirlpool and Kenmore dryers. The same tools, same fastener locations, and same disassembly sequence apply. The only physical difference is that Maytag uses slightly heavier-gauge sheet metal on some cabinet components.
Q: Where is the tech sheet located in a Maytag dryer? A: The tech sheet is typically stored in one of three locations: (1) taped to the inside of the rear access panel, (2) inside the console housing at the top, or (3) clipped inside the lower kick panel area. It contains the wiring diagram, diagnostic codes, and component test values for your specific model.
Q: Can I remove the drum by myself or do I need a helper? A: One person can manage a Maytag dryer drum removal. The drum is not excessively heavy (typically 25-35 lbs depending on model). Grip the rear edge, tilt it toward you, and walk it forward out of the cabinet. A helper makes it easier but is not required.
Q: Do I need to replace the belt every time I remove the drum? A: Not necessarily. Inspect the belt for cracks, fraying, glazing (shiny surface), or stretching. Maytag dryer belts are rated for higher cycle counts than standard Whirlpool belts. If the belt shows no visible wear and maintains proper tension, it can be reused. However, belts are inexpensive ($15-$25) and many technicians replace them preventively during major disassembly.
Need a certified technician? Book same-day repair →

