How to Disassemble a Bosch Ascenta Dishwasher (SHE Series)
The Bosch Ascenta line (models like SHE3AR55UC, SHE3AR75UC, SHE3AR56UC) is Bosch's entry-level dishwasher series. While it shares the core engineering of the 500 and 800 series, the Ascenta has construction differences that affect disassembly: simpler clip-based panel retention, some Phillips screws mixed with Torx, a front-mounted control panel, and a lighter chassis. This guide covers the Ascenta-specific disassembly sequence for all common repair access points.
If your model starts with SHE3 or SHE4, this guide applies. For SHPM, SHP, or SHX models (500/800 series), use the general Bosch disassembly guide.
Before You Start
- Tools needed: Torx T20 driver, Torx T15 driver, Phillips #2 screwdriver (Ascenta uses some Phillips unlike higher series), plastic spudger, flashlight, magnetic tray
- Parts needed: None (disassembly procedure)
- Time required: 15-40 minutes depending on access depth
- Difficulty: Beginner to Intermediate
- Safety warning: Disconnect power at the circuit breaker and close the water supply valve. Ascenta models weigh 60-70 lbs (lighter than 500/800 series due to less sound insulation) but still require a helper when tipping.
Do You Have the Right Tools?
Water pressure gauge ($60), spray arm tester, float switch multimeter ($85), and drain inspection camera. Our technician arrives with $15K+ in professional tools — your diagnostic is free.
Licensed & Insured · 90-Day Warranty · Same-Day Service
Step-by-Step Instructions
Step 1: Power Down and Prepare
Switch off the circuit breaker labeled for the dishwasher. Close the hot water supply valve under the kitchen sink. Open the dishwasher door fully and verify no power (panel should be dark). Remove both dish racks: pull to stops, lift the front end slightly, and slide them out completely.
Step 2: Remove the Kick Plate
The Ascenta kick plate is held by 2 screws at the bottom edge (one near each corner). Early models (2012-2014) may use Phillips; later models use Torx T20. Remove the screws. The panel either slides forward and drops, or has flexible tabs at the top that release when you pull the bottom forward first. Set aside.
Step 3: Remove the Lower Spray Arm and Filter
The lower spray arm lifts straight up off its mounting post — grip the center hub and pull firmly upward. Then remove the triple-filter assembly: turn the cylindrical mesh filter one-quarter turn counterclockwise (follow the arrow on the handle) and lift out. Lift the flat fine filter by its edge. These steps expose the sump for pump and sensor access.
Step 4: Remove Upper Rack Track for Upper Spray Arm Access
On Ascenta models, push the plastic stop tabs at the back of each track inward, then slide each track forward and out. This gives clearance to the upper spray arm mounting. The upper spray arm unscrews counterclockwise (plastic nut, hand-tight only).
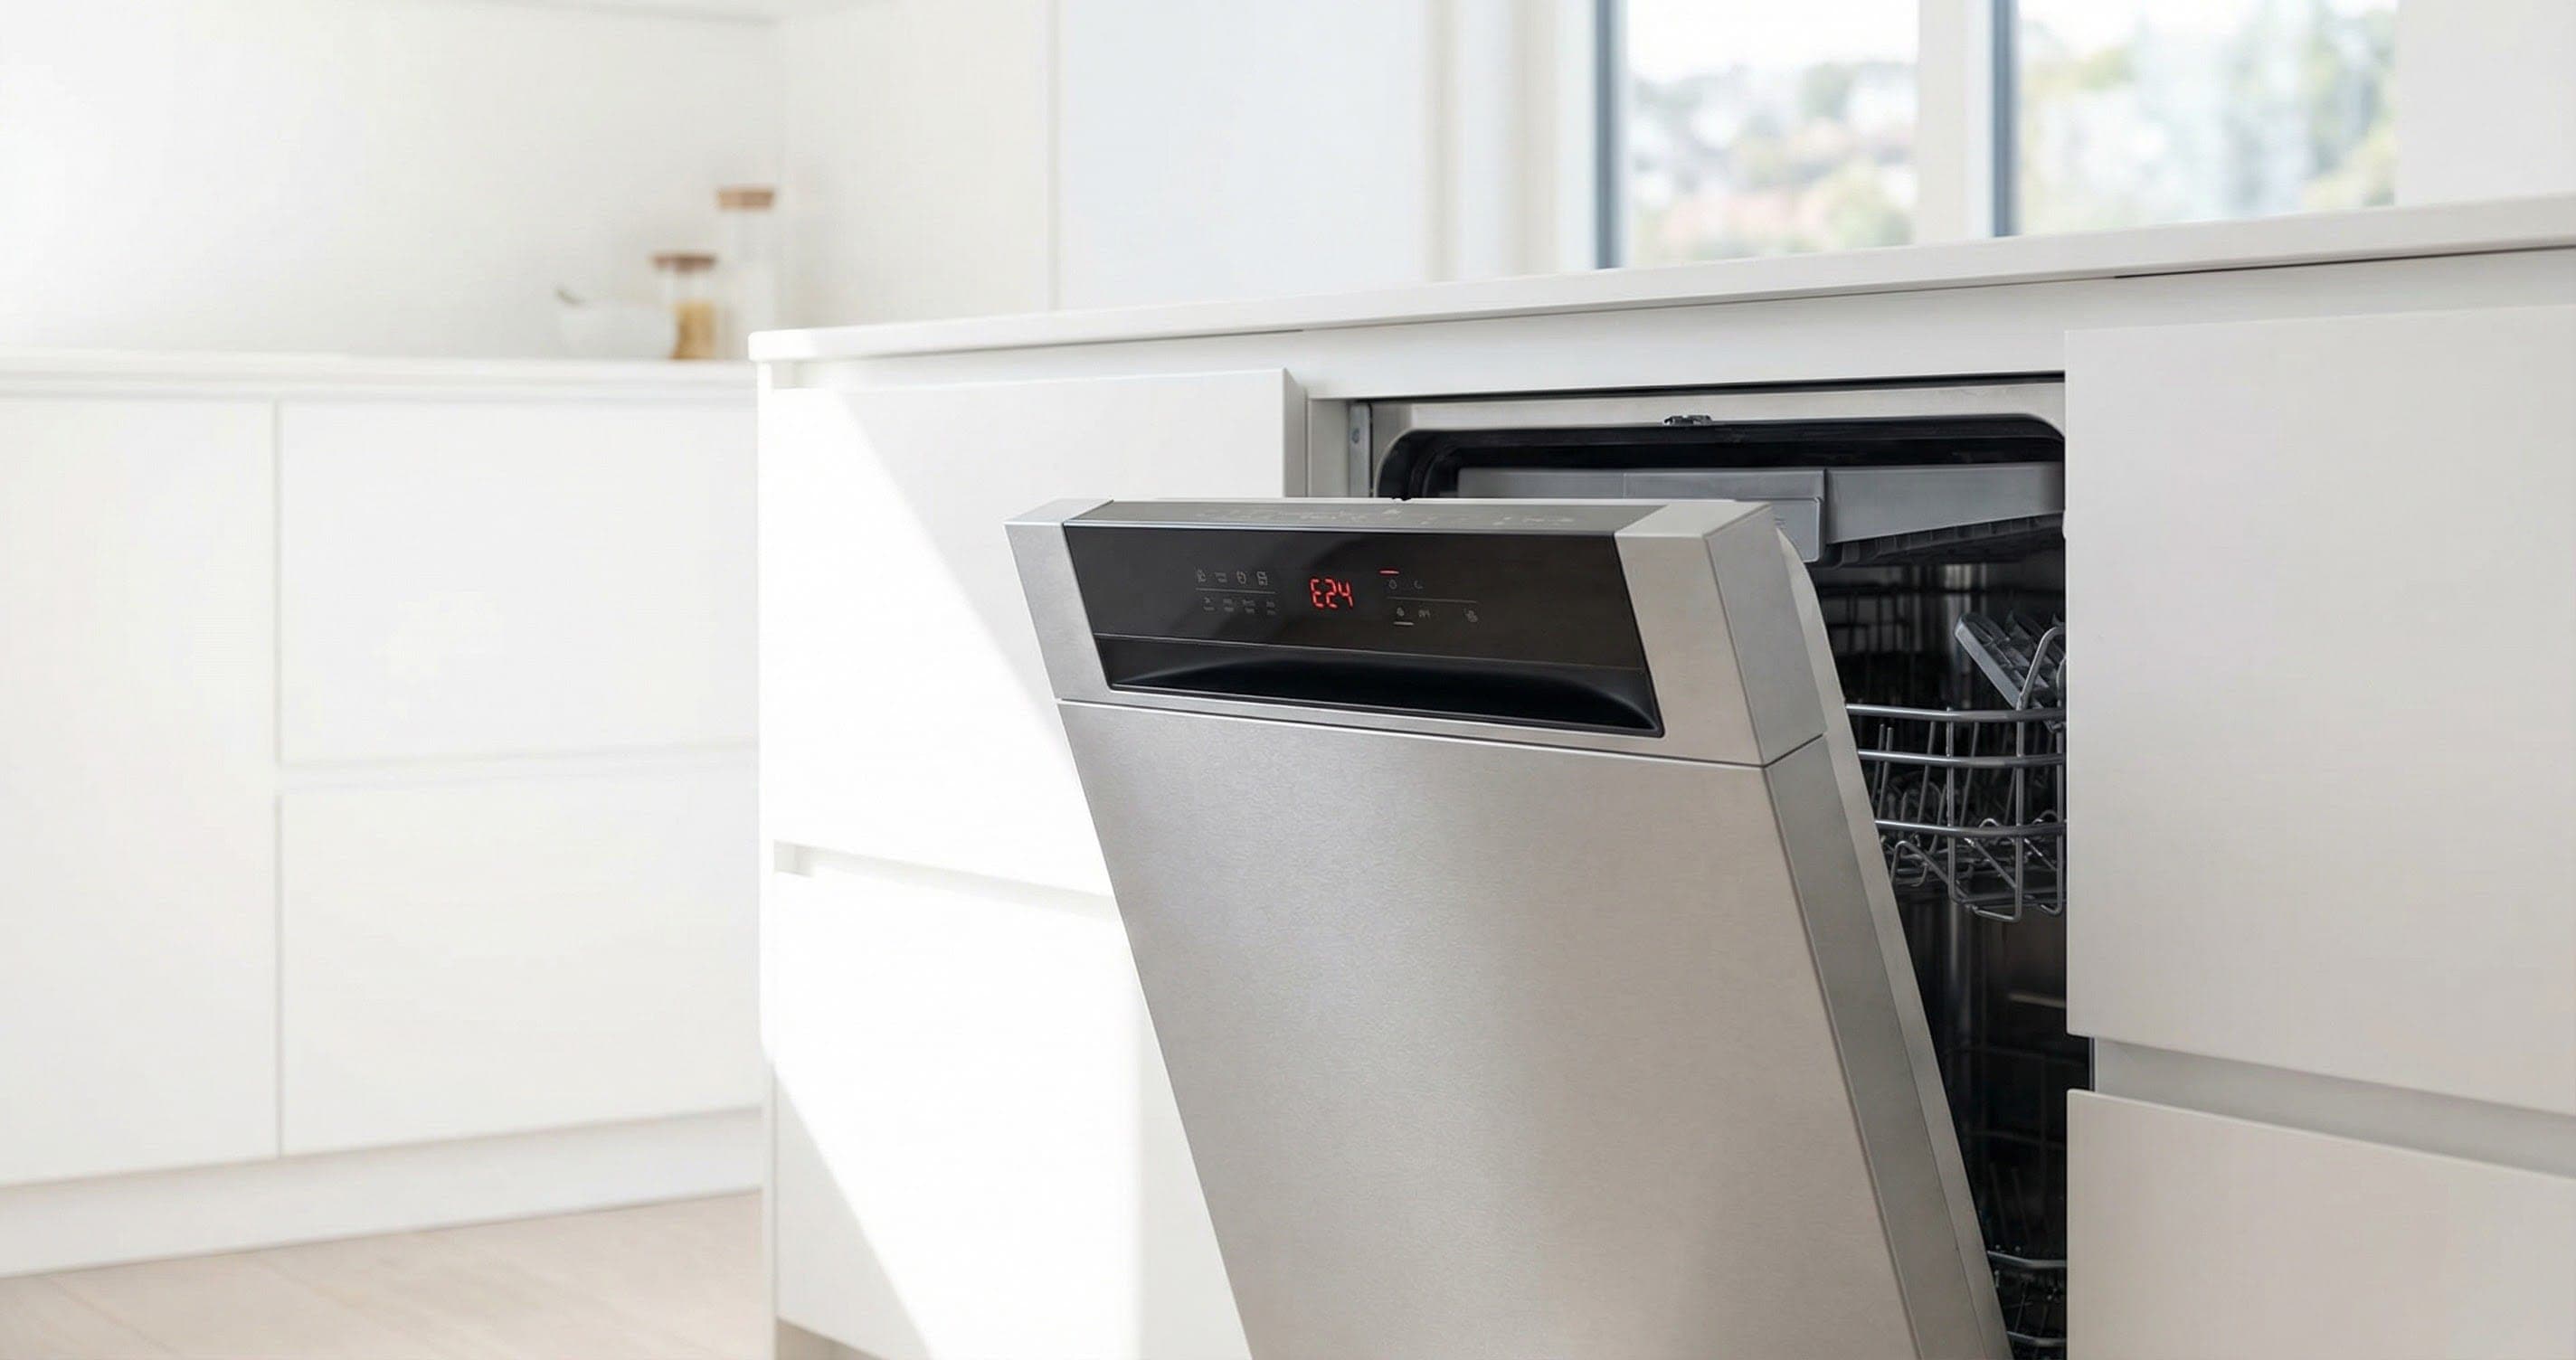
Step 5: Access the Front-Mounted Control Panel
The Ascenta has its control panel on the front face of the door (visible when door is closed) — unlike the 500/800 series which hide controls on the door's top edge. To access the control board: open the door to horizontal position. The outer door panel is held by Torx T15 screws along the inner door perimeter (6-8 screws around edges). Remove all screws while holding the outer panel — it will separate from the inner door once free.
Step 6: Remove the Outer Door Panel
With all perimeter screws removed, the outer door panel slides downward and separates. Support it as it comes free — the panel weighs 5-8 lbs. Set it on a padded surface (stainless scratches easily). With the panel off, you can see: the control board housing at the top, the detergent dispenser mechanism in the center, and the door latch at the top edge.
Step 7: Access the Control Board
The Ascenta control board sits behind a plastic cover at the top of the inner door. Remove 2-3 Torx T15 screws from the cover. The board is visible with its connectors. Photograph all connections before touching anything. Ribbon cables have ZIF (zero insertion force) connectors — lift the locking tab before pulling the cable. Wire harness connectors press-release.
Step 8: Free the Unit from the Countertop
To pull the Ascenta out for underside access: with the door open, look at the top of the door opening. Two metal brackets screw into the countertop underside — remove these screws (Phillips or Torx T20). Close the door. The unit is now free to slide forward. Check supply line and drain hose slack before pulling.
Step 9: Access the Base Area
For pump access (drain pump, circulation pump, inlet valve): you need the base plate off. After pulling the unit out and disconnecting supply line (10mm wrench) and drain hose (spring clamp): tip the Ascenta onto its back with a helper on a moving blanket. The base plate has 4 Torx T20 screws around the perimeter. Remove and lift off. The entire pump assembly, wiring, and AquaStop sensor are now accessible.
Step 10: Reassembly Tips Specific to Ascenta
When reassembling:
- Align the front-facing control panel cutout precisely with the outer door panel — 2mm misalignment makes buttons unresponsive
- Lower rack stop bumpers pop off easily during rack removal — check they are in place before reinserting racks
- The kick plate flex tabs can crack if forced — insert top edge first, then push bottom into position
- Phillips screws on Ascenta strip more easily than Torx — snug only, never overtighten
- When reinstalling outer door panel, slide it upward into position and start bottom screws first
Ascenta vs 500/800 Series: Disassembly Differences
| Feature | Ascenta (SHE3/SHE4) | 500/800 Series |
|---|---|---|
| Control panel | Front-facing (visible) | Top-edge (hidden) |
| Fasteners | Mix of Phillips + Torx | Torx throughout |
| Sound insulation | Minimal (50-52 dB rating) | Heavy (42-44 dB) |
| Unit weight | 60-70 lbs | 75-90 lbs |
| Base plate screws | 4 | 4-6 |
| Custom panel option | No | Yes (800 series) |
| Inner door complexity | Simpler | More integrated |
Safety First — Know the Risks
Live 120V wiring in a wet environment is one of the most dangerous DIY scenarios. Water + electricity = serious shock risk. Our techs are licensed and insured — let them handle the risk.
Licensed & Insured · 90-Day Warranty · Same-Day Service
When to Call a Professional
Consider professional help if:
- You need to access the circulation pump and cannot safely tip the unit with a helper
- The control board is damaged — Ascenta boards are less expensive ($80-$150) but still require careful connector work
- Tub mounting points show stress cracks — more common on the lighter Ascenta chassis
- You stripped a Phillips screw (common on Ascenta) — a professional can extract and replace with Torx upgrade
Same-Day Appliance Repair
Fixed or It's Free
$89 → $0 Service Call & Diagnosis — offer ends May 25
Cost Comparison: DIY vs Professional
| DIY | Professional | |
|---|---|---|
| Tools | $10-$25 (Torx set) | Included |
| Labor | $0 | $89-$150 |
| Time | 15-40 min | 10-20 min |
| Risk | Low (Ascenta is forgiving) | Professional experience |
The Real Cost of DIY
Average DIY attempt: $150-400 in tools you may use once, plus the risk of further damage. Our diagnostic visit costs $0 — we find the problem and give you an honest quote.
Licensed & Insured · 90-Day Warranty · Same-Day Service
Need Professional Help?
FAQ
Q: Is the Bosch Ascenta harder or easier to repair than the 500/800 series? A: Generally easier. Less sound insulation (lighter), front-facing control panel (more accessible), and fewer integrated features (simpler wiring). The core components — pumps, valves, filter — are identical across all Bosch series, so the actual repair is the same once you have access.
Q: Are Bosch Ascenta parts interchangeable with 500/800 series? A: Most internal parts are identical: drain pump (BSH 00631200), door latch (BSH 00630783), inlet valve (BSH 00622058), and filter assembly. The differences are cosmetic: outer door panels, control boards, and trim strips are series-specific. Always confirm by model number before ordering.
Q: My Bosch Ascenta has Phillips screws where other guides mention Torx. Why? A: Early Ascenta production (2012-2014) used Phillips in some locations. Later models transitioned to Torx throughout. Both are normal. Have both drivers ready when working on an Ascenta.
Q: How do I know if I have a Bosch Ascenta vs a 300 series? A: The Ascenta was Bosch's budget line from 2012-2018. Models start with SHE3 (Ascenta) or SHE33 (300 series rebrand). The 300 series that replaced it in 2018+ looks similar but has subtle differences in the control panel layout. Check the label inside the door for the full model number — SHE3AR means Ascenta specifically.
Need a certified technician? Book same-day repair →

