How to Clean a Maytag Dryer: Lint Removal, Vent Cleaning, and Sensor Care
Maytag dryers are engineered with commercial-grade drum rollers and an Extra Power button that delivers extended tumble time and additional heat to handle tough loads. These machines are built for durability — but lint and debris accumulation remains their primary maintenance need. A clogged exhaust vent restricts airflow, forces the heating element to work harder, and stresses the thermal fuse. Regular cleaning protects these components and keeps your Maytag dryer running at peak efficiency for its full expected lifespan.
This guide covers both electric (MED series) and gas (MGD series) Maytag dryers. Since Maytag shares the Whirlpool Corporation platform, the internal layout, access procedures, and diagnostic modes are identical. The same F#E# error codes apply across all Whirlpool-family dryers.
Before You Start
- Tools needed: Dryer vent cleaning brush kit (flexible rod type), vacuum with crevice attachment, Phillips #2 screwdriver, 5/16-inch nut driver, microfiber cloths, rubbing alcohol
- Parts needed: None (cleaning/maintenance procedure)
- Time required: 45-60 minutes
- Difficulty: Beginner to Intermediate
- Safety warning: Unplug the dryer completely. For gas models (MGD series), also shut off the gas supply valve behind the unit. Never run the dryer with panels removed.
Do You Have the Right Tools?
Gas leak detector ($130), thermal fuse tester ($95), belt tension gauge, and vent inspection camera ($180). Our technician arrives with $15K+ in professional tools — your diagnostic is free.
Licensed & Insured · 90-Day Warranty · Same-Day Service
Step-by-Step Instructions
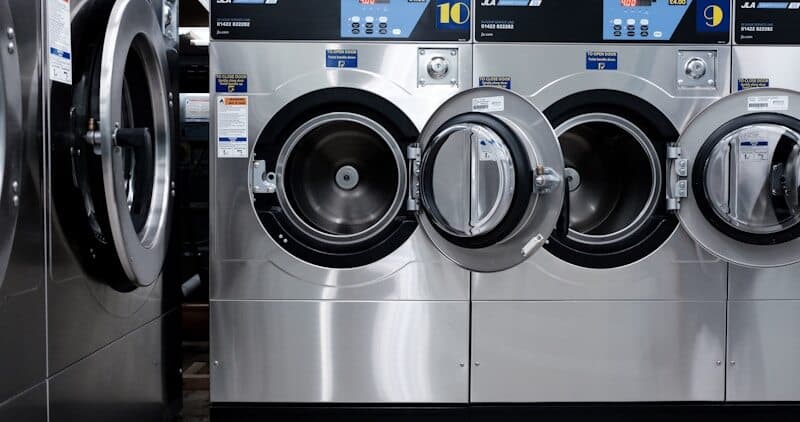
Step 1: Clean the Lint Screen Assembly
Remove the lint screen from the top of the dryer or inside the door (location varies by model year). Roll lint off the screen surface. Then take the screen to a sink and wash it with warm soapy water using a soft brush. This removes the invisible film left by dryer sheets that gradually blocks airflow through the mesh. Hold the screen up to light — you should see light passing uniformly through the entire surface. If water pools on any section rather than passing through, fabric softener residue has sealed those pores.
Let the screen dry completely before reinstalling. A wet lint screen in a hot dryer can warp and reduce its effectiveness. While the screen is out, use your vacuum crevice attachment to clean inside the lint trap housing as deep as the nozzle will reach. Lint accumulates in this cavity and eventually reaches the blower fan.
Step 2: Clean the Exhaust Vent System
Disconnect the flexible duct from the back of the dryer. Inspect the vent connection at the dryer exhaust port — this 4-inch opening accumulates a ring of compressed lint at the junction. Clear it with your fingers or a brush.
Use a dryer vent brush kit (long flexible rod with a cylindrical brush head) to clean the entire exhaust duct run from the dryer to the exterior wall cap. Push the brush through the full length, rotating as you go. For rigid ductwork runs longer than 8 feet, work from both ends.
Go outside and check the exterior vent cap. Remove any lint buildup and verify the flap opens freely. Birds and rodents sometimes nest in vent caps during winter — clear any obstruction completely. A restricted exhaust vent is the number-one cause of Maytag dryer thermal fuse failure, and the Quick Dry cycle (high heat, short duration) is especially prone to triggering this failure when venting is compromised.
Step 3: Clean the Interior Drum
Lint and residue from fabric softener sheets accumulate on the drum surface over time, creating a slightly sticky film that can transfer to clothes. Dampen a microfiber cloth with a solution of equal parts white vinegar and water. Wipe the entire drum interior, including the front and rear rim areas where the drum seal sits.
For stubborn residue (from dryer sheet overuse or accidental crayon/gum incidents), use rubbing alcohol on a cloth. Rotate the drum by hand to access all surfaces. After wiping with alcohol, follow up with a damp cloth to remove any remaining solvent before running the next load.
Check the drum baffles (the raised fins inside the drum that tumble clothes). Lint collects in the seams where baffles are riveted to the drum surface. A stiff brush clears this effectively.
Step 4: Clean the Moisture Sensor Bars
Maytag dryers feature Advanced Moisture Sensing with 4 sensor bars (compared to 2 in base Whirlpool models). These metal strips inside the drum detect remaining moisture in your clothes and signal the control board when the load is dry. When coated with fabric softener residue, the sensors cannot read moisture accurately — resulting in either over-drying (sensor thinks clothes are still wet) or under-drying (sensor detects false dryness from the film).
Locate the sensor bars — they are two pairs of thin metal strips near the lint screen opening inside the drum. Dampen a cloth with rubbing alcohol and wipe each bar thoroughly until the cloth comes away clean. On IntelliDry-equipped models (older Maytag units), there is also an exhaust temperature sensor near the rear of the drum housing — this dual-sensor system requires both surfaces to be clean for accurate cycle termination.
Step 5: Clean the Blower and Lint Trap Housing
For a deeper clean (recommended annually), remove the lower access panel on the front of the dryer using a 5/16-inch nut driver or Phillips screwdriver. The blower wheel and housing are visible at the bottom. Use a vacuum to remove lint accumulation around the blower, motor, and heating element area.
Caution: do not disturb the wiring to the thermal fuse, high-limit thermostat, or cycling thermostat mounted on the blower housing or heater box. These safety devices are critical. Simply vacuum around them without pulling on wires.
If you have a gas model (MGD series), you will also see the gas valve assembly and igniter near the burner tube. Vacuum lint from around these components carefully. Lint on a gas burner assembly is a fire hazard. Do not use compressed air — it pushes lint deeper into components rather than removing it.
Step 6: Inspect and Clean the Exterior Vent Connection
Reconnect the exhaust duct to the dryer. Use a proper 4-inch clamp (not foil tape) for a secure connection that allows future removal for maintenance. Ensure the duct has minimal bends and no crushing — each 90-degree elbow reduces equivalent vent length by about 5 feet. Maytag recommends a maximum equivalent vent length of 60 feet.
Push the dryer back into position, ensuring the duct is not kinked or crushed against the wall. Leave at least 4 inches of clearance between the dryer back and the wall for adequate airflow.
Step 7: Verify Proper Operation
Restore power (and gas supply for MGD models). Run a timed dry cycle for 10 minutes with a damp towel inside. Go outside and verify strong, warm airflow from the exterior vent cap. Back at the dryer, the drum should rotate smoothly with no grinding or squealing. The Wrinkle Prevent feature (up to 150 minutes of intermittent tumble after cycle completion) will activate if enabled — this is normal operation, not a malfunction.
Check that the Advanced Moisture Sensing works correctly by running an automatic cycle with a damp load. The cycle should terminate within the expected time frame rather than running to maximum duration, confirming the sensors are reading accurately after cleaning.
Recommended Cleaning Schedule
| Task | Frequency |
|---|---|
| Lint screen cleaning | Every load |
| Lint screen washing (soap and water) | Monthly |
| Lint trap housing vacuuming | Monthly |
| Moisture sensor bar wipe-down | Every 2-3 months |
| Full exhaust vent cleaning | Every 12 months |
| Interior drum wipe-down | Every 3-6 months |
| Blower/internal cleaning | Annually |
| Exterior vent cap inspection | Every 6 months |
Safety First — Know the Risks
Gas dryers carry carbon monoxide and explosion risk. Even electric dryers involve 240V circuits that can deliver a fatal shock. Our techs are licensed and insured — let them handle the risk.
Licensed & Insured · 90-Day Warranty · Same-Day Service
Signs Your Maytag Dryer Needs Cleaning
- Clothes take more than one cycle to dry completely
- The dryer exterior feels unusually hot during operation
- The laundry room becomes humid while the dryer runs
- Clothes come out hotter than normal at cycle end
- The Extra Power button does not seem to improve drying results
- Error code AF (Airflow) appears on the display
- The thermal fuse blows repeatedly (indicates chronic vent restriction)
Troubleshooting After Cleaning
If performance does not improve after thorough cleaning:
- Verify the exhaust duct material is rigid or semi-rigid metal — never use vinyl or plastic flex duct (fire hazard and code violation in most jurisdictions)
- Check that the exterior vent cap is not painted shut or blocked by landscaping
- Confirm the lint screen is the correct size for your model — an ill-fitting screen allows lint to bypass directly into the blower
- Run the Maytag diagnostic mode (same as Whirlpool: press three specific buttons in sequence to enter service test) to verify all thermistors and the moisture sensor read correctly
- If the drum is not spinning, the issue is likely a broken drive belt rather than a cleaning problem — see our drive belt replacement guide
The Real Cost of DIY
Average DIY attempt: $150-400 in tools you may use once, plus the risk of further damage. Our diagnostic visit costs $0 — we find the problem and give you an honest quote.
Licensed & Insured · 90-Day Warranty · Same-Day Service
When to Call a Professional
- The dryer produces a burning smell even after vent cleaning — this suggests lint has accumulated inside the heater box around the element
- The thermal fuse has blown (no heat at all) — while DIY replacement is possible, the root cause of the vent restriction must be resolved first
- You cannot access the full vent run (routed through walls or attic) — professional vent cleaning services have powered rotary brush systems for long runs
- Gas dryer shows error codes related to ignition failure after cleaning — do not attempt gas valve or igniter service without proper training
- The commercial-grade drum rollers are grinding or the belt has glazed surfaces indicating deeper mechanical wear beyond simple cleaning
Same-Day Appliance Repair
Fixed or It's Free
$89 → $0 Service Call & Diagnosis — offer ends May 25
Cost Comparison: DIY vs Professional
| DIY | Professional | |
|---|---|---|
| Parts | $0-$25 (vent brush kit) | $0 |
| Labor | $0 | $89-$175 |
| Time | 1.0h | 30-45 min |
| Risk | None if power disconnected | Service warranty included |
Don't Void Your Warranty
Opening your appliance yourself may void the manufacturer warranty. Our repair comes with a 90-day guarantee, and we document everything for warranty compliance.
Licensed & Insured · 90-Day Warranty · Same-Day Service
Need Professional Help?
FAQ
Q: How do I know if my Maytag dryer vent is clogged? A: The most common signs are: clothes taking multiple cycles to dry, the dryer exterior feeling very hot, humidity in the laundry room during operation, and the AF (Airflow) error code on the display. You can also check by running the dryer and feeling airflow at the exterior vent cap — it should be strong and warm.
Q: Can I use a leaf blower to clean my dryer vent? A: While some people use a leaf blower to push lint out from the dryer end, this is not recommended as it can pack lint into bends or compress it against the vent cap. A proper rotary brush kit that you push through the full vent length is more effective and safer.
Q: Does cleaning the moisture sensors really make a difference? A: Yes, significantly. Maytag dryers use Advanced Moisture Sensing (4 bars) to determine when clothes are dry. A film of fabric softener residue causes inaccurate readings that either over-dry your clothes (wasting energy and damaging fabric) or leave them damp. Cleaning with rubbing alcohol every 2-3 months maintains accurate auto-dry performance.
Q: Will vent cleaning prevent thermal fuse failure? A: Restricted airflow is the number-one cause of thermal fuse failure in Maytag dryers. Regular vent cleaning dramatically reduces this risk. The Quick Dry cycle, which uses maximum heat for a short duration, is especially hard on the thermal fuse when venting is restricted. Annual vent cleaning typically prevents this common failure.
Need a certified technician? Book same-day repair →

