How to Deep Clean a Frigidaire Dishwasher: Filter, Spray Arms, and DishSense Sensor
Frigidaire dishwashers are designed with simplicity in mind, which makes them straightforward to maintain. Unlike some premium brands that use complex twist-lock filter systems, Frigidaire uses a flat mesh filter that lifts straight out with a center handle. This guide covers every cleaning surface inside your Frigidaire dishwasher, from the filter assembly to the OrbitClean spray arm pivot joint to the DishSense soil sensor in the sump housing.
Regular deep cleaning prevents the most common Frigidaire dishwasher complaints: dishes coming out with a film, cycles running too short (the DishSense sensor misreads soil level when dirty), and standing water in the bottom of the tub. If you have a Frigidaire Gallery model with the OrbitClean wash system, the figure-8 pattern arm has an extra pivot joint that collects debris and needs periodic attention.
Before You Start
- Tools needed: Torx T15 driver (if accessing inner door), soft-bristle toothbrush, microfiber cloth, wooden toothpick
- Parts needed: None (cleaning procedure only)
- Supplies: White distilled vinegar, baking soda, warm water
- Time required: 30-40 minutes
- Difficulty: Beginner
- Safety warning: Disconnect power at the circuit breaker before cleaning any internal components. The DishSense sensor and control board are sensitive to direct water spray.
Do You Have the Right Tools?
Water pressure gauge ($60), spray arm tester, float switch multimeter ($85), and drain inspection camera. Our technician arrives with $15K+ in professional tools — your diagnostic is free.
Licensed & Insured · 90-Day Warranty · Same-Day Service
Step-by-Step Instructions
Step 1: Remove the Dish Racks and Inspect the Tub
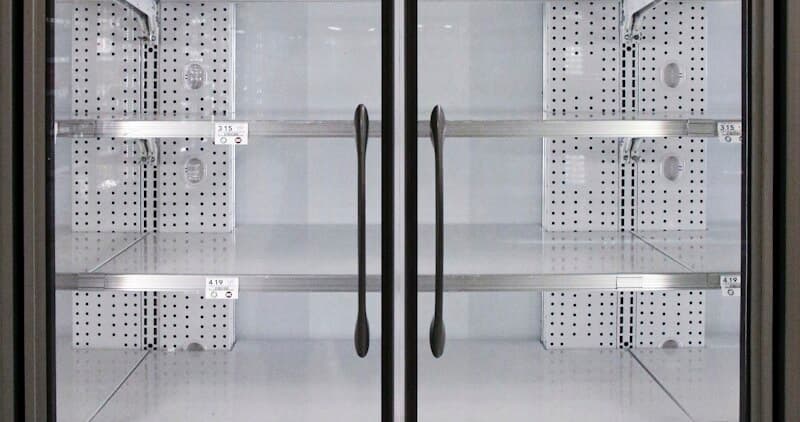
Pull out both the upper and lower dish racks. On Frigidaire models, the upper rack has adjustable height clips on the side rails. Set the racks aside. Look at the tub walls and door interior for mineral deposits, grease splatters, or mold growth in the door gasket folds. Frigidaire dishwashers have a stainless steel or plastic tub depending on the series (Gallery models are stainless, base models are plastic). Note any discoloration patterns, which indicate where water is not reaching during the wash cycle.
Step 2: Remove and Clean the Flat Mesh Filter
Locate the filter assembly at the bottom center of the tub. Frigidaire uses a flat mesh filter with a center handle, unlike Whirlpool and Bosch which use twist-lock cylindrical filters. Grip the center handle and lift straight up. The filter lifts out without any twisting or unlocking motion. If your model has a secondary coarse filter underneath, lift that out as well. Rinse both filters under warm running water, using a soft-bristle toothbrush to scrub trapped food particles from the mesh. For stubborn grease, soak the filter in warm water with a tablespoon of dish soap for 15 minutes. Inspect the filter well in the tub for any debris that fell through. Never run a cycle without the filter installed, as food particles will recirculate and clog the drain pump (part 5304497818).
Step 3: Clean the DishSense Soil Sensor
The DishSense sensor is located in the sump housing, typically near the filter well. It reads water turbidity to determine how dirty the wash water is and adjusts cycle time accordingly. When this sensor gets coated with grease or mineral film, it misreads the soil level and cuts cycles short, leaving dishes dirty. Use a damp microfiber cloth to gently wipe the sensor lens. Do not use abrasive cleaners or scrub pads, as scratching the lens makes the problem worse permanently. If your Frigidaire runs unusually short cycles (the 30-Minute Clean finishing in 20 minutes or the normal cycle ending in 35 minutes), a dirty DishSense sensor is the most likely cause.
Step 4: Clean the Spray Arms and Nozzle Holes
Frigidaire dishwashers have a lower spray arm and an upper spray arm. Gallery models with OrbitClean have a unique figure-8 pattern lower arm with a central pivot joint. To remove the lower spray arm, turn the retaining nut counterclockwise (standard thread) and lift the arm off the hub. For the upper spray arm, it clips onto the feed tube and pulls straight down. Hold a toothpick and push it through each spray nozzle hole from the outside to dislodge mineral deposits and food particles. Rinse the arm under running water while covering the center opening with your thumb to create back-pressure that flushes debris from inside the arm channels.
Step 5: Clean the OrbitClean Pivot Joint (Gallery Models)
If your Frigidaire Gallery has the OrbitClean spray system, the arm has a pivot mechanism that allows the figure-8 washing pattern. This joint accumulates food debris and mineral deposits over time, which restricts the arm movement and reduces wash coverage. With the lower spray arm removed, examine the pivot connection point. Use a toothbrush dipped in white vinegar to scrub around the pivot. Work the arm back and forth to check that it moves freely. If the joint feels stiff or gritty, soak just the pivot section in a bowl of vinegar for 30 minutes. This maintenance step prevents the arm from getting stuck in one position, which creates dead zones where dishes never get clean.
Step 6: Clean the Door Gasket and Interior Edges
The door gasket on Frigidaire dishwashers runs along the perimeter of the tub opening. Pull the gasket away from the tub edge gently and wipe the hidden fold with a cloth dampened with a vinegar-water solution (50/50 mix). Mold and mildew grow in this fold because it stays damp between cycles. Also clean the bottom edge of the door itself, where water splashes up during the wash cycle but never gets rinsed during the final rinse. On Frigidaire models, this area is below the door gasket seal line and accumulates a brown biofilm if neglected.
Step 7: Run a Vinegar Cleaning Cycle
Place a cup of white distilled vinegar in a dishwasher-safe container on the top rack. Run the hottest cycle available (Sanitize if equipped, otherwise Heavy). Do not add detergent. The vinegar breaks down mineral deposits on the tub walls, the heating element, and inside the circulation pump (part 5304519906 on newer models, 154844301 on legacy models). The acetic acid dissolves calcium carbonate without damaging stainless steel or rubber seals. For Gallery models with MaxBoost dry, the heated dry fan will help evaporate remaining moisture after the cycle.
Step 8: Deodorize with Baking Soda
After the vinegar cycle completes, sprinkle one cup of baking soda across the bottom of the empty tub. Run a short hot cycle (use 30-Minute Clean if available). The baking soda neutralizes any remaining vinegar acid, whitens stains on the tub interior, and eliminates odors from the drain path. When this cycle finishes, leave the door cracked open for an hour to air-dry completely. This prevents mildew from re-establishing in the damp environment.
Step 9: Reassemble and Verify
Reinstall the spray arms (lower arm: place on hub and hand-tighten the nut clockwise; upper arm: push onto feed tube until it clicks). Drop the flat mesh filter back into the filter well. Reinstall the dish racks. Close the door and restore power at the breaker. Run a quick rinse cycle with a small load of dishes to verify the spray arms rotate freely and water drains completely. Check for the status LED on the front panel: solid means the cycle completed successfully. If it blinks, the unit detected an issue during the cycle.
Troubleshooting Common Issues
- White film on dishes after cleaning: Hard water mineral deposits. Run an additional vinegar cycle, or use a commercial dishwasher cleaner monthly. Consider adding a rinse aid to the dispenser if you are not already using one.
- Standing water in the bottom after cycle ends: Check that the filter is properly seated (not tilted or lifted). Inspect the drain hose under the sink for kinks. If the dishwasher displays i20 or i40, this indicates a drain blockage downstream of the pump.
- Musty smell persists after cleaning: The odor source is likely in the drain hose itself. Disconnect the hose from the disposal or drain pipe and flush it with a vinegar-water solution. Also check the air gap on the countertop if your installation has one.
- Spray arm does not spin freely: Mineral buildup in the hub bearing. Apply a drop of food-grade mineral oil to the hub where the arm sits. If the arm wobbles excessively, the hub itself may be worn and need replacement.
- DishSense still cutting cycles short: If cleaning the sensor did not help, the sensor itself may be failing. The ER error code on the display confirms a sensor malfunction. This is a $40-60 part replacement.
Safety First — Know the Risks
Live 120V wiring in a wet environment is one of the most dangerous DIY scenarios. Water + electricity = serious shock risk. Our techs are licensed and insured — let them handle the risk.
Licensed & Insured · 90-Day Warranty · Same-Day Service
How Often to Clean Your Frigidaire Dishwasher
| Component | Frequency | Why |
|---|---|---|
| Flat mesh filter | Every 2 weeks | Prevents food recirculation and odors |
| Spray arm nozzles | Monthly | Maintains water pressure and coverage |
| DishSense sensor | Every 2-3 months | Ensures accurate cycle time adjustment |
| OrbitClean pivot (Gallery) | Every 3 months | Prevents figure-8 arm from seizing |
| Door gasket | Monthly | Prevents mold growth in hidden folds |
| Full vinegar cycle | Every 1-2 months | Removes mineral buildup throughout system |
When to Call a Professional
Cleaning resolves the majority of Frigidaire dishwasher performance issues, but call a professional if:
- The PF (power failure) error code appears repeatedly, suggesting a control board issue unrelated to cleanliness
- You hear grinding noises from the circulation pump area even after removing all debris from the sump
- Water leaks from underneath the unit (likely a failed pump seal or cracked sump housing)
- The heating element has visible damage (corrosion, pitting, or a broken section) that cleaning cannot address
- Error codes i20 or i40 persist after clearing all drain obstructions, indicating a possible drain pump motor failure (part 5304497818)
Same-Day Appliance Repair
Fixed or It's Free
$89 → $0 Service Call & Diagnosis — offer ends May 25
The Real Cost of DIY
Average DIY attempt: $150-400 in tools you may use once, plus the risk of further damage. Our diagnostic visit costs $0 — we find the problem and give you an honest quote.
Licensed & Insured · 90-Day Warranty · Same-Day Service
Cost: DIY Cleaning vs Professional Service
| DIY | Professional | |
|---|---|---|
| Supplies | $5-10 (vinegar, baking soda) | Included |
| Labor | $0 | $89-$150 (service call) |
| Time | 30-40 min | 30 min |
| Benefit | Free, repeatable monthly | Deep mechanical cleaning included |
Need Professional Help?
Don't Void Your Warranty
Opening your appliance yourself may void the manufacturer warranty. Our repair comes with a 90-day guarantee, and we document everything for warranty compliance.
Licensed & Insured · 90-Day Warranty · Same-Day Service
FAQ
Q: How do I clean the filter on my Frigidaire dishwasher? A: Frigidaire uses a flat mesh filter that lifts straight out by the center handle with no twisting required. Rinse under warm water and scrub with a soft brush. Unlike Bosch or Whirlpool models that require a quarter-turn to unlock, the Frigidaire filter simply pulls up.
Q: Why does my Frigidaire dishwasher cycle seem too short? A: The DishSense soil sensor in the sump housing is likely coated with grease film. When dirty, it reads the water as cleaner than it actually is and shortens the cycle. Wipe the sensor lens with a damp cloth to restore accurate readings.
Q: Can I use bleach to clean my Frigidaire dishwasher? A: Only if your tub is plastic (base Frigidaire models). Never use bleach in a stainless steel tub (Gallery and Professional models) as it causes permanent pitting and discoloration. Use white vinegar instead, which is safe for all tub materials.
Q: How do I clean the OrbitClean spray arm on my Frigidaire Gallery? A: Remove the lower spray arm by turning the retaining nut counterclockwise. The OrbitClean arm has a pivot joint that needs special attention. Soak the pivot in vinegar for 30 minutes if it feels stiff, and clear each nozzle hole with a toothpick. The figure-8 pattern depends on the pivot moving freely.
Need a certified technician? Book same-day repair →

