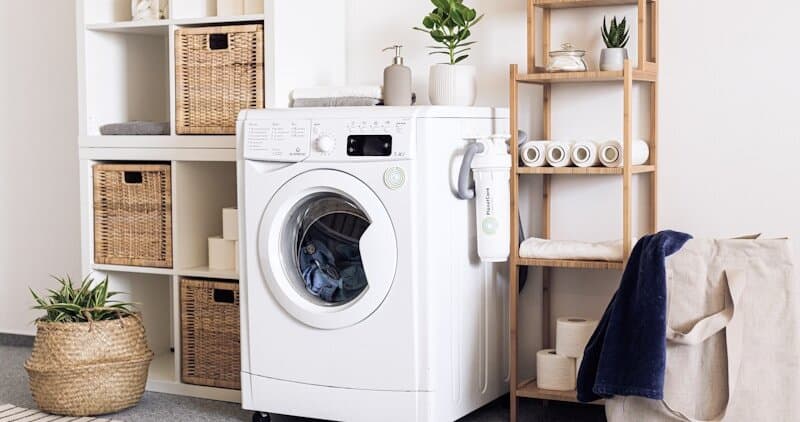
Back-to-School Laundry Surge: Washer and Dryer Care Guide
August in the Bay Area and Sacramento means back-to-school shopping, new schedules, and a dramatic increase in laundry volume. Sports uniforms, art-class-stained clothes, after-school activity gear, and daily outfits — families with school-age children routinely double their laundry loads once school starts.
In our service area, our technicians report a noticeable spike in washer and dryer repair calls in September and October. The pattern is consistent: families increase laundry frequency in August, defer maintenance during the busy transition weeks, and by September something breaks. A pre-school-year tune-up in August prevents the mid-semester breakdown that leaves you hauling laundry to a laundromat during the busiest weeks of the year.
Why Back-to-School Season Is Hard on Laundry Appliances
Summer laundry in California tends to be light — shorts, t-shirts, swimsuits, and towels. School season laundry is heavier and more varied:
- Heavier fabrics. Jeans, sweatshirts, hoodies, and jackets replace summer shorts and tanks.
- More frequent loads. School uniforms, PE clothes, and extracurricular gear generate daily laundry.
- Tougher stains. Grass, mud, paint, ink, and cafeteria food stains require hotter water and longer cycles.
- Larger loads. Parents batch laundry on weekends, running 4 to 6 loads in a day instead of the usual 1 or 2.
This increased demand stresses every component of your washer and dryer. Bearings, suspension springs, drive belts, pumps, heating elements, and motors all wear faster under heavier use.
Do You Have the Right Tools?
Multimeter ($85), vacuum pump ($250), diagnostic software, and specialized hand tools. Our technician arrives with $15K+ in professional tools — your diagnostic is free.
Licensed & Insured · 90-Day Warranty · Same-Day Service
Pre-School-Year Washer Maintenance: 8-Step Checklist
Step 1: Run a Deep Cleaning Cycle
Before the heavy loads begin, start with a clean machine.
- Front-loaders: Run an empty hot cycle with 2 cups of white vinegar. Then wipe the door gasket thoroughly, paying attention to the rubber folds where mold and mildew accumulate. Bay Area humidity — especially in homes near the coast — accelerates gasket mold growth.
- Top-loaders: Run an empty hot cycle with 2 cups of white vinegar and half a cup of baking soda. Wipe down the agitator and inner drum.
The American Home Shield recommends cleaning your washing machine monthly to prevent odor-causing bacteria and mineral buildup. August is the perfect time to establish this habit.
Step 2: Inspect Water Supply Hoses
Washing machine hose failure is one of the top causes of residential water damage according to the Insurance Institute for Business and Home Safety. A burst hose can release 500 gallons per hour — enough to cause catastrophic damage in minutes.
- Pull the washer away from the wall.
- Check both hot and cold supply hoses for bulges, cracks, kinks, or corrosion at the fittings.
- Feel the hoses. Rubber hoses that feel stiff and brittle, or soft and mushy, are overdue for replacement.
- If your hoses are older than 5 years, replace them now with braided stainless steel hoses. They cost 15 to 25 dollars for a pair and are far more durable.
- Hand-tighten any loose connections — but do not overtighten, which can crack the valve housing.
Step 3: Clean the Drain Pump Filter
Most front-loading washers have an accessible drain pump filter behind a small panel at the bottom front. This filter catches coins, buttons, hair ties, and small debris that can clog the drain pump.
- Place a shallow pan and towels beneath the filter access panel.
- Open the panel and slowly unscrew the filter cap. Water will drain out — this is normal.
- Remove and clean the filter under running water. Remove any trapped items.
- Check inside the filter housing for debris.
- Reinstall the filter securely.
With school-age kids, this filter catches significantly more debris — small toys, crayons, tissues left in pockets, and sports pins.
Step 4: Level the Machine
An unlevel washing machine vibrates excessively during spin cycles, which accelerates bearing wear and can damage flooring.
- Place a level on top of the machine (front to back, then side to side).
- Adjust the leveling feet until the bubble is centered in both directions.
- Tighten the lock nuts to prevent the feet from shifting.
- Run a spin cycle and observe — the machine should vibrate minimally and not walk across the floor.
Step 5: Check the Detergent Dispenser
Liquid detergent and fabric softener residue builds up in the dispenser over months, creating a sticky mess that can clog dispensing channels and introduce mold.
- Remove the dispenser drawer (most pull straight out with a release tab).
- Soak in hot, soapy water for 15 minutes.
- Scrub with an old toothbrush, paying attention to small channels and ports.
- Clean inside the dispenser cavity in the machine with a damp cloth.
- Reinstall and run a quick rinse cycle.
Step 6: Inspect the Door Gasket (Front-Loaders)
Front-loader door gaskets are notorious for trapping moisture and developing mold. In the Bay Area's coastal climate, this problem is especially persistent.
- Pull back the rubber folds and inspect for mold, mildew, or debris.
- Clean with a solution of equal parts white vinegar and water.
- For stubborn mold, use a diluted bleach solution (1 tablespoon bleach per quart of water).
- Dry thoroughly after cleaning.
- Leave the door ajar between loads to allow air circulation and prevent moisture buildup.
Step 7: Verify Spin Speed and Drainage
- Run a full cycle with a normal load and observe the spin cycle. The washer should spin smoothly without excessive vibration or loud banging.
- After the cycle, check that clothes are damp but not sopping wet. If clothes are very wet after the spin cycle, the drain pump may be weak or the drain hose kinked.
- Check the drain hose where it connects to the standpipe or utility sink. Ensure it is not pushed too far into the drainpipe, which can create a siphon effect.
Step 8: Review Load Capacity
Know your washer's capacity and respect it — especially during back-to-school when the temptation to overload is strong.
- Standard capacity (3.5 to 4.5 cubic feet): Comfortably handles 12 to 16 pounds per load.
- Large capacity (4.5 to 5.5 cubic feet): Handles 16 to 20 pounds per load.
- Overloading symptoms: Clothes not getting clean, excessive vibration, washer walking, error codes, and long-term damage to bearings and suspension.
Pre-School-Year Dryer Maintenance: 6-Step Checklist
Step 1: Professional Vent Cleaning
This is the most important dryer maintenance task, period. The NFPA reports that clothes dryers cause an estimated 13,820 home structure fires annually, with failure to clean as the leading contributing factor. Before you double your dryer usage for the school year, make sure the vent is clear.
- Check the exterior vent while the dryer is running — the flap should open and you should feel strong airflow.
- If airflow is weak, the vent needs cleaning. For vents longer than 10 feet or with multiple bends, hire a professional.
- Professional vent cleaning costs 80 to 150 dollars and takes about an hour.
Step 2: Clean the Lint Trap Housing
- Remove the lint screen.
- Use a long brush or vacuum crevice attachment to clean inside the lint trap housing.
- Wash the lint screen with warm, soapy water to remove dryer sheet residue.
- Let the screen dry completely before reinstalling.
Step 3: Inspect the Vent Hose
- Pull the dryer away from the wall.
- Check the vent hose for kinks, crushes, or excessive length (maximum recommended: 25 feet including turns).
- If the hose is plastic or foil, replace it with rigid or semi-rigid metal ducting. Plastic hoses are a fire hazard and are prohibited by many building codes.
- Secure all connections with metal tape (not duct tape, which degrades with heat).
Step 4: Clean the Drum
Crayons, ink, and other school-related items that survive a wash cycle can melt or transfer in the dryer.
- Wipe the drum interior with a damp cloth and rubbing alcohol to remove any residue.
- Run an old towel through a complete drying cycle to absorb any remaining residue before drying school clothes.
Step 5: Test the Moisture Sensor
Many modern dryers have moisture sensors that detect when clothes are dry and end the cycle automatically. If these sensors are coated with dryer sheet residue, they misread moisture levels and either over-dry (wasting energy and damaging clothes) or under-dry.
- Locate the sensor bars — usually two metal strips inside the drum near the lint filter.
- Wipe with rubbing alcohol and a soft cloth.
- Run a test load on the auto-dry setting and verify it stops at the right time.
Step 6: Level the Dryer
Like the washer, an unlevel dryer vibrates excessively and wears components faster.
- Place a level on top and adjust the feet.
- Tighten lock nuts to prevent shifting.
- On stacked units, verify both the washer and dryer are level — an unlevel base amplifies vibration in the stacked dryer.
Safety First — Know the Risks
Appliances involve high voltage (120-240V), pressurized water, gas lines, and chemical refrigerants. Over 400 DIY repair injuries are reported yearly. Our techs are licensed and insured — let them handle the risk.
Licensed & Insured · 90-Day Warranty · Same-Day Service
Smart Laundry Habits for the School Year
Load Management
- Sort by soil level, not just color. Heavily soiled PE uniforms and lightly worn school shirts should be separate loads.
- Pre-treat stains immediately. Grass, ink, and paint stains set if dried. Keep a stain treatment spray near the laundry hamper.
- Use the right water temperature. Cold water handles most school clothes effectively and saves energy. Reserve hot water for heavily soiled items and whites.
- Do not overload. Two properly sized loads clean better than one overstuffed load and put less strain on the machine.
Dryer Efficiency
- Clean the lint screen before every load. This takes 5 seconds and improves drying efficiency by up to 30 percent.
- Do not over-dry. Use the auto-dry setting if available. Over-drying wastes energy and causes excessive wear on fabrics.
- Dry similar fabrics together. Lightweight shirts dry faster than heavy jeans. Mixing them means either over-drying the shirts or under-drying the jeans.
Same-Day Appliance Repair
Fixed or It's Free
$89 → $0 Service Call & Diagnosis — offer ends May 25
Frequently Asked Questions
How many loads per week is too many for a residential washer? Most residential washers are designed for 5 to 8 loads per week. Running 10 or more loads weekly accelerates wear on bearings, the drive belt, and the pump. If you consistently need more than 8 loads per week, consider a commercial-grade residential washer.
My washer smells bad. How do I fix it? Run a cleaning cycle with white vinegar, clean the door gasket (front-loaders), clean the drain pump filter, and leave the door ajar between loads. If the smell persists, the drain pump or hose may have a biofilm buildup that requires professional cleaning.
Should I upgrade to a larger washer for back-to-school? Not necessarily. A properly maintained standard-capacity washer handles school-year laundry fine for most families. Upgrading makes sense if you consistently overload your current machine or if it is more than 10 years old and showing wear.
The Real Cost of DIY
Average DIY attempt: $150-400 in tools you may use once, plus the risk of further damage. Our diagnostic visit costs $0 — we find the problem and give you an honest quote.
Licensed & Insured · 90-Day Warranty · Same-Day Service
EasyBear Back-to-School Appliance Service
Do not start the school year with a washer or dryer on its last legs. EasyBear offers pre-school-year laundry appliance tune-ups throughout the Bay Area and Sacramento. Our technicians handle hose inspection, vent cleaning, filter service, and a complete performance check — everything your laundry setup needs to handle the back-to-school surge.
Book your back-to-school tune-up with EasyBear today. Same-day appointments available, transparent pricing, and the confidence that your laundry appliances will keep up with your family's busiest season.
Appliance Repair Technician · 11 years experience
Experienced technician with 11 years specializing in Frigidaire and Electrolux refrigerator and dryer repair with a focus on safety.