How to Replace a Bosch Washing Machine: Complete Swap Guide
Replacing a Bosch front-load washer with a new unit involves both removing the old machine safely (transport bolts, AquaStop disconnection) and installing the new one correctly (transport bolt removal, precise leveling, AquaStop connection, and calibration). Bosch machines are heavier than typical washers (170-190 lbs) due to anti-vibration counterweights, and the AquaStop system has specific connection requirements that differ from standard hoses.
This guide covers the full process from old machine removal to new machine first cycle.
Before You Start
- Tools needed: Torx T20 screwdriver, 10mm socket wrench, adjustable wrench or pliers, spirit level, measuring tape, appliance dolly or furniture slider pads
- Supplies needed: Towels, shallow pan, masking tape, thread-seal tape (for wall valve only — not for hose connections)
- Time required: 60-90 minutes total (removal + installation)
- Difficulty: Intermediate
- Safety warning: Two people required for lifting and positioning. The old machine retains 200-500ml of water in the sump. The new machine shipping bolts MUST be removed before first use.
Do You Have the Right Tools?
Multimeter ($85), vacuum pump ($250), diagnostic software, and specialized hand tools. Our technician arrives with $15K+ in professional tools — your diagnostic is free.
Licensed & Insured · 90-Day Warranty · Same-Day Service
Step-by-Step Instructions
Step 1: Prepare the Space and Verify Fit
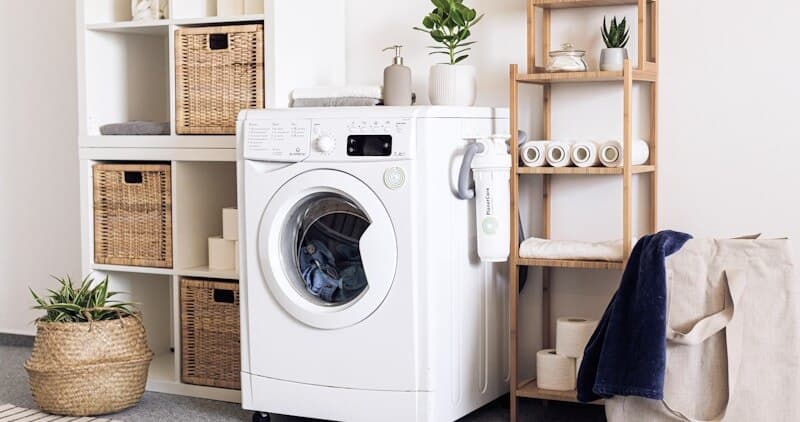
Measure the installation space: width, depth, and height (including countertop clearance if applicable). Standard Bosch front-loaders are 23.5 inches wide (compact/European) or 27 inches (full-size US). Verify door swing clearance — Bosch doors open wide (approximately 170 degrees) and need clearance on the hinge side.
Check that your water supply valves are accessible and in working condition (turn them off and on to verify they actually shut off — a valve that has not been operated in 10+ years may not seal properly).
Verify electrical: Bosch washers require a grounded 120V/15A outlet (standard US). The cord length is typically 5-6 feet. Do not use an extension cord.
Step 2: Remove the Old Machine
Follow the complete removal procedure:
- Run a drain/spin cycle to empty water
- Unplug power, disconnect water supply hoses, disconnect drain hose
- Install transport bolts in the rear panel holes (3-4 bolts depending on model)
- Tape door and drawer shut
- Dolly or slide the machine out of its position
Full detail for each step is in the removal guide (how-to-remove-bosch-washing-machine). The critical step is installing transport bolts — without them, the tub swings during movement and destroys internal components.
Step 3: Inspect and Prepare the Installation Area
With the old machine removed, inspect the installation bay:
- Floor condition: Check for water damage, mold, or soft spots under where the machine sat. This is your chance to address floor issues before they are hidden again.
- Water valves: Inspect for corrosion or slow drips. Replace valves if they do not fully shut off (quarter-turn ball valves are most reliable).
- Drain standpipe: Flush the standpipe with hot water. Check it is at the correct height — Bosch requires 24-39 inches above floor level for proper siphon break.
- Electrical outlet: Confirm it is GFCI-protected if within 6 feet of a water source (code requirement in most jurisdictions).
- Clean the floor: Remove any debris, old lint, or moisture. The new machine feet need a clean, flat surface for stable leveling.
Step 4: Unpack the New Machine
Remove all external packaging. Do NOT use a box cutter on the cardboard — it is easy to accidentally scratch the cabinet finish or cut a hose.
Open the drum door and remove any internal packaging (foam blocks, tape, protective films). Check the accessories bag — it should contain: transport bolt hole plugs, inlet hose(s), drain hose (if not pre-attached), liquid detergent dosing funnel (i-DOS models), and the user manual.
Step 5: Remove Transport Bolts from New Machine (Critical)
The new machine has 3-4 transport bolts installed in the rear panel. They MUST be removed before first use. Operating with transport bolts installed causes catastrophic vibration that will damage the drum suspension system within minutes.
Use a 13mm wrench to remove each bolt. Pull each bolt and its plastic spacer out completely. Insert the plastic plugs (from accessories bag) into the empty holes. Store the transport bolts somewhere safe — you will need them if you ever move the machine again.
Step 6: Position the New Machine
With an appliance dolly or two people, move the new machine to its installation bay. Position it roughly centered in the space with the rear close to (but not touching) the wall connections.
Leave enough space at the rear for hoses to connect without sharp kinks — typically 3-4 inches between the machine back and the wall.
Step 7: Connect Water Supply
Connect the inlet hose(s) to the machine first (hand-tight plus quarter turn with pliers — Bosch hoses have rubber seals inside the ferrule; do NOT use thread tape on hose connections).
Then connect the other end to the wall valve. For AquaStop hoses: the AquaStop module (large plastic box) connects to the wall valve. Ensure the connection is hand-tight plus quarter turn. The AquaStop module must hang vertically — do not kink or horizontally route the module section.
Turn on the water supply and check for drips at both connections. Tighten slightly if dripping — but do not overtighten, which can damage the rubber seal.
Step 8: Connect Drain Hose
Insert the drain hose into the standpipe (or hook over sink edge). The hose end should be 24-39 inches above floor level. Do not push the hose more than 6 inches into the standpipe — this can create a siphon effect that drains water during wash.
If using a standpipe, do not seal the gap between hose and pipe — an air gap is required to prevent siphoning. Some installations use a drain hose anti-siphon clip (included with some models) that hooks the hose at the correct height on the rear of the machine.
Step 9: Level the Machine Precisely
Place a spirit level on top of the machine — check both left-right and front-back. Bosch machines are extremely sensitive to leveling due to their high spin speeds (1200-1600 RPM).
Adjust the front leveling feet by turning them: counterclockwise extends the foot (raises that corner), clockwise retracts (lowers). The rear feet on most Bosch models are self-adjusting — tilt the machine forward about 2 inches and set it back down; the rear feet automatically adjust to floor level.
Lock the front feet by tightening the lock nut against the base frame with a wrench. An unlocked foot will vibrate loose over time.
Verify stability: push each top corner of the machine — it should not rock in any direction. If it rocks, one foot is not making full contact with the floor.
Step 10: First Run and Calibration
Plug in the power cord. The machine may show a welcome screen or language selection on first power-up. Set your preferences.
Run the calibration sequence: hold Start + RPM for 3 seconds. The machine runs a short program (2-3 minutes) that calibrates the weight sensor, motor speed sensor, and i-DOS dosing pump (if equipped). This calibration is essential for accurate cycle performance.
After calibration, run an empty hot wash cycle (90C cotton) with a tablespoon of citric acid. This flushes manufacturing residues from internal hoses and the drum surface. Your first load of laundry should go in after this flush cycle.
If equipped with i-DOS: fill the detergent and softener tanks according to the manual. Run the i-DOS calibration separately (Settings → i-DOS → Calibrate on display models).
Troubleshooting Installation Issues
- Machine vibrates excessively on first spin: Re-check that ALL transport bolts are removed (sometimes one is hidden under a label or tape). Re-level with spirit level. Check that the floor is solid — flexible/bouncy flooring amplifies vibration.
- Water leaks at inlet connection: Verify the rubber seal inside the hose ferrule is present and not damaged. Do not use thread tape — it interferes with the rubber seal.
- E17 error (no water fill): Check that the wall valves are fully open. Check that AquaStop module is not triggered (indicator window red). Verify the inlet filter screens (small mesh screens inside the hose connections at the machine end) are not clogged with debris from the plumbing.
- Machine rocks despite leveling: The floor surface may be uneven. Use a thin rubber anti-vibration pad under the machine (available at appliance stores). Or shim the problem foot with a stainless steel washer.
Safety First — Know the Risks
Appliances involve high voltage (120-240V), pressurized water, gas lines, and chemical refrigerants. Over 400 DIY repair injuries are reported yearly. Our techs are licensed and insured — let them handle the risk.
Licensed & Insured · 90-Day Warranty · Same-Day Service
When to Call a Professional
- Plumbing modifications needed (new valve installation, standpipe relocation)
- Electrical work required (new outlet, GFCI installation)
- Floor damage discovered under old machine (structural repair needed before loading 190 lbs on it)
- Stacking installation (washer-dryer stack requires a stacking kit and precise alignment)
Same-Day Appliance Repair
Fixed or It's Free
$89 → $0 Service Call & Diagnosis — offer ends May 25
Cost Comparison: DIY vs Professional
| DIY | Professional Install | |
|---|---|---|
| Parts/Supplies | $0-$30 | Included |
| Labor | $0 | $150-$300 |
| Time | 60-90 min (2 people) | 45-60 min |
| Risk | Low if transport bolts addressed | Warranty on install |
The Real Cost of DIY
Average DIY attempt: $150-400 in tools you may use once, plus the risk of further damage. Our diagnostic visit costs $0 — we find the problem and give you an honest quote.
Licensed & Insured · 90-Day Warranty · Same-Day Service
Need Professional Help?
FAQ
Q: Can I reuse the old AquaStop hose on the new machine? A: Yes, if the AquaStop indicator is green (not triggered) and the hose is in good condition. However, Bosch includes a new AquaStop hose with every machine — using the new one is recommended since the safety valve mechanism has a finite lifespan.
Q: Do I need to buy a drain hose separately? A: No — Bosch includes a drain hose with every new machine. If your installation requires a longer run than the included hose, extension kits are available. Do not exceed 13 feet total drain hose length (pump head limitation).
Q: My new Bosch is taller/shorter than the old one — will it fit under the countertop? A: Bosch compact (24-inch) models are designed to fit under standard European-height countertops (33.5 inches). Full-size US models are taller. Bosch sells height-adjustable feet that can lower the machine by up to 0.5 inches. Alternatively, some models have a removable top panel that reduces height by 1 inch for under-counter installation.
Q: How soon can I do laundry after installation? A: After removing transport bolts, connecting utilities, leveling, running calibration, and running one empty hot flush cycle — you can do laundry immediately. Total setup time is approximately 60-90 minutes before first real load.
Need a certified technician? Book same-day repair →