How to Fix a Bosch Washing Machine: Diagnose and Resolve Common Error Codes
Bosch washing machines display error codes in E## format for user-visible issues and Er## for service-mode diagnostics. The most common errors — E18 (drain timeout), E23 (leak detected), E21 (i-DOS dosing fault), and E02 (motor fault) — each have specific root causes that are fixable without professional tools in most cases. This guide walks through diagnosis and resolution for each.
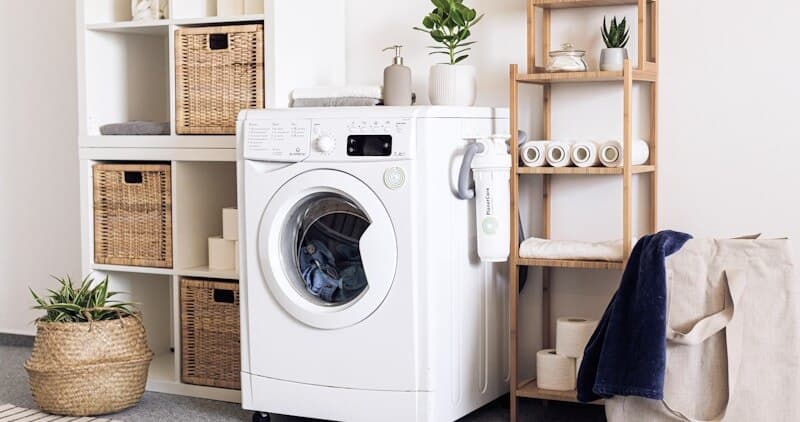
Applies to Bosch WAT, WAS, WAW, and WGA series front-load washers.
Before You Start
- Tools needed: Torx T20 screwdriver, flathead screwdriver, multimeter, pliers, shallow pan or towels, flashlight
- Parts needed: Depends on diagnosis (see individual sections)
- Time required: 30-90 minutes depending on the error
- Difficulty: Beginner to Intermediate (varies by error code)
- Safety warning: Disconnect power before any repair. For E23 (leak) errors, also turn off the water supply and check for standing water under the machine before reaching underneath.
Do You Have the Right Tools?
Multimeter ($85), vacuum pump ($250), diagnostic software, and specialized hand tools. Our technician arrives with $15K+ in professional tools — your diagnostic is free.
Licensed & Insured · 90-Day Warranty · Same-Day Service
Step-by-Step Instructions
Step 1: Identify the Error Code
Bosch displays error codes on the LED panel or cycle selector position. Write down the exact code. If the display is blank or the machine is unresponsive, try a hard reset: unplug for 60 seconds, then replug and attempt to start a cycle. The error code should reappear if the fault persists.
Common Bosch washer error codes:
- E18 / F18: Drain timeout — water not pumping out within the allocated time
- E23 / F23: Leak detected — AquaStop triggered
- E21 / F21: i-DOS dosing fault — detergent not dispensing correctly
- E02 / F02: Motor fault — EcoSilence motor or control module issue
- E04 / F04: Door lock fault — interlock not engaging
- E17 / F17: Fill timeout — water not entering within allocated time
- E29 / F29: Water flow sensor — no flow detected despite valve open
Step 2: Fix E18 — Drain Timeout
E18 means the machine cannot pump water out within 5 minutes. The most common causes in order of likelihood:
Check 1: Drain filter clogged. Open the service flap (bottom-left front). Place a shallow pan underneath. If your model has a small drain hose next to the filter, use it to drain standing water first. Unscrew the filter cap (counterclockwise quarter turn) and remove debris. Common culprits: coins, hair pins, underwire from bras, and lint balls. BSH part 00605010 if the filter cap is cracked.
Check 2: Drain hose kinked. Pull the machine forward and inspect the drain hose from the pump outlet to the standpipe. Look for kinks, especially at the point where it enters the standpipe or hooks over the sink edge. The hose should rise to at least 24 inches above floor level (siphon break) but not exceed 39 inches (maximum pump head).
Check 3: Drain pump impeller stuck. With the filter cap removed, look into the pump housing with a flashlight. You should see the impeller (small plastic fan). Rotate it with your finger — it should spin freely. If it is jammed by a foreign object or seized by debris, clear it. If the impeller is cracked or a blade is missing, replace the pump (BSH 00145787).
Check 4: Drain pump motor failed. With the filter cleaned and impeller free, reinstall the filter, restore power, and start a drain cycle. Put your ear near the pump area — you should hear the pump motor humming. No sound = failed pump motor. Use a multimeter on the pump connector (accessible from the bottom or front panel removed): resistance should be 150-250 ohms across the two pins. Open circuit = dead motor, replace pump assembly.
Step 3: Fix E23 — Leak Detected (AquaStop)
E23 means the AquaStop flood protection sensor in the base pan has detected water. This is Bosch's integrated leak protection — a float switch in the base tray.
Immediate action: Turn off water supply. Unplug machine. Tilt the machine slightly backward (have someone help) and check if water pours out from underneath. If yes, you have an active leak.
Common leak sources:
- Door gasket tear (inspect inner folds — BSH 00772658 for i-DOS models, 00680768 for standard)
- Sump hose clamp loose (large hose from tub bottom to pump — check both clamp connections)
- Detergent drawer overflow (i-DOS calibration off, or manual drawer overfilled)
- Inlet hose leak at machine connection (check washer seal)
Reset AquaStop after fixing leak: Remove the base pan (4 Torx T20 screws from the bottom — you need to tip the machine back or lay it on its side carefully). Dry the base pan completely with towels. The float switch will reset to normal position once dry. Reinstall the base pan. If the AquaStop is in the inlet hose (external unit with electrical connector), and it has triggered, it may require replacement of the entire hose assembly — the AquaStop valve locks permanently on some models.
Step 4: Fix E21 — i-DOS Dosing Fault
E21 means the i-DOS automatic detergent system could not dispense the correct amount. Causes:
Clogged dispensing nozzles: Remove the detergent drawer fully (lift release lever, slide out). Remove the i-DOS tank inserts. Clean the small nozzle openings at the bottom with a toothpick or small brush under running water.
Empty tanks: Refill the i-DOS tanks. The system cannot dose if tanks are below minimum level.
Calibration needed: After cleaning nozzles or refilling, recalibrate: press and hold Start + RPM buttons simultaneously for 3 seconds. The display shows the calibration program. Run it through — the machine doses test amounts and adjusts the pump rate.
Air in lines: If the machine was transported or tanks were completely emptied, air locks can form. Run the calibration cycle twice to purge air.
Step 5: Fix E02 — Motor Fault
E02 indicates the motor is not reaching target speed or has a communication fault with the control module.
For EcoSilence brushless motors (2014+ models): The motor itself has no wearing parts (no brushes). E02 on brushless models usually indicates: (A) failed motor control module (inverter board), (B) loose wiring connector between motor and control board, or (C) seized drum bearing preventing motor from spinning.
Test: With power disconnected, try spinning the drum by hand through the door opening. It should rotate smoothly with slight resistance from the belt. If it grinds, clicks, or will not turn, the rear bearing is likely failed.
Check the motor connector (accessible from rear panel — 6-pin connector on the motor housing). Ensure it is fully seated. Disconnect and reconnect firmly.
For older models with carbon brush motors: E02 can mean worn carbon brushes (BSH 00605694). Remove the rear panel (6 Torx T20), locate the motor at the bottom of the tub. The brushes are in holders on each side of the motor — pull the connector, slide out the retaining clip, and extract the brush. If less than 5mm of carbon remains, replace both brushes as a set.
Step 6: Fix E04 — Door Lock Fault
E04 means the door interlock (BSH 00638259) is not sending a "locked" signal to the control board.
Check the door catch: Close the door firmly — listen for the click. If it does not click, inspect the door strike plate (the hook on the door that enters the lock). Bent or worn strikes do not engage the lock mechanism fully.
Check the lock mechanism: With front panel removed (see disassembly guide), test the lock with a multimeter. When activated (connector attached, machine running), the lock solenoid should show continuity. When the door is closed and the cycle starts, the lock pin extends — if you hear clicking but E04 persists, the lock's feedback switch is failed. Replace the complete lock assembly.
Step 7: Perform a Calibration Reset After Any Repair
After resolving any error and before running a full wash load, perform a calibration cycle. On Bosch washers, hold Start + RPM for 3 seconds to enter calibration mode. This recalibrates the motor speed sensor, weight sensor, and i-DOS dosing (if equipped). Run the calibration program empty — it takes about 3 minutes and involves the drum spinning at various speeds.
This step is especially important after motor work, drum bearing replacement, or shock absorber replacement, as the vibration profile changes.
Troubleshooting Common Issues
- Error code clears but returns after 1-2 cycles: The root cause is intermittent. For E18, this often means the pump impeller is partially obstructed (passes water slowly but times out on large loads). For E02, suspect a loose connector that makes contact intermittently.
- Machine shows no error but will not start: Check door closure (no E04 but door switch needs a firm push), check water supply is on (E17 may flash briefly then clear), and verify the machine is not in child lock mode (key icon lit — hold the + and - buttons together for 3 seconds to unlock).
- Multiple error codes appearing: When 2+ errors show in sequence, the control board is likely failing. A single root failure (bad control board) can trigger multiple downstream error codes as it sends incorrect signals to components.
Safety First — Know the Risks
Appliances involve high voltage (120-240V), pressurized water, gas lines, and chemical refrigerants. Over 400 DIY repair injuries are reported yearly. Our techs are licensed and insured — let them handle the risk.
Licensed & Insured · 90-Day Warranty · Same-Day Service
When to Call a Professional
- E02 on a brushless motor where the drum spins freely — likely an inverter board fault requiring board-level diagnosis
- E23 that recurs despite no visible leak — internal tub crack (rare but serious)
- Er codes visible only in service mode (hold Start + Drain for 6 seconds on most models) — these indicate deeper control faults
- Any repair involving the AquaStop inlet hose replacement — the connector is wired into the control board and requires proper termination
Same-Day Appliance Repair
Fixed or It's Free
$89 → $0 Service Call & Diagnosis — offer ends May 25
Cost Comparison: DIY vs Professional
| DIY | Professional | |
|---|---|---|
| Parts | $0-$85 depending on issue | $0-$85 |
| Labor | $0 | $150-$320 |
| Time | 30-90 min | 30-60 min |
| Risk | Low for filter/hose; Medium for motor/lock | Warranty included |
The Real Cost of DIY
Average DIY attempt: $150-400 in tools you may use once, plus the risk of further damage. Our diagnostic visit costs $0 — we find the problem and give you an honest quote.
Licensed & Insured · 90-Day Warranty · Same-Day Service
Need Professional Help?
FAQ
Q: How do I enter service mode on my Bosch washer? A: On most models, hold Start and the Spin/Drain button simultaneously for 6 seconds with the machine plugged in but not running. The display enters diagnostic mode showing Er## codes and component test options. Exit by unplugging.
Q: My Bosch washer shows E18 but the drain filter is clean — what else could it be? A: Check the drain hose height — if the hose goes higher than 39 inches above the floor (Bosch maximum pump head), the pump cannot push water up. Also check for a blockage inside the standpipe itself, and verify the pump motor is actually running (listen for it during drain).
Q: Can I reset the AquaStop without replacing the hose? A: If the AquaStop triggered due to actual water in the base pan, yes — drying the base pan and resetting the float switch is sufficient. However, if the AquaStop inlet hose valve has fired (some models have a one-shot valve that permanently closes), the hose assembly must be replaced.
Q: Is the E02 motor error fixable on EcoSilence brushless models? A: The motor itself rarely fails since it has no brushes or wearing parts. E02 on brushless models is usually the inverter board or a wiring issue. Check connectors first (free fix). If the board is faulty, it is the most expensive repair — $200-$350 for the part. At that point, compare against the machine's age and value.
Need a certified technician? Book same-day repair →