How to Clean a Maytag Washing Machine: Complete Maintenance Guide
Maytag washing machines are built with commercial-grade technology and backed by a 10-year limited parts warranty on the motor and stainless steel drum. However, even these durability-focused machines need regular cleaning to perform at their best. Residue from detergent, fabric softener, and hard water minerals accumulates over time inside the drum, door gasket, and dispensing systems. This guide covers the complete cleaning process for both Maytag front-load (MHW series) and top-load (MVW series) washers.
Maytag washers share the Whirlpool Corporation platform, which means the same diagnostic mode (3-button sequence) and F#E# error code format apply. If your machine is displaying an odor-related issue or leaving residue on clothes, a thorough cleaning cycle usually resolves the problem without any part replacement.
Before You Start
- Tools needed: Microfiber cloths, soft-bristle brush (old toothbrush works), spray bottle, small bowl
- Cleaning supplies: Affresh washer cleaner tablets (or 2 cups white vinegar + 1/3 cup baking soda), mild all-purpose cleaner
- Time required: 45-60 minutes (plus one full wash cycle)
- Difficulty: Beginner
- Safety warning: Disconnect power before cleaning any exterior components or the dispenser assembly. Leave power connected only for running the clean cycle itself.
Do You Have the Right Tools?
Multimeter ($85), vacuum pump ($250), diagnostic software, and specialized hand tools. Our technician arrives with $15K+ in professional tools — your diagnostic is free.
Licensed & Insured · 90-Day Warranty · Same-Day Service
Step-by-Step Instructions
Step 1: Run the Clean Washer Cycle
Every Maytag washer has a dedicated Clean Washer cycle on the control panel. Place an Affresh tablet directly in the drum (not the dispenser). Select the Clean Washer cycle and start it. This cycle uses higher water temperatures and extended agitation to dissolve buildup inside the tub. On front-load MHW models, the cycle takes approximately 60-75 minutes. On top-load MVW models with the Power Agitator, it runs about 50-60 minutes due to the more aggressive mechanical action.
If you do not have Affresh tablets, pour 2 cups of white vinegar directly into the drum and add 1/3 cup of baking soda to the detergent dispenser. Run the same Clean Washer cycle. The vinegar dissolves mineral deposits while the baking soda neutralizes odors.
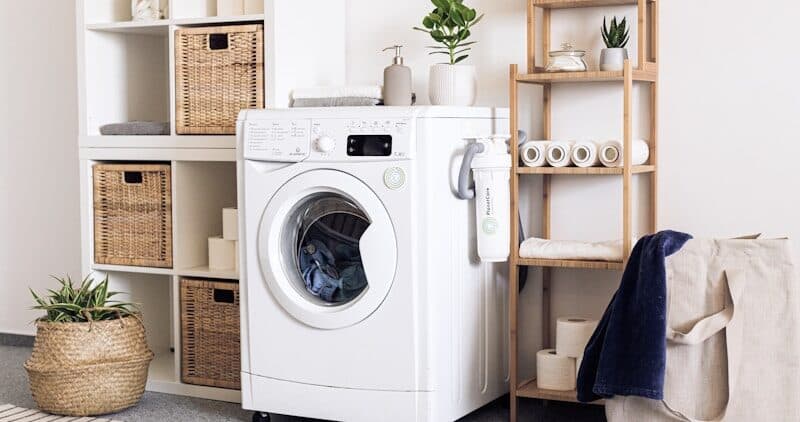
Step 2: Clean the Door Gasket (Front-Load MHW Models)
The rubber door boot seal on Maytag front-load washers traps moisture and creates a breeding ground for mold and mildew. Pull back the gasket folds gently and inspect for black mold spots, hair, coins, or small clothing items trapped in the lower folds.
Mix equal parts water and white vinegar in a spray bottle. Spray the entire gasket surface, paying special attention to the bottom section where water pools. Let it sit for 5 minutes, then wipe thoroughly with a microfiber cloth. For stubborn mold, use a soft-bristle brush with the vinegar solution. Never use bleach on the gasket as it degrades the rubber over time and voids the seal warranty.
The Fresh Hold option on MHW models runs a fan that tumbles clothes for up to 16 hours after the cycle completes to prevent odors. If you use Fresh Hold regularly, the gasket stays drier between loads, reducing mold growth significantly.
Step 3: Clean the Dispenser Drawer
Pull the detergent dispenser drawer fully out (press the release tab at the back center). Rinse all compartments under warm running water. Use a soft brush to scrub any hardened detergent residue from the bleach compartment and fabric softener siphon cap.
For Maytag models with the Optimal Dose system (equivalent to Whirlpool Load & Go), you need to flush the bulk detergent tank periodically. Remove the tank cap, pour warm water into the reservoir, and run a Normal cycle with an empty drum. This prevents the pump mechanism and internal tubing from clogging with thickened detergent.
Also clean the dispenser housing cavity inside the machine where the drawer slides in. Use a damp cloth or long brush to wipe the ceiling of the cavity where water jets spray to flush detergent into the drum.
Step 4: Clean the Drain Pump Filter (Front-Load MHW Models)
Locate the drain pump access door on the lower front panel of your Maytag front-load washer. Place towels and a shallow pan beneath it. Open the door and slowly turn the filter cap counter-clockwise. Water will drain out — expect 1-2 cups of residual water.
Remove the filter completely. Clear any trapped debris: coins, hair ties, small fabric items, and lint accumulation. Rinse the filter under running water and use a brush to clean the filter housing inside the machine. Reinstall the filter by turning clockwise until snug. Check for leaks by running a quick rinse cycle.
Step 5: Clean the Top-Load Agitator or Impeller (MVW Models)
For Maytag top-load washers with the Power Agitator (dual-action design with extra vanes for heavy soil removal), lift the fabric softener dispenser cap from the top of the agitator. Rinse it thoroughly as softener builds up inside and restricts flow.
The agitator itself can be removed for deep cleaning using a 7/16-inch socket on the center bolt. Note that Maytag agitators may be tighter than typical Whirlpool units due to a thicker shaft and heavier-duty construction. Once removed, scrub the base plate and agitator vanes with a brush and vinegar solution. Clear any debris from the agitator barrel.
For Power Impeller models, wipe the textured impeller surface with a vinegar-soaked cloth to remove residue from the grooves.
Step 6: Wipe Down Exterior Surfaces and Controls
Clean the exterior cabinet, control panel, and lid or door with a damp microfiber cloth and mild all-purpose cleaner. For the stainless steel exterior (if equipped), wipe in the direction of the grain. Avoid abrasive cleaners or scrub pads that scratch the finish.
Clean around the water inlet connections at the rear if accessible. Check the hot and cold supply hoses for bulging or cracking while you are there — these should be replaced every 5 years regardless of appearance.
Step 7: Final Verification
Restore power if disconnected. Run an empty Normal cycle with hot water to flush any remaining cleaning solution. When complete, leave the door or lid open to allow the interior to dry completely. On front-load models, this is critical — prop the door ajar after every wash to let the Fresh Hold fan's airflow prevent moisture from pooling in the gasket folds.
Check that no error codes appear on the display. Maytag uses the same F#E# error code format as all Whirlpool Corporation brands. If you see any codes after cleaning, run the diagnostic mode (press three buttons in sequence as described in your service manual behind the console panel) to identify the specific issue.
Recommended Cleaning Schedule
| Task | Frequency |
|---|---|
| Clean Washer cycle | Monthly |
| Door gasket wipe-down | Weekly (front-load) |
| Dispenser drawer rinse | Monthly |
| Drain pump filter clean | Every 3 months (front-load) |
| Agitator/impeller deep clean | Every 6 months (top-load) |
| Supply hose inspection | Every 6 months |
| Optimal Dose tank flush | Every 2 months (if equipped) |
Safety First — Know the Risks
Appliances involve high voltage (120-240V), pressurized water, gas lines, and chemical refrigerants. Over 400 DIY repair injuries are reported yearly. Our techs are licensed and insured — let them handle the risk.
Licensed & Insured · 90-Day Warranty · Same-Day Service
Troubleshooting Persistent Odors
If odors persist after a thorough cleaning:
- Run 3 consecutive Clean Washer cycles with Affresh tablets to break through heavy buildup that one cycle cannot dissolve
- Check that the drain hose standpipe connection is between 39-96 inches high — too low allows sewer gas backflow into the drum
- Verify you are using HE (High Efficiency) detergent. Maytag front-load washers use minimal water, and regular detergent creates excess suds that leave residue and feed mold colonies
- On MVW top-load models with Deep Fill, avoid using the extra water option for every load — the additional water does not improve rinsing if you are already using the correct HE detergent amount
- Inspect the door boot seal for tears or permanent mold staining that cleaning cannot remove — a damaged seal needs replacement (use Maytag/Whirlpool W10-series part numbers for your specific model)
When to Call a Professional
Sometimes cleaning alone will not resolve washing machine issues. Call a professional if:
- You detect a burning smell or see discoloration around the motor area — the commercial-grade motor is covered under Maytag's 10-year warranty
- Standing water remains in the drum after the cycle completes, indicating a drain pump failure rather than a clogging issue
- The Clean Washer cycle itself triggers an F#E# error code, suggesting a sensor or control board issue beyond simple maintenance
- You notice the drum wobbling or producing grinding sounds during spin — the bearings or suspension (shock absorbers on front-load, suspension rods on top-load) may need professional replacement
- Mold has penetrated behind the outer tub, requiring partial disassembly to access and treat
The Real Cost of DIY
Average DIY attempt: $150-400 in tools you may use once, plus the risk of further damage. Our diagnostic visit costs $0 — we find the problem and give you an honest quote.
Licensed & Insured · 90-Day Warranty · Same-Day Service
Cost Comparison: DIY vs Professional
| DIY | Professional | |
|---|---|---|
| Parts | $5-$15 (Affresh tablets) | $5-$15 |
| Labor | $0 | $120-$200 |
| Time | 1.0h (active) + cycle time | 45 min |
| Risk | None if power disconnected | Warranty included |
Same-Day Appliance Repair
Fixed or It's Free
$89 → $0 Service Call & Diagnosis — offer ends May 25
Maytag Warranty Note
Maytag offers one of the strongest warranties in the laundry industry: a 10-year limited parts warranty covering the drive motor and stainless steel wash basket on most MHW and MVW models. Regular cleaning does not void this warranty. However, damage caused by non-HE detergent use or failure to maintain the drain pump filter may not be covered. Keep your purchase receipt and register your appliance at maytag.com for warranty tracking.
Don't Void Your Warranty
Opening your appliance yourself may void the manufacturer warranty. Our repair comes with a 90-day guarantee, and we document everything for warranty compliance.
Licensed & Insured · 90-Day Warranty · Same-Day Service
Need Professional Help?
FAQ
Q: How often should I run the Clean Washer cycle on my Maytag? A: Run it monthly for optimal performance. If you frequently use cold water cycles or wash heavily soiled items, consider running it every 2-3 weeks. The machine will display a reminder when it is time.
Q: Can I use bleach instead of Affresh to clean my Maytag washer? A: You can use liquid chlorine bleach (1/2 cup in the bleach dispenser) as an alternative, but avoid using it on the door gasket directly. Affresh is specifically formulated to dissolve residue without degrading rubber seals. Never mix bleach with vinegar.
Q: Does cleaning void my Maytag 10-year warranty? A: No. Regular cleaning and maintenance are recommended by Maytag and do not affect your warranty coverage. The 10-year limited warranty covers the motor and stainless steel drum against manufacturing defects regardless of cleaning frequency.
Q: Why does my Maytag washer smell even after running the clean cycle? A: Persistent odor usually means mold has established in the door boot gasket folds or behind the outer tub. Try 3 consecutive clean cycles, then thoroughly clean the gasket. If odor persists, the gasket may need replacement. Also verify your drain hose standpipe height is correct (39-96 inches) to prevent sewer gas backflow.
Need a certified technician? Book same-day repair →