Whirlpool Refrigerator Thermostat & Cold Control Replacement
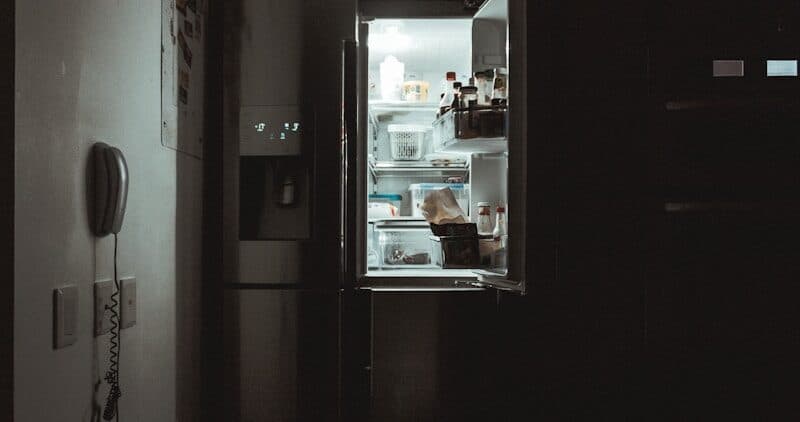
Older Whirlpool refrigerators (especially top-freezer WRT models with dial controls) use a mechanical cold control thermostat to regulate temperature. This is a capillary-tube device — a sealed tube filled with refrigerant runs from the control dial to a sensing bulb inside the refrigerator. As the temperature changes, the refrigerant expands or contracts, opening or closing a switch that controls the compressor.
Newer Whirlpool models with electronic displays use thermistors and a control board instead of a mechanical thermostat. If your model has a digital temperature display, see the sensor or control board guides.
Symptoms of Cold Control Failure
- Refrigerator too cold — the thermostat does not open (does not cut the compressor off), so the compressor runs continuously. Lettuce freezes, drinks are ice cold.
- Refrigerator too warm — the thermostat does not close (does not start the compressor), so no cooling occurs.
- Turning the dial does not change temperature — the thermostat mechanism is stuck at one setting.
- Clicking sound when turning the dial — normal. The click is the switch opening or closing. No click at all when turning through the range = failed mechanism.
Do You Have the Right Tools?
Multimeter ($85), vacuum pump ($250), diagnostic software, and specialized hand tools. Our technician arrives with $15K+ in professional tools — your diagnostic is free.
Licensed & Insured · 90-Day Warranty · Same-Day Service
Testing
Turn the dial from lowest to highest setting. You should hear a click (switch closing) at some point in the range. If no click is heard, the thermostat switch has failed.
With a multimeter: disconnect the thermostat wires and measure continuity. Turn the dial — continuity should change at some point in the range. No change = failed.
Cost: $25-55 OEM. Professional: $100-180 total.
Safety First — Know the Risks
Appliances involve high voltage (120-240V), pressurized water, gas lines, and chemical refrigerants. Over 400 DIY repair injuries are reported yearly. Our techs are licensed and insured — let them handle the risk.
Licensed & Insured · 90-Day Warranty · Same-Day Service
Replacement: Remove the control knob, remove the console cover screws, disconnect thermostat wires, remove capillary tube clips, install new thermostat routing the capillary tube in the same path.
FAQ
My refrigerator is too cold on the lowest setting — is it the thermostat?
Likely. The thermostat is not opening (not shutting off the compressor) at the correct temperature. Replace the cold control.
The Real Cost of DIY
Average DIY attempt: $150-400 in tools you may use once, plus the risk of further damage. Our diagnostic visit costs $0 — we find the problem and give you an honest quote.
Licensed & Insured · 90-Day Warranty · Same-Day Service
How the Cold Control Works in Detail
The cold control thermostat is an electromechanical device with three key components:
Capillary tube: A thin, sealed copper tube approximately 24-36 inches long, filled with a small charge of refrigerant. One end connects to the switch mechanism inside the control housing. The other end (the sensing bulb) is clipped to a surface inside the fresh food compartment.
Switch mechanism: As refrigerant expands (temperature rises), it pushes a diaphragm against a spring-loaded switch contact, closing the circuit and starting the compressor. As temperature drops, the refrigerant contracts, the spring pushes back, and the switch opens to stop the compressor.
Temperature dial: Adjusts the spring tension against the diaphragm. Higher settings require more expansion to open the switch, so the compressor runs longer and the compartment gets colder.
Which Whirlpool Models Use a Mechanical Cold Control?
- WRT series (top-freezer with rotary dial controls) — most common application
- ET series (older top-freezer, pre-2010)
- ED series (older side-by-side with dial controls)
- Common part numbers: W10822278, WP2198202, WP2161283
Models with digital temperature displays (WRF, WRS, WRX series) use electronic thermistors and a control board. Do not attempt to install a mechanical cold control on an electronic model.
Don't Void Your Warranty
Opening your appliance yourself may void the manufacturer warranty. Our repair comes with a 90-day guarantee, and we document everything for warranty compliance.
Licensed & Insured · 90-Day Warranty · Same-Day Service
Extended Testing Procedure
Temperature verification: If the switch clicks and tests with the multimeter but the refrigerator still has temperature problems, the capillary tube sensing bulb may have shifted from its correct position. Check that it is clipped securely to the rear wall or air duct inside the fresh food compartment. A displaced sensing bulb reads ambient air rather than circulated cooled air, causing the compressor to run too much or too little.
Cost Breakdown
| Component | Part Number (Common) | Cost |
|---|---|---|
| Cold control thermostat | WP2198202, WP2161283, W10822278 | $25-$55 OEM |
| Temperature dial knob | Model-specific | $3-$8 |
| Control housing cover | Model-specific | $5-$15 |
| Professional diagnosis + replacement | — | $100-$180 total |
Same-Day Appliance Repair
Fixed or It's Free
$89 → $0 Service Call & Diagnosis — offer ends May 25
Is It Worth Your Time?
The average DIY appliance repair takes 4-6 hours of research, troubleshooting, and parts ordering — with no guarantee of a correct diagnosis. Our technician diagnoses the issue in about 30 minutes — same-day appointments available.
Licensed & Insured · 90-Day Warranty · Same-Day Service
Step-by-Step Replacement
- Unplug the refrigerator
- Remove the temperature dial knob — pull straight off (friction fit)
- Remove the control housing cover — 2-3 Phillips screws
- Photograph the wire connections — note which wire goes to which terminal
- Disconnect the wire terminals — pull the spade connectors off
- Release the capillary tube — follow the tube from the thermostat housing to the sensing bulb. Release clips along its path. Note the routing carefully.
- Remove the thermostat — unscrew the mounting bracket or press the release tab
- Install the new thermostat — mount in the same position. Route the capillary tube along the exact same path, securing with original clips. The sensing bulb must be positioned in the same location.
- Reconnect wires — match to your photograph
- Reassemble the control housing and dial knob
- Plug in and set dial to middle — check temperature after 24 hours
Tools needed: Phillips #2 screwdriver, quarter-inch nut driver (some models), multimeter for testing, needle-nose pliers for capillary tube clips.
Capillary Tube Routing — Critical Detail
The capillary tube must follow its original path exactly. Common routing mistakes:
- Kinking the tube — a kinked tube stops responding to temperature
- Routing across the light bulb area — heat causes false warm readings
- Not clipping the sensing bulb — a loose bulb reads wrong temperature
The Risk of Getting It Wrong
A wrong diagnosis often turns a simple fix into a costly replacement. Without proper diagnostic tools, you might replace the wrong part — or cause additional damage. Our free diagnostic eliminates the guesswork.
Licensed & Insured · 90-Day Warranty · Same-Day Service
DIY vs Professional Assessment
Cold control replacement is a moderate DIY repair ($25-$55, 20-30 minutes). The main challenge is routing the capillary tube correctly and positioning the sensing bulb.
DIY recommended when: The click test clearly shows no switch action and you can photograph the capillary tube routing before removal.
Professional recommended when: The thermostat clicks normally but temperature problems persist (suggests a different root cause — sealed system, defrost, or fan issue), or the capillary tube path is complex.
Frequently Asked Questions
Can I adjust the cold control instead of replacing it?
The temperature dial is the only user adjustment. There is no internal calibration. If the full dial range does not change temperature, the thermostat mechanism has failed and must be replaced.
Will a new cold control improve energy efficiency?
If the old thermostat was stuck closed (compressor running constantly), yes — a working thermostat cycles the compressor properly, which can cut electricity consumption significantly. A constantly running compressor can double the refrigerator's energy use.
My Whirlpool has a dial but also a digital display — which type?
Digital temperature readout = electronic controls (thermistors and board), not mechanical cold control. The dial on these models is an electronic selector. Refer to the sensor or control board guides.
How long does a mechanical cold control last?
Typically 10-20 years. Failure is usually caused by the capillary tube losing its refrigerant charge (micro-leak) or the switch contacts corroding or welding shut from repeated arcing.
Free Diagnostic Visit — Zero Risk
Our certified technician comes to your home, diagnoses the problem with professional tools, and gives you an honest quote — all at zero cost. No parts markup, no hidden fees. If you decide not to proceed, you pay nothing.
Licensed & Insured · 90-Day Warranty · Same-Day Service
Common Whirlpool Cold Control Part Cross-Reference
The same cold control thermostat is used across many Whirlpool top-freezer model lines. Verify your model number against these common part numbers before ordering:
| Part Number | Compatible Series | Notes |
|---|---|---|
| WP2198202 | WRT311, WRT312, WRT511 | Most common, fits 2008-2018 top-freezers |
| WP2161283 | WRT111, WRT318 | Older models, same mounting but different capillary tube length |
| W10822278 | WRT518, WRT519 | Newer top-freezers with updated mounting bracket |
| 2198202 | Legacy ET, EEV models | Same as WP2198202, older part number format |
When ordering, the WP-prefix numbers are the current Whirlpool Corporation standard. Older part numbers without the WP prefix are the same part. Third-party cross-references are available but verify the capillary tube length matches your refrigerator compartment dimensions — a tube that is too short will not reach the correct sensing location.
Troubleshooting After Replacement
If temperature problems persist after installing a new cold control:
-
Wait 24 hours for stabilization — a new thermostat needs time for the capillary tube refrigerant to equilibrate with compartment temperature. Premature adjustment leads to incorrect settings.
-
Verify the sensing bulb placement — the most common cause of continued temperature issues after thermostat replacement is incorrect sensing bulb position. The bulb must be in contact with a surface near the air duct, not hanging freely in the compartment.
-
Check other temperature components — the defrost system (heater, timer/board, termination thermostat), evaporator fan motor, and condenser fan motor all affect compartment temperature. A new thermostat cannot compensate for a failed defrost heater or a dead evaporator fan.
-
Verify the compressor is cycling — listen to the compressor. It should start when the thermostat closes (dial turned up) and stop when it opens (dial turned down or temperature reached). If the compressor never starts, the issue may be the compressor start relay or overload protector, not the thermostat.
Whirlpool refrigerator thermostat problems? Our technicians diagnose and repair on-site. Book a technician →