Whirlpool Refrigerator Not Cooling — Causes, Diagnosis & Repair
A Whirlpool refrigerator that stops cooling properly is a household emergency, especially during Sacramento's triple-digit summer days when interior temperatures can climb past the food safety danger zone within hours. Whirlpool remains the most-repaired refrigerator brand in the United States — not because of poor quality, but because their massive install base means more units in service than any competitor. The good news: Whirlpool's modular design philosophy and decades of backwards-compatible parts make most cooling failures straightforward to diagnose and repair.
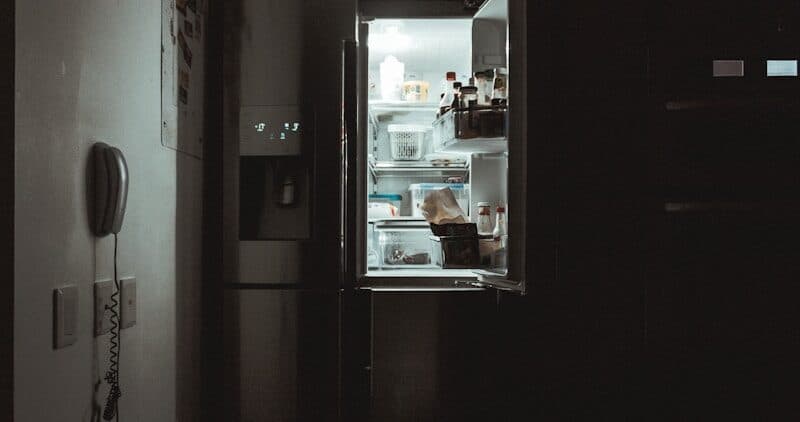
Whether you own a WRF-series French door, WRS-series side-by-side, or WRT-series top-freezer model, the cooling system architecture follows the same fundamental principles. Whirlpool's Accu-Chill temperature management system uses dedicated sensor arrays and variable-speed fan boosting to maintain precise compartment temperatures. When this system fails, identifying the root cause quickly prevents food spoilage and costly emergency service calls.
How Whirlpool's Cooling System Works
Before troubleshooting, understanding the cooling circuit helps narrow the diagnosis. Whirlpool refrigerators use a sealed refrigerant loop: the compressor pressurizes refrigerant gas, the condenser coils (rear bottom) dissipate heat, the evaporator coils (inside the freezer compartment behind the rear panel) absorb interior heat, and fans distribute cold air throughout both compartments.
Whirlpool's Adaptive Defrost technology monitors door openings and compressor run-time to defrost only when frost actually accumulates — unlike competitor brands that defrost on a fixed 8-hour timer regardless of need. This demand-based approach saves energy but means that when defrost components fail, ice accumulation can be more severe before symptoms become obvious.
The Accu-Chill system adds a rapid-cooling mode that boosts evaporator fan speed after detecting warm items placed inside. If your refrigerator was cooling fine until recently, consider whether the failure began gradually (suggesting component wear) or suddenly (suggesting electrical failure or power event).
Do You Have the Right Tools?
Refrigerant gauges ($200+), vacuum pump ($250), leak detector ($150), and EPA-certified recovery equipment. Our technician arrives with $15K+ in professional tools — your diagnostic is free.
Licensed & Insured · 90-Day Warranty · Same-Day Service
Diagnostic Starting Point: Check the Basics
Before disassembling anything, perform these quick checks specific to Whirlpool models:
- Listen for compressor operation — put your ear near the rear bottom panel. A running compressor produces a steady hum. Complete silence means electrical failure or relay problems.
- Check the condenser fan — on WRF and WRS models, the condenser fan sits next to the compressor behind the rear lower access panel. Pet hair and dust accumulation is the single most common reason for gradual cooling loss.
- Verify the display — if your model has a digital temperature display, look for error codes. A flashing temperature display on Whirlpool units often indicates a sensor communication error (error code 02) rather than actual temperature readings.
- Check for PO code — if you see "PO" on the display, your refrigerator detected a power outage. Press any button to clear it and allow normal operation to resume. In Bay Area homes prone to micro-outages, this code appears frequently and is not a malfunction.
Most Common Causes (Ranked by Likelihood)
1. Dirty Condenser Coils and Fan Failure (30% of cases)
The condenser coils on Whirlpool refrigerators mount at the rear bottom of the unit behind a removable cardboard or metal access panel. In Sacramento's dusty environment, these coils can accumulate enough debris in 6-8 months to significantly reduce cooling capacity. When the coils cannot reject heat efficiently, the compressor runs longer and the refrigerator gradually warms.
The condenser fan motor sits adjacent to the coils and pulls ambient air across them. Whirlpool condenser fan motors are particularly susceptible to pet hair wrapping around the shaft bearing. When the fan seizes or slows, heat builds up around the compressor, triggering thermal protection that shuts down the cooling system entirely.
Diagnosis: Pull the refrigerator away from the wall and remove the rear lower panel (typically two 1/4-inch hex head screws). Inspect the coils for matted dust and check if the fan blade spins freely by hand. A fan that resists rotation or wobbles on its shaft needs replacement. Test motor continuity with a multimeter — no reading confirms electrical failure.
DIY Difficulty: Easy Parts Cost: $25–$65 (fan motor); cleaning is free Professional Repair Cost: $120–$250
Repair Steps:
- Unplug the refrigerator from the wall outlet.
- Pull the unit forward to access the rear lower panel.
- Remove the two 1/4-inch hex screws securing the access panel.
- Vacuum the condenser coils thoroughly using a brush attachment — work gently between the fins.
- Check the fan blade for hair or debris wrapped around the motor shaft.
- If the motor has failed, disconnect the wire harness connector and remove the mounting screws (typically two Phillips or 1/4-inch hex).
- Install the replacement fan motor, reconnect the harness, and verify the blade spins freely.
- Replace the access panel and restore power.
2. Evaporator Fan Motor Failure (25% of cases)
The evaporator fan circulates cold air from the freezer's evaporator coils into both the freezer and refrigerator compartments. On Whirlpool models, this fan lives behind the rear panel inside the freezer section. A telltale sign of evaporator fan failure: the freezer stays cold (because it is closest to the coils) while the refrigerator compartment warms up.
Whirlpool's evaporator fan motors on WRF-series French door models are accessed by removing the freezer rear panel — typically 4-6 Phillips screws plus any shelf support clips. On WRT-series top-freezer models, the panel is often held by quarter-turn plastic fasteners instead.
These fans have a built-in door switch that stops the motor when you open the freezer door. If you hear the fan running with the door closed but not when you hold the door switch, the switch itself may be stuck rather than the motor being bad.
Diagnosis: Open the freezer door and manually press the door switch (light switch). Listen for the evaporator fan to start. If silence, remove the freezer rear panel and check for ice blocking the fan blade (defrost system failure) versus a dead motor (electrical failure). Spin the blade by hand — grinding or resistance indicates worn bearings.
DIY Difficulty: Moderate Parts Cost: $30–$75 Professional Repair Cost: $130–$260
Repair Steps:
- Unplug the refrigerator and remove all freezer contents.
- Remove freezer shelves and the rear panel (Phillips screws or quarter-turn clips depending on model).
- If ice encases the fan, defrost with a hair dryer on low — but note this means the defrost system has also failed and needs separate attention.
- Disconnect the fan motor wire harness.
- Remove the mounting bracket screws holding the motor assembly.
- Install the new evaporator fan motor, secure the bracket, and reconnect the harness.
- Reinstall the rear panel, shelves, and restore power.
3. Damper Control Assembly (25% of cases)
Whirlpool refrigerators use a damper (also called an air diffuser or baffle) to regulate cold airflow from the freezer into the refrigerator compartment. This motorized or thermostatic door sits in a duct between the two compartments — usually visible at the top-rear of the refrigerator section behind a vent cover.
When the damper gets stuck closed, cold air cannot enter the refrigerator section. The freezer stays at proper temperature while the fresh food compartment steadily warms. On models with Accu-Chill, the damper works in conjunction with the fan boost system, so a stuck damper prevents the rapid-cooling function from operating correctly.
A common Whirlpool-specific issue: on WRS side-by-side models manufactured between 2018-2022, frost can form on the damper assembly during normal Adaptive Defrost cycles if the door gasket has even minor imperfections, causing the damper to freeze shut intermittently.
Diagnosis: Remove the vent cover at the upper rear of the refrigerator section (usually 2 screws). Visually inspect whether the damper door is open or closed. With the thermostat set to maximum cold, you should be able to see or feel cold air flowing through. If the damper is stuck and manual manipulation does not free it, replacement is needed.
DIY Difficulty: Moderate Parts Cost: $60–$150 Professional Repair Cost: $160–$350
Repair Steps:
- Unplug the refrigerator.
- Remove the upper vent cover inside the refrigerator compartment (typically 2-3 Phillips screws).
- Disconnect the damper motor wire harness if equipped with a motorized damper.
- Note the orientation of the damper assembly before removal.
- Remove mounting screws and slide out the old damper assembly.
- Install the replacement, ensuring the door opens toward the refrigerator compartment.
- Reconnect the wire harness, reinstall the vent cover, and restore power.
4. Sealed System Leak or Compressor Failure (20% of cases)
When condenser coils are clean, both fans operate, and the damper opens properly, but cooling still does not occur, the sealed refrigerant system itself may have failed. This manifests as a compressor that runs continuously without producing adequate cooling, or one that clicks on and immediately shuts off (thermal overload tripping).
Whirlpool compressors are generally reliable — their embraco-style compressors routinely last 12-15 years. However, the start relay (mounted on the compressor body) is a common failure point. A failed start relay produces a clicking sound every few minutes as the compressor attempts to start, overloads, and shuts down.
Test the start relay by unplugging the refrigerator, removing the relay from the compressor (it pulls straight off), and shaking it. A rattling sound inside confirms internal contact failure. This is a $15-40 part that takes 5 minutes to replace and is the most cost-effective repair in refrigeration.
Diagnosis: Listen for the compressor cycling on and off with clicking sounds (relay). Check if the compressor body is extremely hot to the touch (overload). A compressor that runs but does not cool indicates low refrigerant charge — this requires EPA-certified professional service.
DIY Difficulty: Start relay is Easy; compressor replacement is Professional-only Parts Cost: $15–$40 (relay); $250–$450 (compressor with refrigerant recharge) Professional Repair Cost: $150–$250 (relay); $450–$800 (compressor)
Repair Steps (Start Relay):
- Unplug the refrigerator.
- Remove the rear lower access panel.
- Locate the start relay on the side of the compressor — it is a small rectangular or cylindrical component with wires attached.
- Pull the relay straight off the compressor pins.
- Shake the old relay — rattling confirms failure.
- Push the new relay onto the compressor pins in the same orientation.
- Replace the access panel and restore power.
Safety First — Know the Risks
Refrigerant (R-134a/R-600a) requires EPA certification to handle. Improper discharge is a federal violation and health hazard. Our techs are licensed and insured — let them handle the risk.
Licensed & Insured · 90-Day Warranty · Same-Day Service
Whirlpool-Specific Troubleshooting Sequence
Follow this diagnostic path designed for Whirlpool's system architecture:
- Check for error codes or PO (power outage) display — clear PO by pressing any button.
- Listen for compressor operation at the rear lower section.
- Pull out and inspect condenser coils — vacuum if dusty (this alone resolves 15% of no-cool calls).
- Verify condenser fan spins freely and runs when compressor is on.
- Open freezer, press door switch, listen for evaporator fan.
- Check freezer temperature — if freezer is cold but fridge is warm, suspect damper or evaporator fan.
- Inspect the damper assembly in the upper rear of the refrigerator section.
- If compressor clicks on/off, test the start relay.
- Run Whirlpool diagnostic mode (varies by model — check tech sheet taped inside the console or toe panel): typically press three specific buttons within 4 seconds.
Cost Comparison Table
| Component | DIY Repair Cost | Professional Cost | Repair Time |
|---|---|---|---|
| Condenser Coil Cleaning | Free (vacuum) | $100–$150 | 20 min |
| Condenser Fan Motor | $25–$65 | $120–$250 | 30 min |
| Evaporator Fan Motor | $30–$75 | $130–$260 | 45 min |
| Damper Control Assembly | $60–$150 | $160–$350 | 40 min |
| Start Relay | $15–$40 | $150–$250 | 15 min |
| Compressor (professional only) | N/A | $450–$800 | 2–3 hours |
Same-Day Appliance Repair
Fixed or It's Free
$89 → $0 Service Call & Diagnosis — offer ends May 25
The Real Cost of DIY
Average DIY attempt: $150-400 in tools you may use once, plus the risk of further damage. Our diagnostic visit costs $0 — we find the problem and give you an honest quote.
Licensed & Insured · 90-Day Warranty · Same-Day Service
Prevention: Keeping Your Whirlpool Cooling Efficiently
Whirlpool's Adaptive Defrost system reduces maintenance needs compared to timer-based competitors, but these habits extend the life of your cooling system:
- Clean condenser coils every 6 months — more frequently if you have pets or live in dusty conditions (Sacramento summers accelerate dust accumulation significantly).
- Verify door gasket seal quarterly — slide a dollar bill between the gasket and frame with the door closed. If it pulls out without resistance, the gasket needs replacement or the door needs alignment adjustment.
- Keep 3-4 inches clearance behind and above the refrigerator for proper heat dissipation from the condenser.
- Replace the EveryDrop water filter on schedule (every 6 months or 200 gallons) — a clogged filter forces the system to work harder and can restrict water flow to the ice maker.
- Do not block internal air vents with food items — the vent between freezer and refrigerator sections needs unobstructed airflow for the Accu-Chill system to function.
When to Repair vs. Replace
Whirlpool refrigerators have an expected service life of 14-17 years. Given that parts are universally stocked (Whirlpool has the most extensive aftermarket parts network of any appliance brand), repair is almost always economically justified unless:
- The unit is over 15 years old AND the compressor has failed (sealed system repair on aging units often leads to cascading failures)
- Multiple components have failed simultaneously (suggests electrical damage from a power surge)
- The cost of repair exceeds 50% of a comparable replacement unit
For units under 10 years old, every repair scenario described above is worth fixing. Whirlpool parts availability means same-day or next-day service in most Sacramento metro areas.
Don't Void Your Warranty
Opening your appliance yourself may void the manufacturer warranty. Our repair comes with a 90-day guarantee, and we document everything for warranty compliance.
Licensed & Insured · 90-Day Warranty · Same-Day Service
Frequently Asked Questions
Q: My Whirlpool refrigerator shows PO on the display and is not cooling — what does this mean?
PO stands for Power Outage. This is an informational code that appears after power is restored following an interruption. Press any button on the control panel to dismiss it and allow normal cooling to resume. The refrigerator will not begin cooling until PO is cleared. This is especially common in Bay Area homes subject to frequent grid micro-outages.
Q: The freezer section is cold but the refrigerator compartment is warm — what failed?
This specific pattern points to either the evaporator fan motor (not circulating cold air to the fridge section), the damper control assembly (stuck closed, blocking airflow), or a frost-blocked evaporator (defrost system failure). Check the damper first as it is the easiest to inspect visually.
Q: How do I enter diagnostic mode on my Whirlpool refrigerator?
The exact button sequence varies by model but is always documented on the tech sheet taped inside the console, behind the toe panel, or on the rear panel. For most WRF/WRS models: press the door alarm button three times within 10 seconds, then check the display for stored error codes. Error code 02 indicates control board communication failure; code 01 indicates defrost bi-metal issue.
Q: Is it worth repairing a Whirlpool refrigerator that stopped cooling?
Almost always yes, for units under 12 years old. Most cooling repairs cost $120-$350 professionally. A replacement Whirlpool refrigerator runs $900-$2,500. Parts are universally available and shared across Whirlpool, Maytag, KitchenAid, and Amana — making sourcing fast and affordable.
Q: Why does my Whirlpool refrigerator make a clicking sound but not cool?
A repetitive clicking every 2-5 minutes indicates a failed compressor start relay. The compressor attempts to start, overloads, and the relay clicks off. This is a $15-$40 part replacement that resolves the issue in under 10 minutes. Shake the relay — if it rattles internally, it is confirmed bad.
Need professional diagnosis for your Whirlpool refrigerator? Our technicians carry common Whirlpool parts (start relays, fan motors, damper assemblies) on every service call for same-visit repairs. Schedule a repair →

