Whirlpool Refrigerator Frost and Ice Buildup — Adaptive Defrost Failures Explained
Frost accumulation inside a Whirlpool refrigerator signals that the Adaptive Defrost system has stopped maintaining its normal melt cycle. Unlike conventional refrigerators that defrost on a fixed timer every 6-8 hours, Whirlpool's Adaptive Defrost technology monitors compressor run-time and door-opening frequency to calculate precisely when frost removal is needed. This demand-based approach normally keeps evaporator coils frost-free while minimizing energy waste — but when a component in the defrost circuit fails, ice builds up faster than in timer-based systems because there is no fixed-interval backstop.
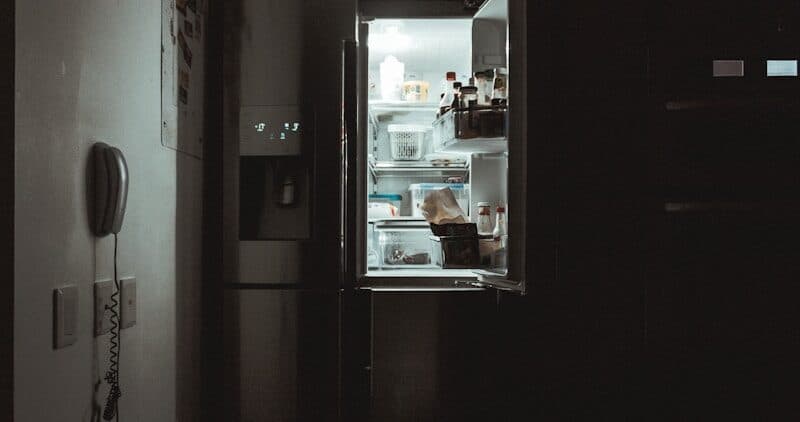
Whirlpool refrigerators (WRF French door, WRS side-by-side, and WRT top-freezer models) share a common defrost architecture. Understanding how these components interact helps pinpoint which part has failed based on where the frost appears and how quickly it accumulates.
Where the Frost Appears Matters
The location of ice buildup narrows the diagnosis significantly:
- Back wall of freezer (behind rear panel): Defrost heater, defrost thermostat, or Adaptive Defrost control board failure — the evaporator coils are icing over because the melt cycle is not activating.
- Around the freezer door frame: Gasket seal failure allowing humid air infiltration. Sacramento's summer humidity makes this worse — warm moist air entering the freezer freezes on contact with cold surfaces.
- Inside the refrigerator compartment (not freezer): The defrost drain is clogged. Meltwater from successful defrost cycles cannot exit and refreezes at the bottom of the freezer section, eventually spilling into the refrigerator as ice sheets or puddles.
- On the evaporator fan blade: The Adaptive Defrost cycle is partially working but not completing — the heater turns on but shuts off too early (defrost thermostat opening prematurely).
Do You Have the Right Tools?
Refrigerant gauges ($200+), vacuum pump ($250), leak detector ($150), and EPA-certified recovery equipment. Our technician arrives with $15K+ in professional tools — your diagnostic is free.
Licensed & Insured · 90-Day Warranty · Same-Day Service
How Whirlpool's Adaptive Defrost System Works
The Adaptive Defrost board (located behind the temperature control panel on most models) tracks two inputs: total compressor run-time since the last defrost and the number of door openings. When the accumulated run-time exceeds a calculated threshold, the board initiates a defrost cycle by:
- Shutting off the compressor and evaporator fan
- Energizing the defrost heater (a glass-tube or calrod element mounted beneath the evaporator coils)
- Monitoring the defrost thermostat (bi-metal sensor clipped to the evaporator) — when coil temperature rises to approximately 47-50 degrees F, the thermostat opens and terminates the heater
- Waiting a brief drain period, then resuming compressor operation
If any component in this chain fails, frost accumulates progressively with each cooling cycle.
Most Common Causes (Ranked by Likelihood)
1. Defrost Heater Failure (28% of cases)
The defrost heater is the workhorse of the defrost system — a resistive heating element that physically melts frost off the evaporator coils. On Whirlpool models, this is typically a glass-tube calrod element positioned beneath the evaporator assembly inside the freezer. When the glass tube cracks or the internal element burns open, no heat is produced during defrost cycles.
Whirlpool uses different heater configurations depending on the model series. WRF French door models typically have a single U-shaped element, while WRS side-by-side models may use dual straight elements to cover the wider evaporator surface. The heater is always accessible by removing the freezer rear panel (4-6 Phillips screws plus plastic shelf support clips).
Diagnosis: Unplug the refrigerator, remove the freezer rear panel, and locate the glass-tube heater beneath the evaporator coils. Disconnect one wire from the heater terminal and test continuity with a multimeter. An open circuit (no continuity) confirms the heater has burned out. Visible dark spots or cracks in the glass tube also indicate failure.
DIY Difficulty: Moderate Parts Cost: $30–$75 Professional Repair Cost: $150–$300
Repair Steps:
- Unplug the refrigerator and allow 24 hours for existing ice to melt (or use a hair dryer on low).
- Remove all freezer contents and shelving.
- Remove the rear freezer panel screws (typically 4-6 Phillips head) and any plastic clips holding shelving brackets.
- Carefully lift out the panel — it may be frozen in place and require gentle prying.
- Photograph the heater wiring before disconnecting for reference.
- Remove the heater mounting clips (they slide or unclip from the evaporator frame).
- Disconnect the wire terminals from the old heater.
- Install the new heater in the same position, secure the clips, and reconnect wires.
- Reassemble the panel, shelves, and restore power.
2. Defrost Thermostat (Bi-Metal) Failure (22% of cases)
The defrost thermostat is a temperature-sensitive switch clipped directly to the evaporator tubing. Its job is to close the circuit to the defrost heater when coil temperature drops below approximately 30 degrees F, and open the circuit (terminating heating) when temperature reaches 47-50 degrees F. This prevents the heater from overheating the evaporator and damaging the refrigerant lines.
When the thermostat fails in the open position, it never allows current to reach the heater — even though the Adaptive Defrost board is sending the signal to defrost. The heater never activates, and frost builds continuously. This is Whirlpool error code 01 on models with diagnostic display capability.
Diagnosis: Access the evaporator (remove freezer rear panel). Locate the small disc-shaped or oval thermostat clipped to the evaporator tubing. Disconnect it and test with a multimeter at room temperature — it should show continuity at temperatures below 30 degrees F. Test by placing it in a bag in the freezer for 10 minutes, then checking continuity while still cold. If no continuity when cold, the thermostat is stuck open.
DIY Difficulty: Moderate Parts Cost: $15–$40 Professional Repair Cost: $130–$250
Repair Steps:
- Unplug the refrigerator and defrost any ice accumulation on the evaporator.
- Remove the freezer rear panel to access the evaporator assembly.
- Locate the defrost thermostat — a small disc or oval component clipped to one of the evaporator tubes, usually near the top.
- Unclip the thermostat from the tube and disconnect the wire terminals.
- Install the new thermostat in the exact same location on the evaporator tube — proper placement is critical for accurate temperature sensing.
- Reconnect wire terminals and reassemble.
3. Clogged Defrost Drain (20% of cases)
Even when the defrost system works correctly, the resulting meltwater must drain away through a small channel at the bottom of the evaporator compartment. This drain leads through a tube to a drip pan above the compressor, where heat from the compressor evaporates the water. On Whirlpool models, the drain hole is prone to freezing shut — especially in Sacramento homes where frequent door openings during hot weather introduce humid air that refreezes in the drain channel.
A frozen drain does not prevent defrost from occurring — the heater still melts coil frost — but the water has nowhere to go. It pools at the bottom of the freezer, refreezes into ice sheets, and eventually overflows into the refrigerator compartment below. You may notice ice forming at the bottom of the freezer or water puddling under produce drawers.
Diagnosis: Remove the freezer rear panel and look at the bottom of the evaporator compartment. If you see a pool of frozen water or ice covering the drain opening, the drain is blocked. The drain hole is typically a small opening (about 3/4 inch) at the base center of the evaporator housing.
DIY Difficulty: Easy Parts Cost: Free (flush with warm water) to $10 (drain strap heater) Professional Repair Cost: $100–$180
Repair Steps:
- Unplug the refrigerator and remove the freezer rear panel.
- Use a turkey baster filled with hot water to flush the drain opening — repeat several times until water flows freely.
- From below, check the drain tube exit point above the compressor drip pan — clear any debris.
- For recurring freezing, install a Whirlpool drain strap heater (a small heating clip that prevents ice formation at the drain entrance).
- Reassemble and monitor for 48 hours.
4. Adaptive Defrost Control Board (15% of cases)
The Adaptive Defrost board is the electronic brain that calculates when to initiate defrost cycles. If this board fails, it may never send the defrost signal regardless of how long the compressor runs. On Whirlpool models, this board is typically located behind the temperature control housing inside the refrigerator section (on fresh-food models) or behind the control panel at the top.
Unlike a simple timer failure where defrost stops entirely, a malfunctioning Adaptive Defrost board may produce erratic behavior — defrosting too infrequently, skipping cycles intermittently, or failing to complete the cycle once started. This makes diagnosis trickier because frost buildup is gradual and inconsistent.
Diagnosis: If the heater, thermostat, and drain are all confirmed good but frost still accumulates, the control board is the remaining suspect. On models with LED diagnostic indicators, two consecutive blinks indicate a defrost circuit fault. Enter diagnostic mode (check the tech sheet inside the console or toe panel for your model's specific 3-button sequence) to verify defrost initiation.
DIY Difficulty: Moderate Parts Cost: $45–$130 Professional Repair Cost: $180–$350
5. Door Gasket Seal Deterioration (10% of cases)
A compromised door gasket allows warm, humid air to continuously infiltrate the freezer compartment. The moisture in this air freezes on cold surfaces — including the evaporator coils, interior walls, and food packaging. Unlike defrost system failures that produce thick ice on the evaporator specifically, gasket failure produces diffuse frost throughout the compartment, particularly around the door frame area.
Whirlpool door gaskets use a magnetic strip embedded within a flexible vinyl material. Over time — particularly in Sacramento's temperature extremes where garage-located refrigerators face 110+ degree ambient temperatures — the vinyl hardens and loses flexibility, creating gaps.
Diagnosis: Close the door on a dollar bill at several points around the perimeter. If the bill slides out without resistance at any point, that section of the gasket is not sealing. Also inspect visually for tears, warping, or sections where the gasket has pulled away from the door liner.
DIY Difficulty: Easy Parts Cost: $45–$120 Professional Repair Cost: $120–$250
6. Evaporator Fan Ice Blockage (5% of cases)
When the evaporator fan blade becomes encased in ice, it cannot circulate cold air. This creates a secondary problem: without airflow across the evaporator coils, localized cold spots develop and the Adaptive Defrost system may not register the need for a defrost cycle at the expected threshold. The result is progressive ice encasement that eventually stops the fan entirely.
You will hear this problem before you see it — the fan motor strains against the ice and produces a loud humming, buzzing, or scraping sound from inside the freezer. If the sound stops and the freezer begins warming, the motor has burned out from overload.
DIY Difficulty: Easy to defrost; Moderate if motor is damaged Parts Cost: Free (manual defrost) to $30–$75 (fan motor replacement) Professional Repair Cost: $130–$260
Safety First — Know the Risks
Refrigerant (R-134a/R-600a) requires EPA certification to handle. Improper discharge is a federal violation and health hazard. Our techs are licensed and insured — let them handle the risk.
Licensed & Insured · 90-Day Warranty · Same-Day Service
Whirlpool Defrost Diagnostic Procedure
- Unplug the refrigerator for 24-48 hours with doors open to fully defrost all ice.
- After defrosting, inspect the evaporator coils for damage or oil staining (indicates refrigerant leak).
- Plug the unit back in and verify the compressor and both fans operate.
- Monitor for 24 hours — if frost returns within one defrost cycle period (varies by usage but typically 8-12 hours), the defrost system is confirmed failed.
- Enter diagnostic mode and initiate a forced defrost test to verify heater activation.
- Check for Whirlpool error code 01 (defrost bi-metal open) or 02 (board communication fault).
Same-Day Appliance Repair
Fixed or It's Free
$89 → $0 Service Call & Diagnosis — offer ends May 25
Cost Comparison
| Component | Parts Cost | Professional Cost | Repair Time |
|---|---|---|---|
| Defrost Heater | $30–$75 | $150–$300 | 45 min |
| Defrost Thermostat | $15–$40 | $130–$250 | 30 min |
| Drain Clearing | Free–$10 | $100–$180 | 20 min |
| Adaptive Defrost Board | $45–$130 | $180–$350 | 35 min |
| Door Gasket | $45–$120 | $120–$250 | 30 min |
| Evaporator Fan Motor | $30–$75 | $130–$260 | 45 min |
The Real Cost of DIY
Average DIY attempt: $150-400 in tools you may use once, plus the risk of further damage. Our diagnostic visit costs $0 — we find the problem and give you an honest quote.
Licensed & Insured · 90-Day Warranty · Same-Day Service
Prevention
- Minimize door openings during hot weather — each opening introduces humid air that the defrost system must handle. Sacramento summers amplify this significantly.
- Verify gasket seal every 3 months — early detection of seal deterioration prevents chronic frost buildup.
- Ensure proper ventilation — 3-4 inches clearance on all sides allows the condenser to reject heat efficiently, reducing overall compressor run-time and defrost demand.
- Replace the EveryDrop water filter on schedule — a clogged filter can cause ice maker overflow that adds unwanted moisture to the freezer environment.
- Do not overfill the freezer — overpacking blocks air circulation and creates frost-prone dead zones.
FAQ
Q: Why does my Whirlpool refrigerator frost up faster than my old one defrosted?
Whirlpool's Adaptive Defrost only runs when needed — it does not defrost on a wasteful fixed schedule. If a defrost component fails, there is no timer backstop to partially compensate. This is by design (saves significant energy when working properly) but means frost accumulates faster when something breaks.
Q: What does error code 01 mean on my Whirlpool refrigerator?
Error code 01 indicates the defrost bi-metal thermostat has opened permanently and is not closing to allow defrost heater operation. The thermostat needs replacement — a $15-$40 part accessible behind the freezer rear panel.
Q: Can I manually defrost my Whirlpool refrigerator to buy time before repair?
Yes. Unplug the unit, leave doors open, and place towels to catch meltwater. After 24 hours, all frost should be melted. Plugging back in will restore cooling, but frost will return within 1-3 days if the underlying defrost fault is not repaired.
Q: My Whirlpool refrigerator has ice on the back wall inside the fridge section — is this a defrost problem?
Ice inside the fresh food compartment (not the freezer) typically indicates a clogged defrost drain rather than a defrost system failure. The defrost system is working (melting coil frost), but the meltwater cannot drain and refreezes or overflows into the refrigerator section.
Frost buildup getting worse? Our technicians stock Whirlpool defrost heaters, thermostats, and control boards for same-visit repair on all WRF, WRS, and WRT models. Schedule a repair →

