What Is Happening: Freezer Temperature Sensor Failure
The 1E code means the freezer compartment temperature sensor is transmitting data the main control board cannot interpret as valid temperature. This NTC thermistor — part number DA32-10109W on most Samsung French Door, Side-by-Side, and 4-Door Flex models produced after 2014 — clips directly to the evaporator frame inside the freezer. It communicates temperature through a two-wire harness routed along the rear wall to the main PCB (DA92-00384 series or newer).
In Samsung's Twin Cooling Plus architecture, the freezer runs on a completely independent cooling loop with its own evaporator, circulation fan, and temperature sensor. When the 1E thermistor fails, the board loses precise freezer regulation. The Digital Inverter compressor falls back from variable-speed modulation (normally 1,100-4,300 RPM adjusted in real-time based on thermal demand from the sensor) to a fixed duty cycle that wastes energy and produces temperature swings of 15-20 degrees rather than the normal tight 3-degree window around your set point. The fresh food section remains completely unaffected because Twin Cooling Plus maintains total independence between the two compartments, each with their own evaporator and dedicated airflow circuit.
Why This Sensor Fails: The Three Pathways
The dominant failure mode (approximately 40% of all 1E occurrences) is connector corrosion at the Molex junction behind the rear freezer panel. Samsung's automatic defrost cycle runs every 8-12 hours, producing condensation that drips along the evaporator frame and housing. Over 3-5 years of service, micro-droplets migrate along the thermistor wire via capillary action toward the white Molex connector. Oxidation accumulates progressively on the metal pins — first as an invisible film reducing conductivity, then as green or white crystalline deposits. This corrosion increases electrical resistance at the connection point, eventually causing the ADC readings on the main board to fall outside the valid temperature range for that input channel.
Thermistor element degradation from thermal cycling fatigue accounts for approximately 35% of 1E failures. The NTC bead inside the sensor probe undergoes thousands of temperature swings between -20F during compressor operation and +47F during defrost heater activation over its service life. After 5-8 years of continuous cycling, the resistance-temperature curve permanently drifts beyond the board's programmed tolerance window. The sensor still responds to temperature changes but reports values that differ enough from expected that the board flags the data as unreliable.
Wire harness chafing against the evaporator frame during thermal expansion cycles causes approximately 15% of 1E failures. The refrigerant tubing and evaporator frame expand slightly during defrost and contract during cooling. This repeated microscopic movement wears through wire insulation at contact points over several years. The remaining 10% trace to the main board's analog-to-digital converter input channel — a cold solder joint issue particularly common on DA92-00384 series boards manufactured between 2016 and 2019 that develops micro-cracks under repeated thermal stress.
Do You Have the Right Tools?
Refrigerant gauges ($200+), vacuum pump ($250), leak detector ($150), and EPA-certified recovery equipment. Our technician arrives with $15K+ in professional tools — your diagnostic is free.
Licensed & Insured · 90-Day Warranty · Same-Day Service
Immediate Food Safety Assessment
Place a standalone digital thermometer in the center of the freezer compartment on a middle shelf (not touching any wall surface). Check the reading after 2 hours of refrigerator operation with 1E code displayed:
- Below 5F: food is completely safe, you have flexible repair timing — days to a full week
- Between 5F and 15F: food remains safe for 24-48 hours, ice cream may soften at the surface
- Between 15F and 25F: surface thawing beginning on some items, arrange repair within 24 hours
- Above 25F: active thawing is occurring, transfer critical frozen items to another freezer immediately
The fresh food section (refrigerator compartment) maintains its normal temperature regardless of 1E status — this is the fundamental design benefit of Samsung's dual-evaporator Twin Cooling Plus system. Each compartment operates independently.
Diagnosis: Three-Step Systematic Approach
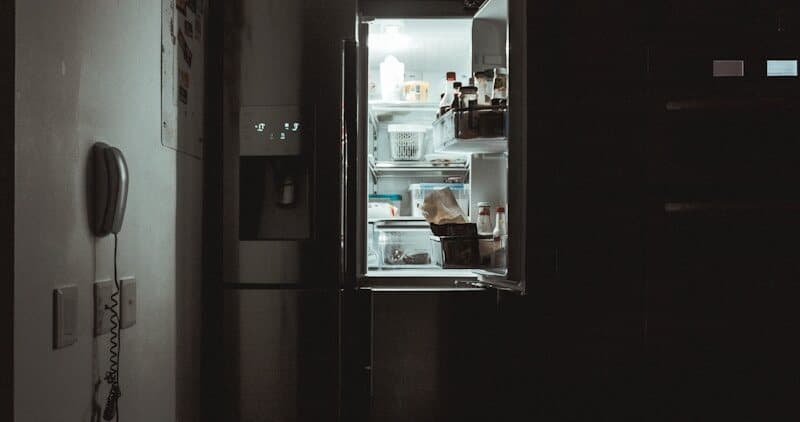
Unplug the refrigerator completely from the wall outlet before beginning any physical inspection. Remove the rear freezer panel by taking out the four Phillips screws along its top edge, then lift the panel forward and up off its lower plastic clips. Behind this panel you find the evaporator coil assembly (aluminum fins with refrigerant tubing), the defrost heater element (glass tube or calrod mounted at the evaporator base), and the 1E thermistor: a small cylindrical probe approximately 1 inch long clipped to the upper section of the evaporator frame, with a two-wire lead running to a white Molex connector about 6 inches from the probe.
Step 1 — Connector inspection and cleaning: Examine both halves of the Molex connector carefully for any green, white, or brown deposits on the metal pins. Even slight discoloration indicates corrosion that may be causing the 1E code. Disconnect both halves of the Molex, spray DeoxIT D5 electrical contact cleaner on a small brush (an old toothbrush works well), scrub all pin surfaces gently on both the sensor side and the harness side, blow dry with compressed air or allow 2 minutes for the solvent to evaporate completely, apply a thin uniform film of dielectric grease to all pin surfaces to prevent future moisture penetration, and reconnect firmly until the retention latch clicks. Reassemble the rear panel, restore power to the refrigerator, and wait 4-6 hours. If 1E clears during this time and does not return over the subsequent 48 hours: connector corrosion was the sole problem. You have resolved the issue without replacing the sensor — saving $100-150 in parts and labor versus a full sensor replacement.
Step 2 — Sensor resistance measurement: If connector cleaning did not resolve the code, unplug the refrigerator again, remove the rear panel again, and disconnect the sensor Molex. Attach your multimeter leads (set to the 20K ohm range) to the two sensor wire ends coming directly from the probe. Expected resistance values: at room temperature (approximately 72F or 22C) you should read approximately 5,000 ohms; at normal freezer operating temperature (0F or -18C) the reading should be approximately 15,000-17,000 ohms; warming the frozen probe between your fingers for 30 seconds should show resistance decreasing visibly on the meter display (this confirms NTC negative-temperature-coefficient behavior is intact). Definitive failure readings: OL (open circuit, infinite resistance) means the NTC element or wire conductor is physically broken; zero ohms means there is an internal short circuit within the sensor; a fixed resistance value that does not respond to temperature changes at all means the NTC bead has become chemically inert and no longer functions as a temperature sensor. Any of these failure readings confirms the sensor must be physically replaced.
Step 3 — Board ADC verification: If a confirmed new replacement sensor still produces 1E after installation, measure the harness-side connector pins (the wires going toward the board) with the sensor disconnected. This measurement should read OL (infinite resistance, indicating no internal connection exists on the board side when nothing is plugged in). Any finite resistance value indicates the board's ADC input has an internal defect — a leakage path pulling the input line high or low regardless of what sensor is connected. Main board replacement (DA92 series, model-specific part number) is required in this scenario.
Safety First — Know the Risks
Refrigerant (R-134a/R-600a) requires EPA certification to handle. Improper discharge is a federal violation and health hazard. Our techs are licensed and insured — let them handle the risk.
Licensed & Insured · 90-Day Warranty · Same-Day Service
Replacing the Sensor: Procedure
Total time: 15-20 minutes. Tools needed: Phillips screwdriver, multimeter for post-installation verification. Push the spring clip tab on the evaporator frame mounting bracket and slide the old probe out of its holder. Note the exact wire routing path through the existing plastic clips along the frame before removing (taking a photograph helps for reference during reinstallation). Disconnect the old sensor's Molex connector from the harness side. Connect the new DA32-10109W sensor's Molex to the harness — it should click firmly when fully seated. Route the new sensor wire along the identical path through each existing wire retention clip on the evaporator frame. Clip the new probe firmly into its bracket on the frame — physical contact between the probe and the evaporator frame metal is essential for accurate temperature reading. Replace the rear panel by aligning the bottom clips first (press panel against them until they snap into place), then install the four Phillips screws along the top edge. Restore power by plugging the refrigerator back in.
The Digital Inverter compressor takes 2-3 minutes to initialize after power restoration before it begins running — this startup delay is a normal initialization sequence, not a sign of any additional fault. Allow 8-12 hours for the freezer to reach stable target temperature. Avoid adding room-temperature or warm food items during this stabilization period as it extends the recovery time.
Same-Day Appliance Repair
Fixed or It's Free
$89 → $0 Service Call & Diagnosis — offer ends May 25
Samsung Forced Defrost: Preventive Maintenance
Running a forced defrost cycle every 6 months prevents moisture accumulation near sensor connections — directly addressing the dominant 40% failure mode before corrosion reaches the threshold that triggers 1E: Hold the Freezer and Fridge buttons simultaneously for 8 seconds until the display changes or beeps. Then press the Freezer button repeatedly until the characters "Fd" appear on the display panel. A 20-minute forced defrost cycle runs automatically. You will hear relay clicking followed by water dripping sounds as ice melts and drains. The compressor resumes normal operation automatically after the cycle completes with no user intervention needed.
The Real Cost of DIY
Average DIY attempt: $150-400 in tools you may use once, plus the risk of further damage. Our diagnostic visit costs $0 — we find the problem and give you an honest quote.
Licensed & Insured · 90-Day Warranty · Same-Day Service
Cost Analysis
| Repair Path | Parts Cost | Professional Total |
|---|---|---|
| Connector cleaning only (resolves approximately 40% of 1E cases) | DeoxIT D5 contact cleaner $8-12 | $90-155 service call |
| Sensor replacement (most common repair) | DA32-10109W $18-32 | $155-265 |
| Both connector cleaning and new sensor (belt-and-suspenders approach) | $28-45 combined | $165-275 |
| Main control board replacement (ADC channel failure) | DA92 series $180-280 | $345-520 |
DIY savings are significant on this particular repair — the sensor itself is inexpensive and the replacement procedure requires only a Phillips screwdriver and a basic multimeter for testing. The primary value of professional service is confirming which specific component has actually failed before ordering parts, avoiding unnecessary part purchases.
Freezer sensor confirmed bad? We stock DA32-10109W for same-day Samsung repair — book sensor replacement →.

