Pre-Summer Fridge Prep: Get Ready for Sacramento's 100°F Days
Sacramento summers are brutal on refrigerators. The National Weather Service data for the Sacramento Valley shows an average of 73 days per year above 90 degrees Fahrenheit, with stretches of 105 to 110 degrees during peak heat waves. Your refrigerator is designed to operate in environments between 55 and 110 degrees, which means Sacramento's summer pushes many units to the edge of their operating range — especially those in garages, sunlit kitchens, or older homes without modern insulation.
In our Sacramento service area, refrigerator emergency calls spike 45 percent between June and August compared to the rest of the year. Our technicians report that the majority of these breakdowns are preventable with a pre-summer tune-up done in May or early June. This guide gives you a complete checklist to prepare your refrigerator before the first triple-digit day hits.
Why Sacramento Heat Is Especially Hard on Refrigerators
Your refrigerator works by removing heat from the interior and releasing it through the condenser coils into the surrounding air. The greater the temperature difference between the coils and the ambient air, the more efficiently this process works. When your kitchen hits 85 or 90 degrees — common in Sacramento homes during summer, even with air conditioning — that efficiency drops dramatically.
Here is what happens inside your refrigerator during a Sacramento heat wave:
- The compressor runs nearly continuously to maintain set temperatures, increasing energy consumption by 30 to 40 percent. At California's average electricity rate of 30 cents per kWh, that can add 20 to 30 dollars to your monthly PG&E bill.
- Condenser coils cannot dissipate heat fast enough, especially if they are dirty or the fridge is pushed against a wall.
- Internal temperature fluctuates, particularly after door openings. Each time you open the door on a 100-degree day, more warm air enters than on a 70-degree day.
- Compressor thermal protection trips on the hottest days, shutting the compressor off temporarily. If this happens repeatedly, the compressor can fail permanently — a repair that typically costs 400 to 700 dollars.
- Food safety is compromised. The USDA recommends that refrigerators maintain 40 degrees Fahrenheit or below. During a heat wave with dirty coils and worn gaskets, internal temperatures can creep above that threshold without you realizing it.
Do You Have the Right Tools?
Multimeter ($85), vacuum pump ($250), diagnostic software, and specialized hand tools. Our technician arrives with $15K+ in professional tools — your diagnostic is free.
Licensed & Insured · 90-Day Warranty · Same-Day Service
Pre-Summer Refrigerator Checklist: 10 Steps
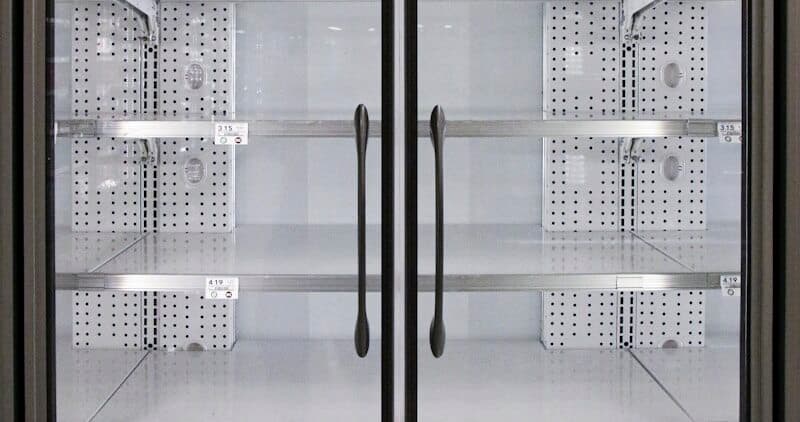
Step 1: Clean the Condenser Coils
This is the highest-impact task on the list. Dirty condenser coils are responsible for more preventable refrigerator failures than any other factor.
- Unplug the refrigerator or turn off the breaker.
- Locate the coils — they are either on the back of the unit or behind a kick plate at the bottom front.
- Use a coil brush or vacuum with a brush attachment to remove all dust, pet hair, and debris.
- Clean the floor beneath the fridge as well. Dust bunnies under the unit get pulled into the coil area by the condenser fan.
- Plug the unit back in and listen — the compressor should start up smoothly.
Energy Star estimates that clean coils reduce refrigerator energy consumption by 15 to 25 percent. In Sacramento's summer, that translates to real savings on your PG&E bill.
Step 2: Check Door Gaskets
Worn gaskets allow warm air to seep in continuously, forcing the compressor to run longer on already-hot days.
- Perform the dollar-bill test on all doors (fridge and freezer). Close the door on a bill and try to pull it out. If it slides freely, the gasket is not sealing properly.
- Test at multiple points around each door — gaskets can fail in specific areas.
- Clean the gaskets with warm, soapy water and dry thoroughly.
- If gaskets are cracked, torn, or fail the test in multiple spots, order replacements now — before summer demand creates parts delays.
Step 3: Verify and Calibrate Temperature Settings
- Place an appliance thermometer in the center of the refrigerator section (not against a wall or near the vent).
- Place a second thermometer in the freezer.
- Wait 24 hours and check readings.
- The refrigerator should read 35 to 38 degrees. The freezer should read 0 degrees.
- If readings are off, adjust the thermostat. If the appliance cannot maintain proper temperatures even with clean coils and good gaskets, the thermostat or temperature sensor may need professional calibration.
Step 4: Ensure Adequate Clearance
- Pull the fridge away from the wall and verify at least 2 inches of clearance on the sides and 1 inch in the back.
- Remove anything stored on top of the refrigerator that could block heat dissipation.
- If the fridge is in an enclosed cabinet or alcove, ensure the cabinetry allows for proper airflow — some built-in installations restrict airflow and contribute to overheating.
Step 5: Clean the Interior
A pre-summer deep clean sets you up for the season.
- Remove all food and check expiration dates.
- Wipe down all shelves, drawers, and walls with a baking soda and water solution.
- Clean the drip tray (usually accessible from behind or beneath the fridge).
- Check and clear the drain hole (usually at the back of the refrigerator compartment). A clogged drain causes water pooling and ice buildup.
Step 6: Replace the Water Filter
If your refrigerator has a water and ice dispenser, replace the filter every 6 months. A clogged filter restricts water flow and can introduce off-flavors. May or June is the natural time for one of your two annual replacements.
Step 7: Check the Condenser Fan
The condenser fan (near the compressor, usually at the bottom rear) pulls air across the coils. If it is not running, the coils cannot dissipate heat regardless of how clean they are.
- With the fridge running, listen near the bottom rear. You should hear the fan running.
- If the fan is not running or is making grinding noises, it may need replacement. This is an inexpensive part (30 to 60 dollars) but critical for summer performance.
Step 8: Inspect the Evaporator Fan
The evaporator fan (inside the freezer compartment) circulates cold air throughout the fridge and freezer. If it fails, the freezer may stay cold but the refrigerator section warms up.
- Open the freezer and listen for the fan. It should stop when you open the door (many models have a door switch) and resume when you close it.
- If you hear clicking, grinding, or nothing at all, the fan motor may need replacement.
Step 9: Prepare Your Garage Refrigerator
If you have a second fridge in the garage — and many Sacramento homes do — it faces the most extreme conditions.
- Garage temperatures in Sacramento can exceed 110 degrees in summer. Most residential refrigerators are not rated for ambient temperatures above 110.
- Clean the coils and check the gaskets with extra attention — these units work harder than kitchen fridges.
- Consider whether you really need the garage fridge running all summer. Unplugging an underused secondary fridge saves approximately 50 to 80 dollars per summer in electricity.
- If you must keep it running, ensure the garage has some ventilation and the fridge is not in direct sunlight.
Step 10: Schedule a Professional Tune-Up
A professional pre-summer tune-up catches issues invisible to homeowners: low refrigerant (which the EPA requires a certified technician to handle), failing start relays, marginal compressor performance, and electrical issues.
During Summer: Daily Habits That Protect Your Fridge
Once summer arrives, these habits reduce stress on your refrigerator:
- Minimize door openings. Know what you want before opening the door. Every opening on a 100-degree day dumps more warm air inside than on a 70-degree day.
- Let hot food cool before refrigerating. Placing hot leftovers directly in the fridge raises internal temperature and forces the compressor to surge. Cool food to room temperature first — but within 2 hours to stay food-safe per USDA guidelines.
- Keep the fridge 70 to 80 percent full. Thermal mass helps maintain temperature, but overcrowding restricts airflow.
- Run the air conditioning. Keeping your kitchen at a reasonable temperature directly reduces your refrigerator's workload. A kitchen at 75 degrees versus 90 degrees makes a significant difference in compressor run time.
- Avoid placing heat sources near the fridge. If your fridge is next to the oven or in direct sunlight, those extra degrees matter.
Safety First — Know the Risks
Appliances involve high voltage (120-240V), pressurized water, gas lines, and chemical refrigerants. Over 400 DIY repair injuries are reported yearly. Our techs are licensed and insured — let them handle the risk.
Licensed & Insured · 90-Day Warranty · Same-Day Service
Warning Signs During Summer
Watch for these indicators that your refrigerator is struggling:
- The compressor runs constantly without cycling off
- Food is not as cold as usual or takes longer to chill
- Ice cream is soft even with the freezer set to 0 degrees
- Water pools inside the refrigerator compartment
- The exterior feels unusually hot to the touch
- Your PG&E bill spikes without other explanation
If you notice any of these, start with the maintenance steps above. If problems persist, call for professional service before a minor issue becomes a compressor failure.
Same-Day Appliance Repair
Fixed or It's Free
$89 → $0 Service Call & Diagnosis — offer ends May 25
Frequently Asked Questions
How hot is too hot for a refrigerator? Most residential refrigerators are designed for ambient temperatures between 55 and 110 degrees. Above 110 degrees, the compressor may not maintain safe food temperatures. This is relevant for garage units in Sacramento during extreme heat events.
Should I turn the fridge colder in summer? No. Keep it at the recommended 35 to 38 degrees. Setting it colder forces the compressor to work even harder. Focus on maintenance — clean coils and good gaskets — rather than lowering the setpoint.
How much does a pre-summer tune-up cost? A professional refrigerator tune-up typically costs 80 to 150 dollars and takes about an hour. Given that a compressor failure costs 400 to 700 dollars, the tune-up is a high-value investment.
The Real Cost of DIY
Average DIY attempt: $150-400 in tools you may use once, plus the risk of further damage. Our diagnostic visit costs $0 — we find the problem and give you an honest quote.
Licensed & Insured · 90-Day Warranty · Same-Day Service
Beat Sacramento's Heat with EasyBear
Do not wait for a 105-degree day to discover your refrigerator is not ready. EasyBear offers pre-summer refrigerator tune-ups throughout Sacramento and the Bay Area. Our technicians clean coils, test temperatures, inspect fans and seals, and catch problems before the heat arrives.
Book your pre-summer fridge prep with EasyBear today. Same-day appointments available, transparent pricing, and the confidence that your refrigerator will perform when Sacramento's summer does its worst.
Senior Appliance Repair Technician · 15 years experience
EPA-certified technician with 15 years of experience specializing in refrigerator and cooling system repairs.