KitchenAid Refrigerator Sensor Replacement — ExtendFresh Sensors & Temperature Monitoring
KitchenAid refrigerators use NTC (Negative Temperature Coefficient) thermistors to monitor temperature in each compartment. Standard models have two sensors — one in the fresh food section and one in the freezer. KitchenAid models equipped with ExtendFresh temperature management add one or two additional sensors in the fresh food compartment to provide zone-specific temperature data. These additional sensors allow the control board to modulate the ExtendFresh circulation fan and the air damper between freezer and fresh food sections with greater precision than a single-sensor system.
Sensor failures are deceptive because the refrigerator continues to run — the compressor, fans, and defrost system all operate — but the control board makes decisions based on incorrect temperature data. A sensor reading artificially cold causes the board to reduce cooling (the board thinks the compartment is already cold enough), leading to warm temperatures. A sensor reading artificially warm causes the board to increase cooling aggressively, potentially freezing items in the fresh food compartment or running the compressor continuously.
How KitchenAid Temperature Sensors Work
All temperature sensors in KitchenAid refrigerators are NTC thermistors — passive electronic components whose electrical resistance decreases as temperature increases. The control board sends a small voltage through the thermistor and measures the resistance to calculate the temperature.
Typical resistance values for the 10K NTC thermistors used in KitchenAid refrigerators:
| Temperature | Expected Resistance |
|---|---|
| 0 degrees F (-18 degrees C) | 32,000–35,000 ohms |
| 32 degrees F (0 degrees C) | 15,000–17,000 ohms |
| 37 degrees F (3 degrees C) | 12,000–14,000 ohms |
| 50 degrees F (10 degrees C) | 8,000–9,500 ohms |
| 77 degrees F (25 degrees C) | 5,000–6,000 ohms (room temperature reference) |
These values are approximate — the exact resistance curve depends on the specific thermistor model. The key diagnostic principle is that resistance should change smoothly and predictably with temperature. An open reading (infinite ohms), a shorted reading (near 0 ohms), or a reading that does not change when the sensor is warmed or cooled indicates a failed sensor.
Do You Have the Right Tools?
Multimeter ($85), vacuum pump ($250), diagnostic software, and specialized hand tools. Our technician arrives with $15K+ in professional tools — your diagnostic is free.
Licensed & Insured · 90-Day Warranty · Same-Day Service
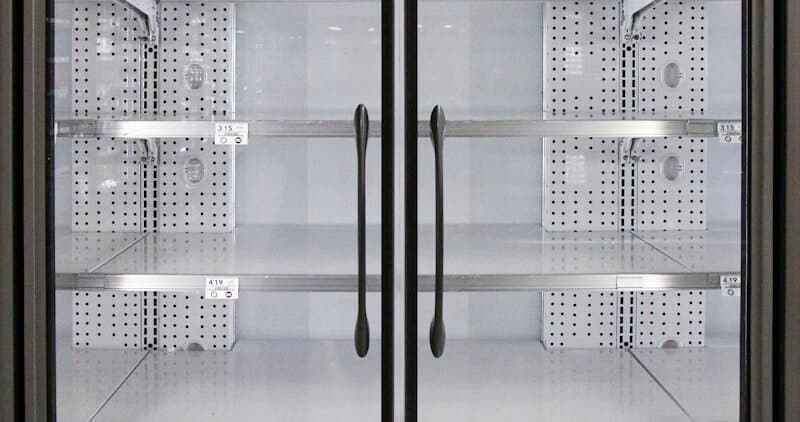
Sensor Locations on KitchenAid Models
Fresh food thermistor. Located on the upper rear wall of the fresh food compartment, usually behind a small cover or clip. On some KRFC models, it is integrated into the air inlet area near the damper. This sensor provides the primary temperature reading that the control board uses to cycle the compressor.
Freezer thermistor. Located on the rear wall of the freezer compartment, typically near the evaporator fan or mounted to the evaporator cover panel. On KitchenAid French door models, this sensor is accessible by removing the freezer rear panel (same panel that covers the evaporator fan motor).
ExtendFresh sensors (1-2 additional). These are positioned at different heights or zones within the fresh food compartment — one may be near the middle shelf and another near the produce drawer area. Their purpose is to detect temperature stratification (warm at the top, cold at the bottom, or vice versa) and adjust the ExtendFresh circulation fan to equalize temperatures across zones.
Defrost thermostat / bi-metal sensor. Located on the evaporator coil assembly in the freezer. This is a temperature-activated switch (not a thermistor) that opens at approximately 140 degrees F to terminate the defrost cycle. While technically a temperature sensor, it operates differently from the NTC thermistors — it is either open or closed, not variable resistance.
Symptoms of Sensor Failure by Location
Fresh food thermistor failure — reads too cold:
- Fresh food compartment gradually warms to 45-55 degrees F
- Compressor runs less frequently than normal
- ExtendFresh circulation fan may run less (board thinks the compartment is already cold)
- No error code on many models because the reading is within plausible range
Fresh food thermistor failure — reads too warm:
- Fresh food items freeze, especially near the rear wall and top shelf
- Compressor runs continuously or near-continuously
- Control board may display a temperature reading that does not match a thermometer placed inside
- Excessive frost on the evaporator if the compressor never cycles off long enough for defrost
Freezer thermistor failure — reads too cold:
- Freezer warms above 10 degrees F
- Ice cream softens, frozen items partially thaw
- Compressor may run normally but the damper stays closed (board thinks the freezer is already cold)
Freezer thermistor failure — reads too warm:
- Freezer drops well below 0 degrees F
- Excessive frost buildup on food packaging
- Compressor runs continuously for the freezer, ignoring the fresh food compartment
ExtendFresh sensor failure:
- Temperature varies significantly by shelf position (5-10 degree difference between shelves)
- FreshFlow produce preserver seems less effective
- ExtendFresh circulation fan behavior changes — runs constantly, never runs, or cycles erratically
- The primary fresh food thermistor reads correctly at its location, but other areas of the compartment drift
Safety First — Know the Risks
Appliances involve high voltage (120-240V), pressurized water, gas lines, and chemical refrigerants. Over 400 DIY repair injuries are reported yearly. Our techs are licensed and insured — let them handle the risk.
Licensed & Insured · 90-Day Warranty · Same-Day Service
Step-by-Step Sensor Replacement
Fresh food and ExtendFresh sensors:
- Unplug the refrigerator
- Locate the sensor (refer to locations above). It is typically a small cylindrical or oval component clipped to the wall or mounted in a plastic housing
- Gently unclip or unscrew the sensor from its mount
- Trace the sensor wire to its connector — it may plug into a harness near the top of the compartment or route through the cabinet to the control board
- Disconnect the sensor connector
- Connect the new sensor to the same connector
- Mount the new sensor in the exact same position as the old one — position matters because temperature varies by location within the compartment
- Plug in the refrigerator and allow 4-6 hours for temperatures to stabilize before evaluating
Freezer thermistor:
- Unplug the refrigerator
- Remove all items from the freezer
- Remove the freezer rear panel (4-6 screws)
- Locate the thermistor — it is typically clipped to the evaporator panel or mounted near the evaporator fan
- Disconnect the wire connector
- Remove the sensor from its clip or mount
- Install the new sensor in the same position
- Reconnect the connector, reinstall the rear panel
- Allow 4-6 hours to stabilize
Defrost thermostat (bi-metal):
- Unplug the refrigerator
- Remove the freezer rear panel to access the evaporator
- Locate the bi-metal thermostat — it is clamped to one of the evaporator tubes
- Disconnect the two wire leads (note which wire goes to which terminal)
- Release the clamp and remove the old thermostat
- Clamp the new thermostat to the same evaporator tube in the same position
- Reconnect the wires, reinstall the rear panel
Same-Day Appliance Repair
Fixed or It's Free
$89 → $0 Service Call & Diagnosis — offer ends May 25
What the Replacement Costs
| Component | Cost Range |
|---|---|
| Fresh food thermistor (OEM) | $10–$25 |
| Freezer thermistor (OEM) | $10–$25 |
| ExtendFresh zone sensor (OEM) | $12–$28 |
| Defrost bi-metal thermostat | $8–$20 |
| Professional labor — single sensor | $60–$120 |
| Professional labor — multiple sensors | $80–$150 |
| Total — single sensor (professional) | $80–$150 |
| Total — single sensor (DIY) | $8–$25 |
Sensors are among the cheapest refrigerator parts. The labor cost typically exceeds the part cost by 3-5x, making this one of the most cost-effective DIY repairs.
The Real Cost of DIY
Average DIY attempt: $150-400 in tools you may use once, plus the risk of further damage. Our diagnostic visit costs $0 — we find the problem and give you an honest quote.
Licensed & Insured · 90-Day Warranty · Same-Day Service
DIY vs Professional Assessment
Sensor replacement is an easy DIY project — no specialized tools, no refrigerant handling, no heavy lifting. The sensors clip on or plug in. The primary challenge is diagnosis: confirming that the sensor is actually the failed component rather than the control board, wiring, or another issue. The resistance test described above is the definitive diagnostic step and requires only a basic multimeter.
Professional service is warranted when: (1) you are unsure which sensor has failed and do not have a multimeter, (2) the refrigerator has ExtendFresh with 3-4 sensors and you need to identify which specific sensor is reading incorrectly, or (3) the sensor tests good but the temperature problem persists, suggesting a control board issue rather than a sensor issue.
Frequently Asked Questions
How many temperature sensors does my KitchenAid refrigerator have?
Standard models have 2 (fresh food + freezer). ExtendFresh models have 3-4 (additional sensors in the fresh food compartment for zone-specific monitoring). All models have a defrost thermostat on the evaporator, though this is a switch rather than a variable sensor. Check your model number — most KRFC and KRMF models manufactured after 2018 include ExtendFresh.
Can a bad sensor cause my KitchenAid to freeze food in the fresh food section?
Yes — if the fresh food thermistor reads warmer than actual temperature, the control board increases cooling aggressively. Items near the air inlet and rear wall freeze first. This is one of the most common sensor failure symptoms and is often mistaken for a damper problem.
How do I test a sensor without removing it?
Place an accurate thermometer next to the sensor location. Compare the temperature shown on the refrigerator's display (which reflects the sensor reading) with the thermometer reading. A discrepancy of more than 3-4 degrees suggests a sensor problem. For definitive testing, disconnect the sensor and measure its resistance with a multimeter, then compare to the expected values for that temperature.
Do I need to recalibrate the ExtendFresh system after sensor replacement?
The system recalibrates automatically. After sensor replacement, allow 24-48 hours for the ExtendFresh algorithm to stabilize its fan cycling pattern based on the new sensor's readings. Temperature fluctuations of 2-3 degrees during this period are normal.
Can I replace a KitchenAid sensor with a generic NTC thermistor?
Technically possible if the generic thermistor has the same resistance curve (10K NTC with matching beta coefficient), but not recommended. KitchenAid OEM sensors include the correct connector, wire length, and mounting clip. A generic thermistor requires splicing wires and fabricating a mount, creating potential reliability issues for a $10-25 savings.
Sensor testing and replacement for KitchenAid single-sensor and ExtendFresh multi-sensor systems. Book a technician →