KitchenAid Refrigerator Ice Maker Not Making Ice — Complete Fix Guide
KitchenAid's Professionally-Inspired Design ice system is engineered to deliver consistent, high-quality ice production — some premium models even feature Clear Ice technology that produces restaurant-quality transparent cubes. When your KitchenAid ice maker stops producing, the failure typically involves the water delivery system rather than the ice maker mechanism itself. Understanding how KitchenAid's ice architecture differs from standard brands is essential for accurate diagnosis.
This guide addresses ice production failures across the KitchenAid refrigerator lineup: KRFF French door models, KRMF counter-depth units, and KBSD built-in refrigerators with their more complex dual ice maker configurations.
How KitchenAid Ice Systems Work
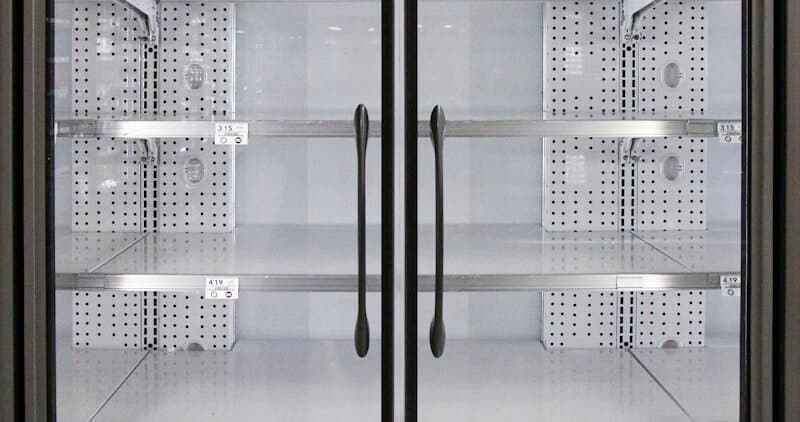
KitchenAid ice makers operate on a timed fill cycle. The water inlet valve opens for a calibrated period (typically 7-8 seconds), filling the ice mold through a dedicated fill tube. The freezer temperature drops the water to freezing, then the harvest cycle rotates the ejector blades to push cubes into the bin. On models with the FreezShield feature, an ice wall insulator prevents ice from melting during door-open periods.
The EveryDrop water filtration system (Filter 4 on most French door models, Filter 5 on side-by-side units) sits in the water path before the inlet valve. KitchenAid specifies 6-month filter replacement intervals, and the control board tracks filter life. Unlike some brands where an expired filter merely affects taste, KitchenAid's system can restrict water flow enough to completely halt ice production when the filter clogs.
Do You Have the Right Tools?
Refrigerant gauges ($200+), vacuum pump ($250), leak detector ($150), and EPA-certified recovery equipment. Our technician arrives with $15K+ in professional tools — your diagnostic is free.
Licensed & Insured · 90-Day Warranty · Same-Day Service
Safety Precautions
- Shut off the water supply at the wall valve before any ice system work. KitchenAid's water connections are typically at the bottom rear behind a cover plate.
- Disconnect power before accessing any electrical components.
- On KBSD built-in models, the water line may route through custom cabinetry — trace the line before disconnecting to avoid flooding concealed spaces.
- Have towels ready. Ice maker work inevitably involves water spillage when disconnecting fill tubes.
Most Common Causes (Ranked by Likelihood)
1. Frozen or Clogged Water Fill Tube (30% of cases)
The fill tube delivers water from the inlet valve to the ice maker mold. On KitchenAid French door models, this tube runs from the rear of the unit up through the freezer door hinge area and into the ice maker compartment. The tube is vulnerable to freezing at the point where it enters the freezer compartment — a known issue on KRFF and KRMF models where the tube passes through a temperature transition zone.
Bay Area homes with slightly lower water pressure (below 40 PSI) experience this more frequently because the slower water fill allows partial freezing during the fill cycle itself.
Diagnosis: Remove the ice maker bin and look at the fill cup area above the mold. If you see ice formations around the fill tube opening, or if the tube feels rigid when gently squeezed, it is frozen. You may also notice a small ice dam forming at the entry point.
DIY Difficulty: Easy Parts Cost: $0-25 (if tube needs replacement: $15-25) Professional Repair Cost: $95-175
Repair Steps:
- Turn off the ice maker using the power switch (arm or button depending on model).
- Unplug the refrigerator and open the freezer.
- Locate the fill tube — it enters the ice maker area from above or behind, directing water into the ice mold tray.
- Use a hair dryer on low heat to thaw the frozen section. Direct warm air at the fill cup and tube for 5-10 minutes. Do NOT use high heat — the plastic tube deforms above 150F.
- Once thawed, pour a cup of warm water through the tube from the top to confirm flow.
- Restore power. If the tube refreezes within weeks, the fill tube heater (a small heating element wrapped around the tube) has failed and needs replacement.
2. Water Inlet Valve Failure (25% of cases)
KitchenAid's water inlet valve is an electrically-operated solenoid that opens when the control board signals a fill cycle. The valve requires a minimum of 20 PSI water pressure to open properly — and KitchenAid recommends 40-60 PSI for optimal ice production. The valve assembly on most KitchenAid refrigerators is located at the bottom rear behind an access panel.
On KBSD built-in models, the valve is significantly harder to access because the unit cannot be pulled forward. Service requires removing the bottom grille and working from below.
Diagnosis: Listen during what should be a fill cycle (approximately every 90 minutes). You should hear a brief buzzing sound as the solenoid opens. Silence means either the valve has failed, the control board is not sending signal, or the valve is not receiving water. Check the supply line first — then test voltage at the valve terminals during a fill request. KitchenAid valves should receive 120V AC during fill. If voltage is present but no water flows, the valve is defective.
DIY Difficulty: Moderate Parts Cost: $35-75 (part number W10408179 or equivalent for most models) Professional Repair Cost: $135-250
Repair Steps:
- Shut off the water supply and disconnect power.
- Remove the bottom rear access panel (2-4 screws depending on model).
- Place towels below the valve area — residual water will spill.
- Disconnect the water supply line from the valve inlet (1/4" compression fitting on most models).
- Disconnect the outlet tube leading to the fill tube.
- Unplug the electrical connector from the valve solenoid.
- Remove the mounting screws (usually 2) and extract the old valve.
- Install the new valve in reverse order. Tighten compression fittings snug — do not overtighten.
- Restore water and power. Run a manual fill cycle to test (press and hold the ice maker reset button for 10 seconds on most models).
3. Expired or Clogged EveryDrop Filter (20% of cases)
KitchenAid's EveryDrop filtration system (Filters 4 and 5 are the most common for refrigerators) is more restrictive than standard refrigerator filters by design — it removes more contaminants. The tradeoff is that flow restriction increases significantly as the filter ages. Beyond the recommended 6-month interval, a clogged EveryDrop filter can reduce water flow to the ice maker below the minimum threshold for a complete fill.
KitchenAid models track filter usage and display a status indicator (blue = good, yellow = order soon, red = replace now). However, in areas with hard water or high sediment — common in parts of the Sacramento region — the filter may clog well before the 6-month indicator triggers.
Diagnosis: Remove the filter and attempt to produce ice without it (use the bypass plug that came with the refrigerator, or run briefly without a filter for testing only). If ice production resumes immediately, the old filter was the restriction.
DIY Difficulty: Easy Parts Cost: $40-60 (genuine EveryDrop Filter 4 or 5) Professional Repair Cost: $95-150 (includes filter + service call)
Repair Steps:
- Locate the filter — on most KitchenAid French door models, it is in the upper right interior of the fresh-food compartment. On some models, it is in the base grille.
- Turn the filter counterclockwise to release (push-turn mechanism).
- Install the new filter by inserting and turning clockwise until it clicks.
- Hold the filter reset button for 3 seconds to reset the indicator.
- Dispense 3-4 gallons of water through the dispenser to flush the new filter before making ice.
4. Ice Maker Module Failure (15% of cases)
The ice maker module contains the motor, heater, and thermostat that control the harvest cycle. When this module fails, the mold may fill with water but never cycle to eject cubes — or the thermostat may not trigger the harvest even though ice has formed. On KitchenAid models with the Professionally-Inspired ice system, the module is integrated with the ice maker frame and must be replaced as a unit.
Diagnosis: Check if there is frozen water in the mold but no ejection occurring. If the mold is full of ice but the unit never harvests, the module has failed. You can also try a manual harvest: on most KitchenAid ice makers, there is a small test button (or notch for a flat-head screwdriver) on the front of the module. Press it — you should hear the motor activate and see the ejector blades rotate.
DIY Difficulty: Moderate Parts Cost: $80-175 Professional Repair Cost: $195-375
Repair Steps:
- Turn off the ice maker and disconnect power.
- Remove the ice bin.
- Release the ice maker from its mounting bracket (squeeze the spring clip or remove screws — varies by model year).
- Disconnect the wire harness from the module.
- Slide the ice maker forward and out of the freezer.
- Install the new assembly, connect the harness, and remount.
- Restore power and initiate a manual test cycle to confirm operation.
5. Freezer Temperature Too Warm (10% of cases)
KitchenAid ice makers require the freezer to maintain 0F to -5F for proper ice production. If the freezer temperature rises above 10F, ice production halts entirely. The Preserva Food Care System on dual-system models maintains freezer temperature independently of the fresh-food section — so a freezer-specific cooling failure will stop ice without affecting refrigerator temperatures.
This is often secondary to another issue: frosted evaporator coils (defrost failure), a failing freezer fan, or a stuck damper preventing adequate airflow to the freezer section.
Diagnosis: Place a thermometer in the freezer for 2 hours with the door closed. If temperature is above 5F, the freezer cooling issue must be resolved before addressing ice maker operation.
DIY Difficulty: Varies (depends on root cause) Parts Cost: $35-200 Professional Repair Cost: $150-400
Safety First — Know the Risks
Refrigerant (R-134a/R-600a) requires EPA certification to handle. Improper discharge is a federal violation and health hazard. Our techs are licensed and insured — let them handle the risk.
Licensed & Insured · 90-Day Warranty · Same-Day Service
Diagnostic Sequence for KitchenAid Ice Makers
- Verify the ice maker is turned on. Check the power arm position (down = on) or the button/switch status. On models with door-mounted controls, confirm ice production is not paused.
- Check freezer temperature — must be 0F or below. If above 5F, address cooling first.
- Inspect the fill tube for ice blockage. This is the most common and easiest fix.
- Listen for the inlet valve buzzing during fill cycles (every ~90 minutes).
- Check water supply — ensure the wall valve is fully open and the supply line is not kinked.
- Test with filter removed — use the bypass plug to rule out filter clogging.
- Attempt manual harvest — press the test button to verify the module can cycle.
- Enter diagnostic mode for error codes specific to the ice system.
Same-Day Appliance Repair
Fixed or It's Free
$89 → $0 Service Call & Diagnosis — offer ends May 25
DIY vs Professional Repair
| Issue | DIY? | Parts Cost | Professional Cost |
|---|---|---|---|
| Frozen fill tube | Yes | $0-25 | $95-175 |
| Water inlet valve | Moderate | $35-75 | $135-250 |
| EveryDrop filter replacement | Yes | $40-60 | $95-150 |
| Ice maker module | Moderate | $80-175 | $195-375 |
| Freezer temp issue | Varies | $35-200 | $150-400 |
The Real Cost of DIY
Average DIY attempt: $150-400 in tools you may use once, plus the risk of further damage. Our diagnostic visit costs $0 — we find the problem and give you an honest quote.
Licensed & Insured · 90-Day Warranty · Same-Day Service
Prevention for KitchenAid Ice Systems
- Replace the EveryDrop filter every 6 months without exception. Set a phone reminder — do not rely solely on the unit's indicator in hard-water areas.
- Check water pressure annually. KitchenAid requires 40-60 PSI. Low pressure causes slow fills and frozen fill tubes.
- Empty and clean the ice bin monthly. Ice absorbs freezer odors, and old ice can jam the dispenser chute.
- Inspect the fill tube annually for signs of partial freezing or mineral buildup at the entry point.
FAQ
Q: My KitchenAid has the Clear Ice feature and it stopped working — is it a different repair?
Clear Ice models use a slower freeze cycle and a circulation pump to produce transparent ice. The water delivery system is the same, but the module is more complex and expensive ($150-250 for the assembly). Diagnose the water supply path first — 80% of Clear Ice failures are still water delivery issues, not the specialty module.
Q: Can I use a generic filter instead of EveryDrop in my KitchenAid?
Physically yes, but generic filters may have different flow rates that either restrict ice production or bypass proper filtration. KitchenAid's warranty requires genuine EveryDrop filters for covered repairs. For ice production issues specifically, always test with the genuine filter before assuming other problems.
Q: My KitchenAid ice maker makes ice but the cubes are small or hollow — what does this mean?
Small or hollow cubes indicate insufficient water reaching the mold during each fill cycle. This points to low water pressure, a partially clogged filter, or a failing inlet valve that does not open fully. Check water pressure first — it should be at least 40 PSI at the refrigerator connection.
Q: How long should it take for a KitchenAid ice maker to produce a full bin?
Most KitchenAid models produce 8-10 cubes per cycle, with cycles completing every 90-120 minutes. A full bin typically takes 24-48 hours from a fresh start. After filter replacement or any water system repair, allow 24 hours before evaluating ice production levels.
KitchenAid ice system not cooperating? Our technicians carry EveryDrop filters and common inlet valve assemblies on every truck. Schedule ice maker repair →

