How to Replace the Ice Maker Assembly on a Whirlpool Refrigerator
Whirlpool ice maker modules are self-contained units that mount inside the freezer compartment with a single screw and a wire harness connection. When the module fails — producing no ice, only partial cubes, or cycling endlessly without ejecting — replacing the entire module is the standard repair because the internal components (thermostat, heating element, motor, and ejector blades) are not individually serviceable. Whirlpool manufactures the ice makers used across their entire brand portfolio (Whirlpool, Maytag, KitchenAid, Amana), making this one of the most universal appliance repairs.
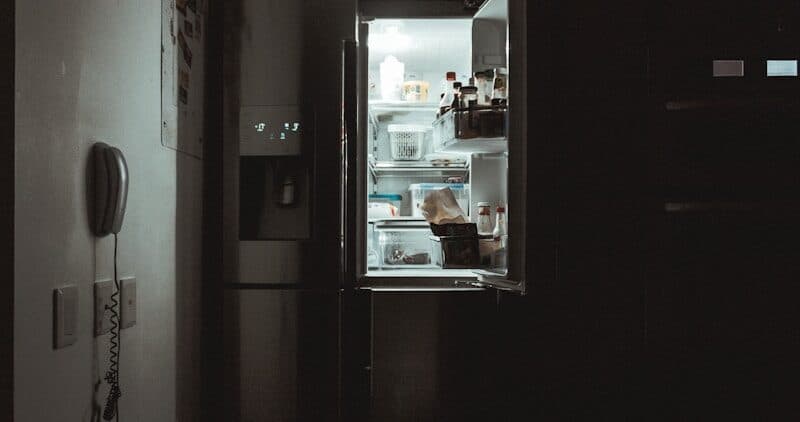
Whirlpool refrigerator ice makers come in two configurations: standard mounting (module mounts on the left wall of the freezer compartment, ice drops into a removable bin below) found in WRS side-by-side and WRT top-mount models, and In-Door-Ice (module mounts inside the freezer door, ice stores in a door-mounted bin to free up shelf space) found in select WRF French door models. The replacement procedure differs between these configurations, primarily in how the fill tube routes water to the module.
Before You Start
- Tools needed: Phillips #2 screwdriver (mounting screw), 1/4" nut driver (optional for fill tube bracket), pliers or towel (for fill tube connection)
- Parts needed: Whirlpool ice maker assembly — common part numbers include W10882923 (most WRS/WRF models), W10190961 (older WRT models), and W10377151 (In-Door-Ice models). Verify by your model number on the rating plate inside the fresh food section.
- Time required: 15-25 minutes
- Difficulty: Beginner
- Safety warning: Unplug the refrigerator or turn off the circuit breaker. Turn off the water supply at the saddle valve or angle stop behind the refrigerator. Have a towel ready — the fill tube will drip when disconnected.
Do You Have the Right Tools?
Refrigerant gauges ($200+), vacuum pump ($250), leak detector ($150), and EPA-certified recovery equipment. Our technician arrives with $15K+ in professional tools — your diagnostic is free.
Licensed & Insured · 90-Day Warranty · Same-Day Service
Step-by-Step Instructions
Step 1: Prepare the Refrigerator
Unplug the refrigerator from the wall outlet. If the outlet is difficult to reach behind the unit, turn off the circuit breaker for the refrigerator circuit. Shut off the water supply valve — this is typically a saddle valve on the cold water line behind the refrigerator, or an angle stop if a dedicated line was installed. Open the freezer door and remove the ice bin by lifting it straight up and pulling it out.
Step 2: Remove the Old Ice Maker Module
The ice maker module is secured to the freezer wall with a single Phillips screw located at the top-front of the module mounting bracket. Remove this screw and set it aside. Gently pull the ice maker module forward and down — it slides off a rear mounting hook or bracket.
As you pull the module away from the wall, locate the wire harness connector on the rear. This is a single plug connector (typically white or gray) that provides power to the module. Press the release tab on the connector and pull the plug apart. Do not pull on the wires themselves — grip the connector body.
Step 3: Disconnect the Fill Tube
The fill tube is a small copper or plastic tube that delivers water from the rear of the refrigerator into the ice maker mold. On standard-mount models, the fill tube enters the freezer through the rear wall and curves over the ice maker mold. It may be held in position by a fill tube clamp or simply friction-fit.
For standard models: the fill tube remains in the freezer wall — you do not need to remove it. The new ice maker positions beneath the fill tube outlet the same way the old one did.
For In-Door-Ice models: the fill tube routes through the door hinge area and connects to the module inside the door. Disconnect the fill tube fitting at the module end (quarter-turn compression fitting or push-fit connector depending on model year).
Step 4: Inspect the Fill Tube
Before installing the new module, check the fill tube for mineral buildup or ice blockage. Sacramento and Bay Area water (8-12 grains/gallon hardness) deposits calcium inside the fill tube over time, gradually restricting flow. A restricted fill tube produces small or hollow ice cubes even with a new module.
Flex the fill tube gently — if you hear or feel mineral flakes breaking loose inside, flush the tube with warm water before installing the new module. If the tube is severely restricted (less than 50% open), replace it. Whirlpool fill tubes are model-specific but inexpensive ($8-$15).
Step 5: Install the New Ice Maker Module
Connect the wire harness first — plug the connector into the new module until the release tab clicks. Route the wire harness the same way the original was routed (typically along the freezer wall behind the module).
Slide the new module onto the rear mounting hook or bracket. Align the front mounting hole with the screw hole in the freezer wall. Insert and tighten the Phillips mounting screw. Snug only — overtightening can crack the plastic mounting bracket on the module.
Verify that the fill tube outlet is positioned directly above the ice maker mold (the crescent-shaped trough). The water must drop into the mold, not onto the ejector blades or the module housing. Adjust the fill tube position if needed.
Step 6: Verify the Fill Tube Heater (If Equipped)
Many Whirlpool models include a fill tube heater — a small heating element that wraps around the fill tube where it enters the freezer to prevent water from freezing in the tube between fill cycles. Verify this heater is properly positioned and connected. If the heater has been dislodged during the ice maker replacement, the fill tube will freeze shut within 24-48 hours and ice production will stop.
The heater wire connects to a separate small connector near the fill tube entry point — confirm it is plugged in.
Step 7: Reinstall the Ice Bin and Restore Power
Slide the ice bin back onto its rails or support shelf beneath the ice maker. The bin must be properly seated — if it sits too high, the ejector arm's shutoff lever will not reach the bin's fill level, and ice production will not stop when the bin is full (causing overflow).
Plug the refrigerator back in. Turn on the water supply. Wait 2-4 hours for the first batch of ice. The first 1-2 batches may be smaller or oddly shaped as the system primes — this is normal.
Step 8: Test and Calibrate
After the first batch ejects, check the following:
- Cube size: Full, crescent-shaped cubes indicate proper fill. Small or thin cubes indicate low water pressure or a restricted fill tube.
- Ejection: Cubes should drop cleanly into the bin. If they stick to the mold, the mold heating element inside the module may not be functioning — the module is defective out of the box (rare but possible).
- Shutoff: Fill the bin to the rim. The ejector arm should ride up on the ice pile and stop production. If it does not, the shutoff arm may be bent or the bin is not properly seated.
- Production rate: Whirlpool ice makers produce approximately 8-10 cubes per cycle, with a cycle every 2-3 hours. Expect a full bin (approximately 4 lbs) within 24 hours at normal freezer temperature (0°F).
If the ice maker does not begin producing ice within 4 hours, enter Whirlpool diagnostic mode (3-button sequence from the tech sheet located behind the base grille or inside the fresh food compartment ceiling) and check for F8E# codes related to the water system.
In-Door-Ice Specific Notes
Whirlpool's In-Door-Ice system positions the ice maker inside the freezer door instead of the cabinet wall. Key differences:
- The fill tube routes through the door hinge area — check the hinge seal for leaks after reconnection.
- The wire harness also routes through the hinge — ensure it is not pinched when the door closes.
- The ice bin is inside the door, not a separate pull-out bin — verify the bin sits flush in the door pocket.
- Door alignment affects fill tube alignment — if the door was recently adjusted or the hinge is loose, the fill tube may not align with the mold correctly.
Safety First — Know the Risks
Refrigerant (R-134a/R-600a) requires EPA certification to handle. Improper discharge is a federal violation and health hazard. Our techs are licensed and insured — let them handle the risk.
Licensed & Insured · 90-Day Warranty · Same-Day Service
Troubleshooting After Replacement
- No ice after 4 hours: Verify the water supply is turned on. Check for ice blockage in the fill tube (common if the old module was left disconnected long enough for the tube to freeze). Run warm water through the tube to clear any blockage.
- Very small cubes: Low water pressure at the inlet valve (minimum 20 PSI required). Also check the EveryDrop water filter — a clogged filter restricts flow. Replace the filter if it has been installed for more than 6 months.
- Ice has bad taste or odor: The first 2-3 batches may pick up freezer odors. Discard them. If the taste persists, replace the water filter. Whirlpool uses EveryDrop filters (proprietary but widely available) — turn quarter-turn to remove.
- Cubes stuck together in bin (clumping): The freezer temperature may be too warm. Verify 0°F. Also check that the Adaptive Defrost cycle is not running too frequently (warming the freezer enough to partially melt and refreeze cubes).
- Ice maker cycles but no water enters mold: The water inlet valve at the rear lower panel of the refrigerator may have failed. Test by pressing the ice maker's test button (small, located on the module front or bottom) — if the module cycles but no water flows during the fill phase, the inlet valve is the problem, not the module.
When to Call a Professional
- If the water supply line behind the refrigerator leaks or the saddle valve is corroded — water line work near electrical components carries risk.
- If the ice maker replacement does not resolve the problem and you suspect the inlet valve or control board — these components involve electrical testing and sealed water connections.
- If the fill tube enters the freezer at an unusual angle or is routed through a sealed wall penetration that you cannot access.
Same-Day Appliance Repair
Fixed or It's Free
$89 → $0 Service Call & Diagnosis — offer ends May 25
The Real Cost of DIY
Average DIY attempt: $150-400 in tools you may use once, plus the risk of further damage. Our diagnostic visit costs $0 — we find the problem and give you an honest quote.
Licensed & Insured · 90-Day Warranty · Same-Day Service
Cost Comparison: DIY vs Professional
| DIY | Professional | |
|---|---|---|
| Parts | $60-$120 | $60-$120 |
| Labor | $0 | $120-$200 |
| Time | 15-25 min | 15-20 min |
| Risk | Low | Warranty on service |
Need Professional Help?
Don't Void Your Warranty
Opening your appliance yourself may void the manufacturer warranty. Our repair comes with a 90-day guarantee, and we document everything for warranty compliance.
Licensed & Insured · 90-Day Warranty · Same-Day Service
FAQ
Q: How do I find the right ice maker part number for my Whirlpool refrigerator? A: Locate your model number on the rating plate (inside the fresh food section, left wall). Search this model number on the Whirlpool parts website or a parts retailer. Common numbers: W10882923 (WRS/WRF), W10190961 (older WRT), W10377151 (In-Door-Ice).
Q: Do Whirlpool ice maker parts work in Maytag and KitchenAid refrigerators? A: Yes. Whirlpool manufactures the ice makers for all Whirlpool Corporation brands. The same physical module is used with different brand labels. Cross-reference using your specific model number.
Q: How do I test if my Whirlpool ice maker is bad before replacing it? A: Press the test button on the module (small button on the front or bottom). The module should cycle: you will hear the motor, the ejector blades rotate, and then the fill valve should open for 7-8 seconds. If no motor sound — module is dead. If motor runs but no water — inlet valve is the issue.
Q: Why does my new ice maker make a clicking sound every few minutes? A: This is the module's thermostat checking the mold temperature. It clicks when it senses the mold is cold enough to begin a new fill cycle. This is normal operation.
Need a certified technician? Book same-day repair →

