How to Replace a Whirlpool Refrigerator Freezer Door Gasket
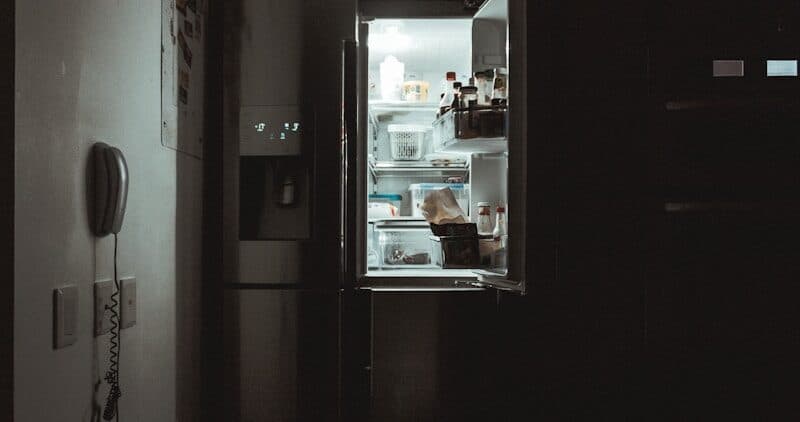
The freezer door gasket on a Whirlpool refrigerator creates the airtight seal that keeps cold air inside the compartment. When this magnetic rubber gasket wears, warps, or tears, warm kitchen air enters the freezer continuously. The compressor runs longer trying to maintain 0°F, energy bills increase, frost builds up on the evaporator coils and along the door opening, and eventually the freezer cannot maintain safe food storage temperatures. Replacing a worn gasket is one of the most cost-effective refrigerator repairs — the part is relatively inexpensive and the procedure requires no special tools.
Whirlpool freezer door gaskets use a push-in retaining lip that fits into a channel around the door liner. Unlike some older designs that use screws through the gasket flange, Whirlpool's current design (used on WRF French door, WRS side-by-side, and WRT top-mount models) allows gasket replacement without removing the door or any screws. The gasket material is a flexible magnetic rubber that creates a seal through magnetic attraction to the steel door frame.
Before You Start
- Tools needed: None required for the gasket itself. A hair dryer or heat gun on low setting helps straighten a gasket that has been folded in its shipping box.
- Parts needed: Whirlpool door gasket specific to your model and door position. On French door models, the left and right freezer drawer gaskets are different parts. On side-by-sides, the freezer side gasket differs from the fresh-food side. Always order by model number, not by generic measurement.
- Time required: 20-30 minutes
- Difficulty: Beginner
- Safety warning: No need to unplug the refrigerator for this repair — the gasket is an external component. Keep the door open only as long as necessary to minimize temperature rise in the freezer.
Do You Have the Right Tools?
Refrigerant gauges ($200+), vacuum pump ($250), leak detector ($150), and EPA-certified recovery equipment. Our technician arrives with $15K+ in professional tools — your diagnostic is free.
Licensed & Insured · 90-Day Warranty · Same-Day Service
Step-by-Step Instructions
Step 1: Prepare the New Gasket
New gaskets arrive folded or rolled in a box. The folds can create kinks and waves in the rubber that prevent the gasket from seating properly against the door frame. Before installation, soak the new gasket in warm water (110-120°F) for 5-10 minutes, or use a hair dryer on low heat to warm and straighten the folded sections. Lay the gasket flat on a clean surface and let it relax to its natural shape. This preparation step is critical — installing a kinked gasket leaves gaps in the seal.
Step 2: Identify the Gasket Retaining Method
Whirlpool uses a push-in retention system on current models. Open the freezer door and inspect the existing gasket where it meets the door. Pull the gasket lip away from the door liner slightly — you will see it is pushed into a groove (channel) that runs around the perimeter of the door liner. There are no screws holding the gasket (on current Whirlpool models). On some older models (pre-2010), the gasket may be held by screws that pass through a gasket flange and thread into the door liner — if you see screw heads, you have the older style and will need a Phillips screwdriver or 1/4" nut driver.
Step 3: Remove the Old Gasket
Start at the top corner of the freezer door. Grip the gasket and pull it firmly away from the door liner. The retaining lip will pop out of the channel. Work your way around the entire perimeter, pulling the gasket out of the channel continuously. On push-in style gaskets, this requires moderate force but should come free without tearing the door liner.
For screw-retained gaskets: loosen (do not fully remove) the screws around the perimeter. Loosen just enough to free the gasket flange — removing screws completely can cause the door liner to shift position relative to the outer door shell. Work in sections: loosen the top screws, tuck the new gasket under the flange at the top, then move to each side, then the bottom.
Step 4: Clean the Gasket Channel
With the old gasket removed, wipe the channel (groove) with a warm, damp cloth. Remove any mold, food residue, or adhesive deposits. Inspect the channel for cracks or damage that could prevent the new gasket from seating properly. The channel should be a clean, uniform groove all the way around.
Also clean the door frame surface where the gasket's magnetic strip contacts the refrigerator cabinet. Any residue on this surface creates gaps in the magnetic seal. Sacramento kitchen environments with cooking grease in the air gradually coat gasket surfaces, reducing magnetic attraction.
Step 5: Install the New Gasket
Start at the top center of the door. Push the gasket's retaining lip firmly into the channel — you should feel it click or snap into place. Work from the center outward to each top corner, then down each side, and finally across the bottom.
Key installation tips:
- Push firmly — the lip must fully seat in the channel. A partially seated gasket will pull out when the door opens and closes.
- Keep the gasket straight — do not stretch or compress it around corners. The gasket is molded to the exact perimeter dimensions of your door.
- Corners are critical — the gasket is pre-formed with right-angle corners that must align with the door corners. If a corner is bunched or twisted, the seal will leak at that point.
- Magnetic strip orientation — the magnetic strip inside the gasket must face the door frame (outward from the compartment). If the gasket is installed inside-out, the magnetic pull will not engage the frame.
Step 6: Verify the Seal
Close the freezer door and inspect the gasket all the way around:
- Visual check: The gasket should compress evenly against the cabinet frame with no visible gaps, bulges, or waves.
- Dollar-bill test: Close the door on a dollar bill at 8-10 points around the perimeter. Pull the bill — you should feel consistent resistance at every point. Weak spots indicate the gasket is not properly seated or the door hinge needs adjustment.
- Listen test: Close the door and listen. If you hear a faint hissing or feel air movement near the gasket, a gap exists.
- Frost test (24-48 hours): After 24 hours, inspect the inside of the freezer door area. Frost accumulation in a specific location along the gasket line indicates a leak at that point.
Step 7: Adjust Door Alignment if Needed
A new gasket that passes the visual test but fails the dollar-bill test at the top or bottom may indicate door sag rather than a gasket problem. Whirlpool refrigerator doors hang on adjustable hinges:
- WRF French door: The freezer drawer has leveling adjustments at the drawer glides. The upper French doors have hinge adjustments at the lower hinge (raise/lower with a 5/16" wrench).
- WRS side-by-side: The freezer door has an adjustable lower hinge that shifts the door up or down.
- WRT top-mount: The freezer door hinges are fixed but can be shimmed if the door sags.
If the door hangs unevenly (one side higher than the other), even a perfect new gasket cannot seal properly.
Common Gasket Part Numbers by Model Type
| Whirlpool Model Series | Door Position | Typical Part Number |
|---|---|---|
| WRF French door | Left door | Model-specific (W-prefix) |
| WRF French door | Right door | Model-specific (W-prefix) |
| WRF French door | Freezer drawer | Model-specific (W-prefix) |
| WRS side-by-side | Freezer side | Model-specific (W-prefix) |
| WRS side-by-side | Fresh-food side | Model-specific (W-prefix) |
| WRT top-mount | Freezer door | Model-specific (W-prefix) |
Gaskets are NOT interchangeable between model series — each door size and shape requires its own gasket. Order by your specific model number from the rating plate inside the fresh-food section.
Safety First — Know the Risks
Refrigerant (R-134a/R-600a) requires EPA certification to handle. Improper discharge is a federal violation and health hazard. Our techs are licensed and insured — let them handle the risk.
Licensed & Insured · 90-Day Warranty · Same-Day Service
Signs Your Gasket Needs Replacement
- Visible tears or cracks in the rubber — even small tears allow air exchange.
- Permanent deformation — the gasket is compressed flat and no longer springs back to its original profile.
- Mold growth in the gasket folds that cannot be cleaned — mold degrades the rubber material.
- The dollar-bill test fails at multiple points around the perimeter — this indicates the magnetic strip has weakened or the rubber has lost its flexibility.
- Frost appears at the door edges — localized frost along the gasket line is a direct indicator of air infiltration.
- The compressor runs nearly continuously — if the compressor rarely cycles off, a gasket leak may be the cause (warm air constantly entering forces the compressor to work overtime).
Troubleshooting After Replacement
- New gasket has a gap at one corner: The gasket corner was not properly aligned with the door corner during installation. Pull the gasket out of the channel at that corner, re-form the corner, and re-seat.
- Gasket pulls out when door opens: The retaining lip was not fully pushed into the channel. Remove and reinstall that section with firmer pressure.
- Frost still forms after new gasket: Check door alignment — the door may be sagging. Also verify the Adaptive Defrost system is functioning (a separate issue from the gasket).
- Door does not close fully with new gasket: The new gasket material may be thicker (stiffer) than the worn original. It will compress and conform within 24-48 hours of use. If it still does not close after 48 hours, the gasket may be the wrong part for your model.
The Real Cost of DIY
Average DIY attempt: $150-400 in tools you may use once, plus the risk of further damage. Our diagnostic visit costs $0 — we find the problem and give you an honest quote.
Licensed & Insured · 90-Day Warranty · Same-Day Service
When to Call a Professional
- If the gasket channel in the door liner is cracked or damaged, preventing the new gasket from seating.
- If the door hinges need adjustment and you are not comfortable loosening hinge bolts on a heavy door.
- If the refrigerator has multiple issues beyond the gasket (temperature problems, compressor noise, defrost failures) that may require comprehensive diagnosis.
Same-Day Appliance Repair
Fixed or It's Free
$89 → $0 Service Call & Diagnosis — offer ends May 25
Cost Comparison: DIY vs Professional
| DIY | Professional | |
|---|---|---|
| Parts | $40-$100 (model-specific) | $40-$100 |
| Labor | $0 | $100-$180 |
| Time | 20-30 min | 15-20 min |
| Risk | None | Warranty on service |
Don't Void Your Warranty
Opening your appliance yourself may void the manufacturer warranty. Our repair comes with a 90-day guarantee, and we document everything for warranty compliance.
Licensed & Insured · 90-Day Warranty · Same-Day Service
Need Professional Help?
FAQ
Q: Can I use a universal gasket instead of a Whirlpool-specific one? A: Universal gaskets exist but require cutting to size and adhesive installation. They rarely seal as well as OEM Whirlpool gaskets, which are pre-molded to your door's exact dimensions with pre-formed corners. The price difference is minimal — OEM gaskets are worth the investment.
Q: How long does a Whirlpool refrigerator door gasket last? A: Typically 8-12 years. Lifespan depends on how frequently the door is opened, kitchen humidity, and whether the gasket is cleaned periodically. Gaskets in homes with children (frequent door openings) or in humid climates wear faster.
Q: My new gasket arrived folded and has kinks. Is it defective? A: No — all gaskets ship folded. Soak in warm water (110-120°F) for 5-10 minutes or use a hair dryer on low heat to relax the folds. The material memory will return the gasket to its proper shape.
Q: Does the gasket go on the door or the cabinet frame? A: The gasket mounts on the door. When the door closes, the gasket's magnetic strip contacts the cabinet frame, creating the seal. The retaining lip pushes into the channel on the inner edge of the door liner.
Need a certified technician? Book same-day repair →

