How to Replace the Ice Maker Assembly in a KitchenAid Refrigerator
When your KitchenAid refrigerator stops making ice — no cubes forming, only partial cubes, or the ice maker cycles endlessly without producing — the ice maker module itself is often the culprit. KitchenAid refrigerators (model prefixes KRFF, KRFC for French door; KRSF, KRSC for side-by-side) use the same rail-mount ice maker design as their Whirlpool parent brand, making replacement straightforward with basic tools.
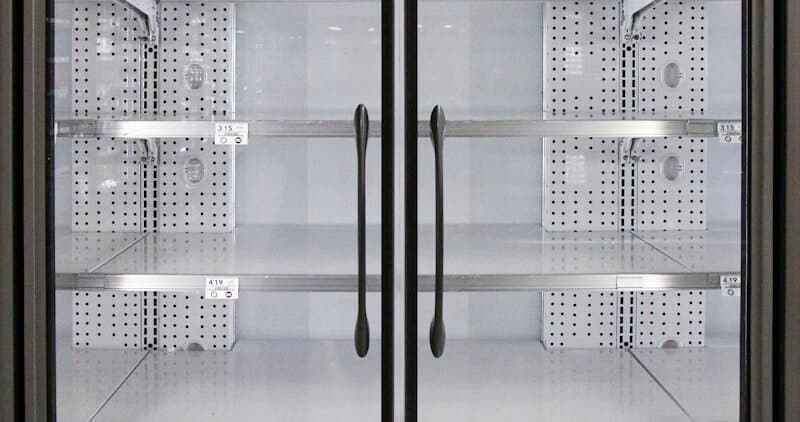
The ice maker module in KitchenAid refrigerators is a self-contained unit that slides onto a mounting rail inside the freezer compartment. It includes the mold, heating element (for cube release), motor (for the ejector arm), and thermostat — all in one replaceable assembly. When one internal component fails, you replace the entire module rather than attempting internal repair.
Before You Start
- Tools needed: Phillips #2 screwdriver, 1/4" nut driver, flat-blade screwdriver (for wiring connector), towel (for water drips)
- Parts needed: Replacement ice maker assembly ($60-$120 — KitchenAid and Whirlpool part numbers often cross-reference)
- Time required: 20-30 minutes
- Difficulty: Intermediate
- Safety warning: Turn off the water supply valve to the refrigerator before starting. Unplug the refrigerator or turn off its circuit breaker. Have towels ready — residual water in the fill tube will drip when disconnected.
Do You Have the Right Tools?
Multimeter ($85), vacuum pump ($250), diagnostic software, and specialized hand tools. Our technician arrives with $15K+ in professional tools — your diagnostic is free.
Licensed & Insured · 90-Day Warranty · Same-Day Service
Step-by-Step Instructions
Step 1: Confirm the Ice Maker Needs Replacement
Before purchasing a new module, verify the ice maker is the failed component rather than a water supply issue:
Check the water supply: Pull the refrigerator away from the wall and verify the water shutoff valve is fully open. A partially closed valve or kinked water line prevents the fill tube from delivering water to the mold. Inspect the small copper or braided supply line for kinks, and verify water flows by disconnecting the line at the back of the fridge into a cup.
Check the fill tube: Inside the freezer, locate the fill tube (a small plastic tube that enters the freezer compartment and dispenses water into the ice mold). If this tube is frozen solid (ice plug), the ice maker cannot fill. Thaw with a hair dryer — if ice production resumes after thawing, the fill tube heater (if equipped) or insulation is the issue, not the ice maker module itself.
Check the ice maker arm/sensor: KitchenAid ice makers have either a wire bail arm (older models — arm up = off, arm down = on) or an optical sensor (newer models — LED detects ice level). Verify the arm is in the down (on) position or the sensor is not blocked.
Listen during a fill cycle: With the freezer door closed, listen near the back. You should hear a buzz/hum (water inlet valve opening) followed by water running into the mold. If no sound occurs during what should be a fill cycle (every 2-4 hours), the ice maker module is not sending the signal to the water valve — module has likely failed.
Step 2: Turn Off Water and Power
Locate the water supply valve (usually under the kitchen sink or behind the refrigerator at the wall). Turn fully clockwise to close. Unplug the refrigerator or turn off its dedicated circuit breaker.
Open the freezer door and remove any ice from the ice bucket. Remove the ice bucket itself — on KitchenAid models, it lifts up and pulls straight out from its slides.
Step 3: Remove the Old Ice Maker Module
The ice maker module is mounted on a rail bracket on the freezer wall (usually the left side on French door models, upper left on side-by-side models). Remove the mounting screws — typically 2-3 Phillips or 1/4" hex head screws attaching the module to the mounting bracket or directly to the freezer wall.
Gently pull the ice maker module forward off the rail. It will still be connected by:
-
Wire harness connector: A multi-pin connector (usually white, 3-4 pins) where the module plugs into the freezer wall. Press the locking tab and pull the connector straight apart. Do not pull by the wires.
-
Fill tube alignment: The fill tube cup/funnel on the module should slide away from the fill tube that protrudes from the freezer wall. There is no physical fastener here — just alignment.
With both disconnections made, the old module comes completely free. Set it aside.
Step 4: Prepare the New Ice Maker Module
Unbox the replacement module. Verify it matches your model — compare the wire connector pin count/shape, the mounting hole pattern, and the overall dimensions with the old module. KitchenAid ice makers cross-reference heavily with Whirlpool (same parent company, approximately 70% parts commonality). A Whirlpool-branded module with the same part number is physically identical.
If the new module came with a wiring adapter or mounting bracket, install these per the included instructions before proceeding.
Step 5: Install the New Module
Slide the new module onto the mounting rail, aligning:
- The mounting screw holes with the bracket/wall holes
- The fill cup/funnel with the fill tube protruding from the freezer wall (the tube tip should sit inside the cup without touching the sides)
- The wire harness connector with its mate on the freezer wall
Connect the wire harness first — push the connector until it clicks into the socket. Verify full engagement by tugging gently. Then install the mounting screws (snug — do not overtighten into the plastic freezer liner or you may crack it).
Verify the fill tube is centered in the fill cup. Misalignment causes water to overshoot the mold, creating ice sheets on the freezer floor instead of cubes in the mold.
Step 6: Restore Water and Power
Reinstall the ice bucket on its slides. Close the freezer door. Turn the water supply valve back on (counterclockwise to open fully). Check for leaks at the valve and along the supply line behind the refrigerator.
Plug the refrigerator back in (or restore the breaker). The ice maker will go through an initial sensing cycle. On KitchenAid models with the Measured Water Fill feature (some French door models), the system may take one full cycle (2-4 hours) to calibrate fill volume to the new module.
Step 7: Verify Ice Production
The first batch of ice takes 2-4 hours to form (the freezer must first cool the new module and mold to operating temperature). After 4 hours:
- Check that the mold has filled with water (open freezer, visually inspect)
- After 6-8 hours, the first cubes should have ejected into the bucket
- Full ice production rate (approximately 3-4 pounds per 24 hours on KitchenAid models) resumes within 24 hours
Discard the first 2-3 batches of ice if the water line was disconnected, as they may contain impurities from the idle plumbing.
If no ice forms after 24 hours with the new module: verify the freezer temperature is at or below 0 degrees F (ice makers will not cycle if the freezer is above 5 degrees F). Also verify the water inlet valve is receiving the fill signal from the new module (listen for the buzz during what should be a fill cycle).
Troubleshooting After Replacement
- Ice cubes are hollow or small: water fill volume is too low. This may correct after 2-3 cycles as the module calibrates. If persistent, the water inlet valve may be partially clogged or water pressure is low (minimum 20 PSI required)
- Ice cubes are cloudy: normal for the first few batches with new water in the line. If persistent, the water filter needs replacement (KitchenAid models use the same filter as Whirlpool EveryDrop equivalents)
- Ice cubes stick together in the bucket: freezer temperature is cycling (door opened frequently) or the ice is not being used fast enough and sublimating then re-freezing together. This is not an ice maker module issue
- Water leaks onto the freezer floor: fill tube misalignment — realign the tube to sit centered in the module's fill cup
- Ice maker makes grinding noises: the ejector arm is hitting an ice cube jammed in the mold. Check for a single oversized cube preventing ejection; remove manually
Safety First — Know the Risks
Appliances involve high voltage (120-240V), pressurized water, gas lines, and chemical refrigerants. Over 400 DIY repair injuries are reported yearly. Our techs are licensed and insured — let them handle the risk.
Licensed & Insured · 90-Day Warranty · Same-Day Service
KitchenAid Ice Maker Part Cross-Reference
KitchenAid ice maker modules commonly cross-reference with Whirlpool using these part number relationships:
- KitchenAid prefix W10 → Whirlpool WPW10 (often same physical part)
- Search your model number on both KitchenAid and Whirlpool parts databases — the less expensive listing ships the same component
- Common KitchenAid French door ice maker: W10882923, W10873791 (cross-references to Whirlpool equivalents)
When to Call a Professional
- Water inlet valve fails to open despite confirmed power signal from new ice maker — requires valve replacement involving water line work
- Fill tube repeatedly freezes solid after thawing — indicates a failed fill tube heater or insulation issue requiring freezer wall access
- New ice maker immediately shows error LED (solid red or blinking pattern) — possible wiring issue or incompatible module
- Water supply line behind the refrigerator is leaking at a compression fitting — requires plumbing repair tools and knowledge
Same-Day Appliance Repair
Fixed or It's Free
$89 → $0 Service Call & Diagnosis — offer ends May 25
The Real Cost of DIY
Average DIY attempt: $150-400 in tools you may use once, plus the risk of further damage. Our diagnostic visit costs $0 — we find the problem and give you an honest quote.
Licensed & Insured · 90-Day Warranty · Same-Day Service
Cost Comparison: DIY vs Professional
| DIY | Professional | |
|---|---|---|
| Parts | $60-$120 | $60-$120 |
| Labor | $0 | $120-$200 |
| Time | 0.5h | 0.5h |
| Risk | Low | Warranty included |
Need Professional Help?
Don't Void Your Warranty
Opening your appliance yourself may void the manufacturer warranty. Our repair comes with a 90-day guarantee, and we document everything for warranty compliance.
Licensed & Insured · 90-Day Warranty · Same-Day Service
FAQ
Q: Are KitchenAid ice maker parts the same as Whirlpool? A: Yes, in most cases. KitchenAid refrigerators use the same ice maker platform as Whirlpool (same parent company, same factory). The module, mounting rail, and fill system are often direct cross-references. Verify by comparing the last 6-8 digits of the part number.
Q: How long does a KitchenAid ice maker typically last before replacement? A: 5-8 years is typical. The internal thermostat and motor are the most common failure points. If your refrigerator is 10+ years old and the ice maker fails, replacement is still worthwhile as it's far less expensive than a new refrigerator.
Q: My KitchenAid ice maker has a blinking green light. What does that mean? A: A blinking green light typically indicates the ice maker is in diagnostic mode or detecting a fault. The blink pattern (number and speed of blinks) corresponds to a specific fault code. Check your model's tech sheet for the blink code chart — typically found behind the toe plate or inside the control housing.
Q: Can I upgrade my KitchenAid ice maker to make more ice? A: The ice production rate is limited by freezer temperature, water flow rate, and cycle timing — not the physical module. A new module of the same design produces the same amount. For more ice, ensure freezer is at 0 degrees F, water pressure is above 20 PSI, and the water filter is fresh.
Need a certified technician? Book same-day repair →