How to Replace the Door Gasket on a KitchenAid Freezer
The door gasket (seal) on your KitchenAid freezer is a flexible magnetic strip that maintains an airtight seal between the door and the cabinet. When this gasket deteriorates — cracking, hardening, warping, or losing its magnetic grip — warm room air infiltrates continuously, forcing the compressor to run constantly, increasing energy consumption by 20-30%, and eventually causing the freezer to fail to maintain proper temperature.
KitchenAid freezers share the same door gasket architecture as their Whirlpool Corporation siblings. The gasket is held in a retaining channel by either a friction-fit design (pushed into a groove) or a screw-retained design (the gasket lip sits behind a metal retainer strip secured by screws). Both designs are straightforward to replace with no specialized tools.
Before You Start
- Tools needed: Phillips #2 screwdriver (for screw-retained type), 1/4" nut driver (some models), thin flat-blade screwdriver or plastic putty knife (for friction-fit type), hair dryer, clean cloths
- Parts needed: Replacement door gasket specific to your model ($40-$90 depending on door size)
- Time required: 30-45 minutes
- Difficulty: Beginner to Intermediate
- Safety warning: You do not need to unplug the unit for gasket replacement (no electrical components involved), but working with the door open for extended periods will raise internal temperature. Transfer frozen food to a cooler if the process takes more than 30 minutes.
Do You Have the Right Tools?
undefined. Our technician arrives with $15K+ in professional tools — your diagnostic is free.
Licensed & Insured · 90-Day Warranty · Same-Day Service
Step-by-Step Instructions
Step 1: Identify Your Gasket Retention Type
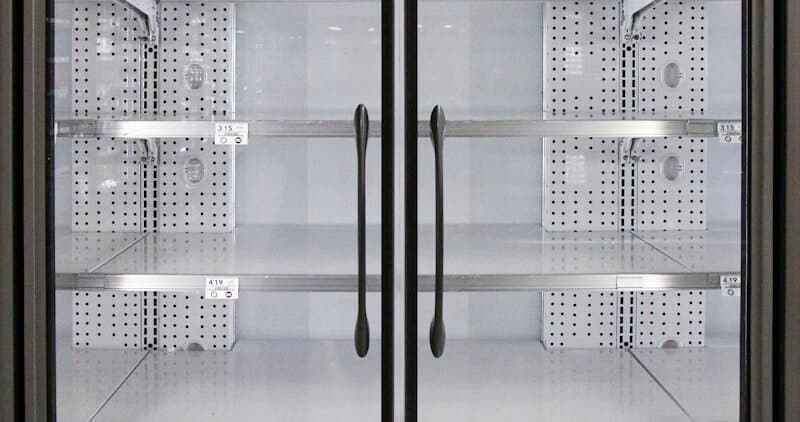
Open the freezer door and examine how the gasket attaches to the door:
Friction-fit (push-in): The gasket has a flexible arrow-shaped lip that pushes into a channel groove around the door perimeter. No screws visible behind the gasket. This type is more common on newer KitchenAid models.
Screw-retained: Peel back the inner lip of the gasket. If you see screws (typically Phillips) every 6-8 inches around the perimeter, these hold a metal retainer strip that clamps the gasket in place. Common on older and commercial-style KitchenAid freezers.
Identifying the type before starting prevents frustration and ensures you have the correct tools ready.
Step 2: Order the Correct Replacement Gasket
Door gaskets are model-specific — the dimensions, magnet placement, and retention profile must match exactly. Find your KitchenAid model number (inside the fresh food compartment on the sidewall, or on the door frame when opened) and order by model number.
KitchenAid gaskets often cross-reference to Whirlpool part numbers at lower cost — verify dimensions match before purchasing a cross-reference. The physical gasket is identical; only the packaging brand differs.
When the new gasket arrives, remove it from packaging and soak in warm water (110-120 degrees F) for 10-15 minutes. This softens the rubber and relaxes any packaging folds or creases. Alternatively, warm it with a hair dryer on low setting. A gasket installed cold and stiff may not seat properly in corners.
Step 3: Remove the Old Gasket
For friction-fit gaskets: Start at the top of the door (easier to work at eye level). Grip the gasket at a corner and pull it firmly away from the door. The arrow-shaped retention lip pulls out of the channel. Work around the entire perimeter, pulling the gasket free section by section.
If the gasket is brittle and tearing, use a thin flat screwdriver to pry the retention lip out of the channel — but be careful not to bend or damage the channel itself.
For screw-retained gaskets: Start at the top center. Loosen (do not fully remove) the screws along the top section. Loosen just enough to free the gasket lip from under the retainer strip. Work one section at a time (top, then sides, then bottom) — loosening the entire perimeter at once allows the door liner to shift, potentially making reassembly difficult.
Pull the old gasket free from under the retainer as each section loosens.
Step 4: Clean the Gasket Channel
With the old gasket removed, inspect and clean the channel/mounting surface:
- Remove any residual adhesive, debris, or mold with warm soapy water and a cloth
- For mold (common in the channel where moisture collects), use a solution of 1 tablespoon baking soda per quart of water
- Dry completely before installing the new gasket
- Inspect the channel for damage — bent metal or cracked plastic that would prevent the new gasket from seating. Minor bends can be straightened with pliers; severe damage may require door panel replacement
Step 5: Install the New Gasket
Ensure the new gasket is warm and pliable (soaked in warm water or warmed with hair dryer).
For friction-fit: Start at a top corner. Press the arrow-shaped retention lip firmly into the channel until you feel it snap/seat into the groove. Work from the corner in both directions along the top, pressing firmly every inch. Then work down both sides, and finally across the bottom.
Corners require extra attention — the gasket must make a tight 90-degree turn without bunching or pulling away. Push the material firmly into the corner, ensuring no gap forms.
For screw-retained: Slide the new gasket lip behind the retainer strip, starting at the top center. Work outward in both directions toward the corners. Once positioned, tighten the screws snugly (not overly tight — the retainer should clamp the gasket lip but not crush it). Work the sides and bottom the same way.
After installing the full perimeter, go back and verify every section is fully seated with no gaps, bubbles, or pulled-away sections.
Step 6: Shape the Gasket for Proper Seal
New gaskets may not immediately conform perfectly to the door contour, especially at corners. Use a hair dryer on medium heat to warm each section while pressing the gasket against the freezer cabinet with the door closed. The combination of heat and pressure helps the gasket take its final shape.
Close the door firmly and leave it closed for several hours (overnight if possible). This allows the gasket magnets to pull the rubber into proper alignment against the cabinet face.
Step 7: Verify the Seal
After the gasket has set for several hours, perform the dollar bill test around the entire perimeter:
- Place a dollar bill perpendicular to the door edge
- Close the door on the bill
- Pull the bill straight out — you should feel moderate resistance (the magnet and rubber compression gripping the paper)
- Repeat every 6 inches around the full perimeter
- Any spot where the bill pulls out freely indicates an incomplete seal
Common problem areas: corners (gasket bunching or not making full contact), top center (gasket weight pulls down over time), and near the hinge side (less magnetic force due to hinge geometry).
If certain areas fail the bill test, apply more heat with the hair dryer and press firmly while cooling. For persistent gaps at corners, you may need to re-pull and reseat the corner section.
Troubleshooting After Installation
- Gasket pulls away from door after closing: the retention lip is not fully seated in the channel. Pull that section out and firmly re-press, ensuring the arrow catches behind the lip of the channel
- Gap at corners: excess material is bunching. Gently stretch the gasket away from the corner while pressing the corner section in. Do not cut the gasket — it is manufactured to exact length
- Door does not close easily: the new gasket is thicker/stiffer than the worn old one. This is normal and will improve after a few days of use as the rubber compresses to its working position
- Frost forming on the outer edge of the gasket: this is normal condensation during high-humidity conditions, not a leak. If frost forms on the inner edge (food side), that indicates an air leak at that point
Safety First — Know the Risks
undefined Our techs are licensed and insured — let them handle the risk.
Licensed & Insured · 90-Day Warranty · Same-Day Service
When to Call a Professional
- The gasket channel (metal or plastic) is bent, cracked, or warped beyond straightening — requires door panel repair or replacement
- The door itself is sagging on its hinges, creating a gap that no gasket can span — hinge adjustment or replacement needed first
- You have a KitchenAid built-in freezer with custom panel overlay where gasket access requires panel removal with specialized fasteners
Same-Day Appliance Repair
Fixed or It's Free
$89 → $0 Service Call & Diagnosis — offer ends May 25
Cost Comparison: DIY vs Professional
| DIY | Professional | |
|---|---|---|
| Parts | $40-$90 | $40-$90 |
| Labor | $0 | $100-$180 |
| Time | 0.5-0.75h | 0.5h |
| Risk | None | Warranty included |
The Real Cost of DIY
Average DIY attempt: $150-400 in tools you may use once, plus the risk of further damage. Our diagnostic visit costs $0 — we find the problem and give you an honest quote.
Licensed & Insured · 90-Day Warranty · Same-Day Service
Need Professional Help?
FAQ
Q: How do I know my KitchenAid freezer gasket needs replacement? A: Signs include: visible cracks or tears in the rubber, gasket feels hard/brittle rather than flexible, condensation/frost forming on the outside edge of the door, freezer running constantly, or the dollar bill test shows no resistance when pulled through a closed door.
Q: Can I use a universal gasket on my KitchenAid freezer? A: No. Universal gaskets are not recommended — the magnetic strength, profile shape, and dimensions are specific to each model. An ill-fitting gasket creates more problems than it solves. Always order model-specific.
Q: How long do KitchenAid freezer gaskets typically last? A: 8-12 years under normal conditions. Gasket life shortens with frequent door opening (flexing degrades the rubber), exposure to food oils (which soften the material), and lack of cleaning (mold growth attacks the rubber surface).
Q: The gasket looks fine but my freezer still runs too much. Is it the gasket? A: Possibly — a gasket can lose magnetic strength without visible damage. Try the dollar bill test. If the bill test passes, the issue is likely internal (condenser coils dirty, defrost system failing, or thermostat calling for cooling excessively).
Need a certified technician? Book same-day repair →