How to Replace Key Components in a Frigidaire Freezer: Thermostat, Fan, and Defrost Parts
Frigidaire freezers are built on the Electrolux platform with a traditional design philosophy that prioritizes serviceability. Unlike some competitor brands with sealed, integrated assemblies, Frigidaire freezer components are individually replaceable with standard tools (Phillips #2, Torx T15, 1/4" nut driver). This guide covers the three most commonly replaced components: the temperature control thermostat (cold control), the evaporator fan motor, and the defrost heater assembly. Together, these three parts account for approximately 70% of all Frigidaire freezer service calls.
The replacement procedures apply to Frigidaire upright freezers (FFFH series), chest freezers (FFFC series), and the freezer compartment of Frigidaire side-by-side and top-mount refrigerators. Parts are cross-compatible with Electrolux branded units sharing the same platform.
Before You Start
- Tools needed: Phillips #2 screwdriver, Torx T15 driver, 1/4" nut driver, multimeter, flat-blade screwdriver (for prying clips), work gloves (evaporator can have sharp edges)
- Parts needed: Temperature thermostat (
$25-$40, part 216715200), evaporator fan motor ($25-$45, part 242077702), or defrost heater (~$30-$55, part 5303918301) - Time required: 30-60 minutes per component
- Difficulty: Intermediate
- Safety warning: Unplug the freezer completely. Allow 15 minutes for capacitor discharge in the compressor start circuit. If accessing the evaporator in a frost-free model, the evaporator coil edges are sharp — wear work gloves.
Do You Have the Right Tools?
undefined. Our technician arrives with $15K+ in professional tools — your diagnostic is free.
Licensed & Insured · 90-Day Warranty · Same-Day Service
Replacing the Temperature Control Thermostat
Step 1: Locate the Thermostat
On Frigidaire upright freezers, the temperature control thermostat is located behind the temperature adjustment knob inside the freezer compartment, typically at the upper rear area. On chest freezers, it is inside the control housing on the exterior (usually right side near the hinge). Remove the knob by pulling straight off (friction fit). Remove the 2 Phillips screws holding the thermostat mounting plate or bracket.
Step 2: Disconnect and Test the Old Thermostat
The thermostat has 2-3 wire terminals. Note their positions (photograph or label). Disconnect the spade connectors by pulling straight off with needle-nose pliers. Test with your multimeter: set the thermostat to the coldest position and check for continuity across the two main terminals. A good thermostat shows closed circuit (near zero ohms) at the coldest setting and opens as you rotate to the warmest/off position. If the thermostat reads open at all settings, it has failed and the compressor cannot receive power.
Step 3: Install the New Thermostat
The new thermostat includes a sensing tube (thin copper capillary) that must be routed exactly as the original. This tube senses the freezer temperature. Route it through the same clip or channel as the original, ensuring no kinks. Connect the wire terminals to the same positions as the original. Mount the thermostat bracket with the original screws. Press the knob back on. Set to the middle position (typically 4-5 on a 1-7 scale) as a starting point.
Replacing the Evaporator Fan Motor
Step 4: Access the Evaporator Compartment
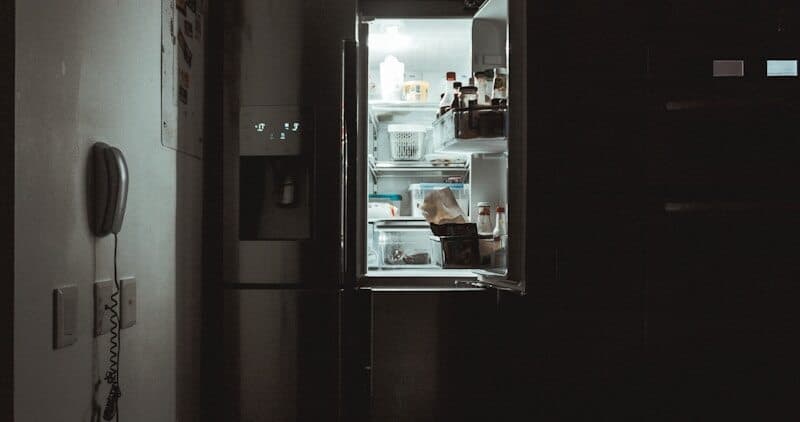
On upright freezers, the evaporator is behind the rear interior panel. Remove all shelves and drawers. Remove the screws holding the rear panel (typically 6-8 Phillips screws around the perimeter, plus 2-4 Torx T15 screws on clip-style retainers specific to Frigidaire). Some panels have additional hidden screws behind cosmetic plugs. Gently pull the panel forward; the fan blade assembly is at the top.
Step 5: Remove the Old Fan Motor
The fan motor mounts to a bracket at the top of the evaporator housing with 2-3 screws or rubber grommets. Disconnect the wire connector (a 2-pin Molex-style plug). Remove the mounting screws. Slide the motor and blade assembly out. The fan blade typically pulls off the motor shaft (friction fit or small retaining clip). Transfer the blade to the new motor unless the replacement includes a new blade.
Step 6: Install the New Fan Motor
Press the fan blade onto the new motor shaft to the same depth. Mount the motor to the bracket using the original hardware. Connect the wire plug. Before reinstalling the rear panel, plug in the freezer briefly and verify the fan runs and the blade does not contact the housing or evaporator fins. Unplug, then reinstall the rear panel with all original screws. Ensure the panel gasket (foam strip around the perimeter) is intact for proper air-channel sealing.
Safety First — Know the Risks
undefined Our techs are licensed and insured — let them handle the risk.
Licensed & Insured · 90-Day Warranty · Same-Day Service
Replacing the Defrost Heater
Step 7: Locate the Defrost Heater
With the evaporator rear panel already removed (Step 4), the defrost heater is visible below or alongside the evaporator coils. On Frigidaire models, it is typically a glass tube heater mounted in metal clips beneath the evaporator, or an aluminum-sheathed calrod-style element integrated into the evaporator tray. The heater connects via 2 wire terminals at its mounting bracket.
Step 8: Remove the Old Defrost Heater
Disconnect the two wire terminals at the defrost heater ends. Note: on some Frigidaire models, the connectors are ceramic high-temperature connectors rather than standard spade terminals. Remove the metal retaining clips or screws holding the heater in position (typically 2-4 clips). Carefully slide the heater out from under the evaporator coils. Avoid bending the evaporator fins as they are fragile.
Step 9: Install the New Defrost Heater
Slide the new heater into position under the evaporator, seating it in the same mounting clips. The heater should not touch the evaporator fins directly (a gap of 1/4" minimum prevents localized hot spots that could damage the evaporator coating). Secure with the retaining clips. Connect the wire terminals. Ensure the wires route away from the heater body (they are not rated for direct heater contact temperature).
Post-Installation Verification
Step 10: Reassemble and Monitor
Reinstall the evaporator rear panel. Restore power. For thermostat replacement: the compressor should start within 1-2 minutes if the thermostat is set to mid-range. For fan replacement: open the door and listen for fan operation (some models stop the fan when the door opens; close the door and listen at the external vent). For defrost heater: you must wait for a full defrost cycle (8-12 hours on most Frigidaire models) to confirm the heater activates. Check after 24 hours that no excessive frost has formed on the evaporator.
The Real Cost of DIY
Average DIY attempt: $150-400 in tools you may use once, plus the risk of further damage. Our diagnostic visit costs $0 — we find the problem and give you an honest quote.
Licensed & Insured · 90-Day Warranty · Same-Day Service
Frigidaire Freezer Parts Cross-Reference
| Component | Frigidaire Part # | Electrolux Equivalent | Fits Models |
|---|---|---|---|
| Cold control thermostat | 216715200 | Same | FFFH17/20/21 series |
| Evaporator fan motor | 242077702 | Same | Most upright freezers |
| Defrost heater (glass tube) | 5303918301 | Same | Frost-free uprights |
| Defrost thermostat | 5303918202 | Same | All frost-free models |
| Defrost timer | 215846602 | Same | Mechanical timer models |
| Defrost control board | 5303918476 | Same | Electronic defrost models |
Troubleshooting After Replacement
- Compressor does not start after thermostat replacement: Verify wire connections match the original configuration. Ensure the thermostat is set to a cold position (not "off"). Check that the sensing tube is not kinked
- Fan makes noise after replacement: The blade may be out of balance or contacting the housing. Recheck blade seating depth on the motor shaft. Verify clearance to the evaporator shroud
- Frost returns quickly after defrost heater replacement: The defrost thermostat (bimetallic disc mounted on the evaporator) may also be failed, preventing the cycle from completing. Test separately
- Freezer runs but temperature is off: After thermostat replacement, allow 24 hours for stabilization. Adjust the thermostat one number at a time, waiting 12 hours between adjustments to see the effect
Same-Day Appliance Repair
Fixed or It's Free
$89 → $0 Service Call & Diagnosis — offer ends May 25
Don't Void Your Warranty
Opening your appliance yourself may void the manufacturer warranty. Our repair comes with a 90-day guarantee, and we document everything for warranty compliance.
Licensed & Insured · 90-Day Warranty · Same-Day Service
When to Call a Professional
Contact a professional if:
- The evaporator coils are visibly corroded or leaking refrigerant (oily residue on the tubing)
- The compressor start components have failed in addition to the thermostat
- You need to work on the sealed refrigerant system (requires EPA certification)
- The freezer is a built-in model with complex trim/panel removal requirements
- Multiple components have failed simultaneously, suggesting an electrical surge or control board failure
Cost Comparison: DIY vs Professional
| DIY | Professional | |
|---|---|---|
| Parts | $25-$55 per component | $25-$55 |
| Labor | $0 | $150-$300 |
| Time | 30-60min per part | 45min-1h |
| Risk | Low (power disconnected) | Warranty included |
Is It Worth Your Time?
undefined Our technician diagnoses the issue in about 30 minutes — same-day appointments available.
Licensed & Insured · 90-Day Warranty · Same-Day Service
Need Professional Help?
FAQ
Q: How do I find the correct replacement part for my Frigidaire freezer? A: Locate your model number on the rating plate (inside the door frame on uprights, or on the rear/side panel on chest models). Enter this model number on Frigidaire's parts website or a third-party supplier. All Frigidaire parts also cross-reference with Electrolux part numbers.
Q: Can I replace just the defrost heater or do I need to replace the whole defrost system? A: Each defrost system component (heater, thermostat, timer/board) can be replaced individually. However, if the heater has been non-functional for an extended period, test the thermostat as well since repeated over-icing may have stressed it.
Q: How do I know if my Frigidaire freezer uses a mechanical timer or electronic defrost? A: Check the model and year. Generally, Frigidaire freezers manufactured before 2010 use a mechanical defrost timer (a small motorized unit near the compressor). Models from 2010 onward typically use an electronic adaptive defrost control board mounted near the temperature control.
Q: Is it worth repairing a 15-year-old Frigidaire freezer? A: If the sealed system (compressor, evaporator, condenser, tubing) is intact and only auxiliary components need replacement, repairs are cost-effective even on older units. Sealed system failures (refrigerant leaks, compressor seizure) on units over 12-15 years old typically warrant replacement.
Need a certified technician? Book same-day repair →