How to Repair a GE Refrigerator Clogged Defrost Drain
Water pooling under the crisper drawers is the most common complaint with GE French door refrigerators. The cause is almost always a clogged defrost drain — the small opening at the bottom rear of the fresh food compartment that channels defrost water to the evaporation pan below. GE French door models are particularly susceptible because their drain location allows food particles and ice to accumulate. This is a simple 25-minute fix that requires no special tools and prevents recurring water damage to your food and refrigerator interior.
The defrost cycle runs every 8-12 hours on GE refrigerators. When the defrost heater melts accumulated frost from the evaporator coils, water flows down a channel to the drain opening, then through a tube to the drip pan near the compressor. When this drain or tube becomes blocked — usually by ice forming in the drain opening or food debris washing down — water backs up and spills onto the floor of the fresh food section, pooling under the crisper drawers.
Before You Start
- Tools needed: Phillips #2 screwdriver, turkey baster, hot water (not boiling), small funnel, flexible drain brush, hair dryer
- Parts needed: None — optional: GE drain strap heater WR49X10173 (~$15) to prevent recurrence
- Time required: 25 minutes
- Difficulty: Beginner
- Safety warning: Unplug the refrigerator. Place towels under the unit — melted ice will drain onto the floor during this repair.
Do You Have the Right Tools?
Refrigerant gauges ($200+), vacuum pump ($250), leak detector ($150), and EPA-certified recovery equipment. Our technician arrives with $15K+ in professional tools — your diagnostic is free.
Licensed & Insured · 90-Day Warranty · Same-Day Service
Step-by-Step Instructions
Step 1: Empty the Fresh Food Section Bottom
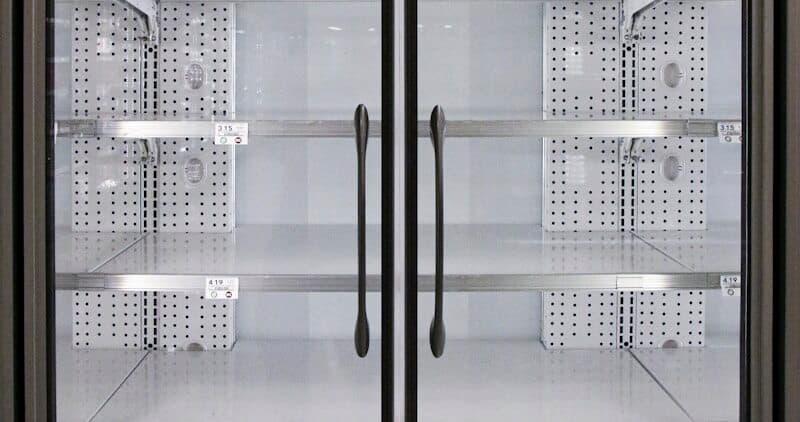
Unplug the refrigerator. Remove all food from the fresh food section. Pull out the crisper drawers completely — lift slightly at the front and pull straight out. On GE French door models, you may also need to remove the lower shelf or shelf support track to access the drain area at the rear bottom. Place towels on the floor in front of the refrigerator.
Step 2: Locate the Defrost Drain Opening
Look at the bottom rear wall of the fresh food compartment. You will see a small opening (approximately 1/2 inch diameter) that may be partially hidden by a plastic cover or channel. On GE French door models, this is typically centered at the lowest point of the rear wall, just above where the crisper drawers sit. If you see standing water or ice around this opening, you have confirmed the clog.
Step 3: Remove Ice from the Drain Opening
If the drain opening is frozen over (common in GE models), use a hair dryer on low heat to melt the ice. Aim the warm air at the drain area for 2-3 minutes until the ice melts. Do not use a sharp object to chip ice — you can damage the drain channel or the plastic liner. Alternatively, pour warm (not boiling) water directly into the drain opening using a turkey baster. You may hear gurgling as the ice melts and water flows through.
Step 4: Flush the Drain Tube
Once the drain opening is clear, use a turkey baster filled with warm water to flush the entire drain tube. Squeeze firmly to create pressure that pushes debris through the tube and into the drip pan below. Repeat 4-5 times. Listen for water flowing into the pan at the bottom rear of the refrigerator (you may need to look under the front kick plate to confirm). If water does not flow through after multiple attempts, the tube itself is blocked — proceed to Step 5.
Step 5: Clear a Stubborn Tube Blockage
If flushing alone does not work, use a flexible drain brush (sold at hardware stores, or use a pipe cleaner) inserted through the drain opening. Gently push it through the tube while rotating. Do not force it — the drain tube on GE models makes a slight curve as it exits the cabinet. After working the brush through, flush again with warm water using the turkey baster. For severely frozen tubes, you may need to access the lower end from the compressor area (remove rear bottom panel) and work the brush up from below.
Step 6: Prevent Future Clogs (Optional Drain Strap)
GE makes a drain strap heater (part WR49X10173, approximately $15) that installs along the drain channel inside the fresh food section. This small heater warms the drain opening slightly during defrost cycles, preventing ice from reforming. Installation is simple: the strap adheres to the drain channel and connects to existing wiring. If you experience recurring drain clogs (more than once per year), installing this strap eliminates the problem permanently.
Step 7: Reassemble and Monitor
Clean the area around the drain with a mild baking soda solution to remove any mold or residue. Reinstall shelves and crisper drawers. Plug in the refrigerator. Place a dry paper towel under the crisper drawers as a monitor — check it in 48 hours. If it is still dry, the repair was successful. Activate Turbo Cool (press and hold 3 seconds) to speed temperature recovery after the door was open during repair.
Troubleshooting Common Issues
- If water returns within a week, the drain channel inside the freezer section (above the fresh food drain) may be misrouted — this requires removing the freezer rear panel to inspect
- If you hear a continuous dripping sound after the repair, that is normal — it is defrost water flowing properly into the drip pan
- If the drip pan under the compressor overflows, the condenser fan is not evaporating water fast enough. Check that the fan is running and the pan is not cracked
- Brown or smelly water from the drain indicates mold growth in the tube — flush with a dilute bleach solution (1 teaspoon per cup of water)
Safety First — Know the Risks
Refrigerant (R-134a/R-600a) requires EPA certification to handle. Improper discharge is a federal violation and health hazard. Our techs are licensed and insured — let them handle the risk.
Licensed & Insured · 90-Day Warranty · Same-Day Service
When to Call a Professional
Contact a certified technician if:
- The drain tube is physically damaged or disconnected from the evaporator housing (requires interior access behind insulation)
- Flushing fails completely and the tube appears kinked or crushed inside the cabinet wall
- You notice ice forming on the rear wall of the fresh food section in addition to the drain clog — this suggests a door seal problem or thermostat issue compounding the drain problem
- The issue occurs simultaneously with cooling problems — a failing defrost system creates both symptoms
Same-Day Appliance Repair
Fixed or It's Free
$89 → $0 Service Call & Diagnosis — offer ends May 25
Cost Comparison: DIY vs Professional
| DIY | Professional | |
|---|---|---|
| Parts | $0-$15 | $0-$15 |
| Labor | $0 | $120-$200 |
| Time | 0.4h | 0.5h |
| Risk | Minimal | Warranty included |
The Real Cost of DIY
Average DIY attempt: $150-400 in tools you may use once, plus the risk of further damage. Our diagnostic visit costs $0 — we find the problem and give you an honest quote.
Licensed & Insured · 90-Day Warranty · Same-Day Service
Need Professional Help?
FAQ
Q: Why does this clog keep happening on my GE French door refrigerator? A: GE French door models position the defrost drain in a low area where food particles can wash into it. The drain opening also tends to freeze during defrost cycles on models without the drain strap heater. Installing the GE drain strap heater (WR49X10173) permanently prevents ice accumulation.
Q: Is water under my crisper drawers dangerous? A: It is not an electrical hazard since the water is contained inside the refrigerator. However, standing water promotes mold growth and can damage food. Fix it promptly — the repair takes under 30 minutes.
Q: Can I use boiling water to clear the drain? A: GE recommends hot but not boiling water. Boiling water can crack the plastic drain tube or damage the interior liner due to thermal shock. Water heated to about 150°F (hot from the tap) is sufficient to melt any ice blockage.
Q: How do I prevent food from falling into the defrost drain? A: Keep the crisper drawers in place (they act as a barrier), avoid storing loose food items near the rear of the bottom shelf, and periodically check that the drain cover (if equipped) is in position.
Need a certified technician? Book same-day repair →

