How to Repair a Frigidaire Freezer: Diagnosing Cooling Failures and Frost Buildup
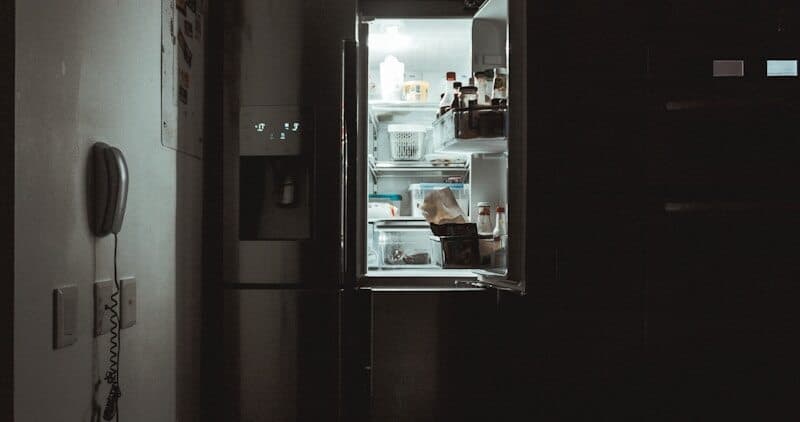
Frigidaire freezers share the Electrolux cooling platform, which means parts interchangeability with Electrolux-branded units and a well-documented service history. Gallery series freezers with the EvenTemp twin evaporator system use separate cooling loops for the freezer and refrigerator compartments, but standalone Frigidaire upright and chest freezers use a single evaporator with a simpler defrost cycle. The most common failure modes are defrost system malfunctions (causing ice buildup that blocks airflow), failed evaporator fans, and dirty condenser coils causing the compressor to overheat and cycle off prematurely.
This guide covers the complete diagnostic and repair process for Frigidaire freezers across all product lines: basic chest freezers, upright freezers, and the freezer compartment of Gallery and Professional refrigerator-freezer combos. The systematic approach identifies whether the problem is thermal (defrost/condenser), mechanical (fan/compressor), or electronic (control board/sensors).
Before You Start
- Tools needed: Phillips #2 screwdriver, Torx T15 driver, multimeter, 1/4" nut driver, flashlight, hair dryer (for emergency defrost), coil brush
- Parts needed: Varies by diagnosis (defrost heater $30-$55, evaporator fan motor $25-$45, defrost thermostat $15-$25, defrost timer/board $35-$80)
- Time required: 45-90 minutes depending on diagnosis
- Difficulty: Intermediate
- Safety warning: Unplug the freezer completely and allow 15 minutes for any residual electrical charge to dissipate. Move food to coolers with ice packs during repair. The compressor start relay contains a capacitor that holds charge briefly after power removal.
Do You Have the Right Tools?
undefined. Our technician arrives with $15K+ in professional tools — your diagnostic is free.
Licensed & Insured · 90-Day Warranty · Same-Day Service
Step-by-Step Instructions
Step 1: Identify the Symptom Pattern
Before disassembling anything, determine which failure pattern matches your freezer:
- Too warm (above 0F) but compressor runs: Likely airflow blockage from frost buildup, failed evaporator fan, or dirty condenser coils
- Too warm and compressor does NOT run: Likely start relay failure, overload protector tripping, or compressor failure
- Excessive frost on back wall or evaporator: Defrost system failure (heater, thermostat, timer, or control board)
- Runs constantly but maintains temperature: Dirty condenser coils forcing extended run cycles, or low refrigerant
- Cycles on/off rapidly (short cycling): Overheating compressor due to condenser restriction or failing start components
Step 2: Check and Clean the Condenser Coils
Frigidaire freezers are especially sensitive to condenser coil contamination. The condenser coils are located either underneath (accessed by removing the front toe grill with two Phillips screws) or at the rear (visible without disassembly). Use a coil brush to clean between the fins and a vacuum to remove debris. On Frigidaire units, neglected condenser coils are the number one cause of premature compressor failure. Clean these every 6 months as preventive maintenance. After cleaning, verify the condenser fan (underneath models) spins freely and runs when the compressor activates.
Step 3: Test the Evaporator Fan Motor
The evaporator fan circulates cold air from the evaporator coils throughout the freezer compartment. On Frigidaire upright freezers, access the evaporator by removing the rear interior panel (typically 6-8 Phillips screws plus Torx T15 fasteners holding the panel clips). The fan motor is mounted at the top of the evaporator housing. Spin the fan blade by hand: it should turn freely with no grinding or resistance. With your multimeter, test the motor windings: a good motor reads 200-600 ohms. Infinite resistance means a burned-out winding requiring replacement. Also check for ice encasing the fan blade, which prevents rotation even with a good motor.
Step 4: Diagnose the Defrost System
Frigidaire freezers use either a mechanical defrost timer (older models) or an electronic adaptive defrost control board (Gallery and newer models). The defrost cycle involves three components working in sequence: the defrost timer/board initiates the cycle, the defrost heater melts frost from the evaporator, and the defrost thermostat terminates the cycle when evaporator temperature rises above 38-48F.
Testing the defrost heater: Disconnect the heater leads at the terminal block (below the evaporator). Test with your multimeter: a good heater reads 20-80 ohms depending on the model. Infinite ohms means an open (burned out) heater element.
Testing the defrost thermostat: This bimetallic disc opens the heater circuit when temperature rises above its setpoint. At room temperature, the thermostat should read OPEN (infinite ohms). Place it in a cup of ice water for 5 minutes and retest: it should now read CLOSED (near zero ohms). If it reads open at all temperatures, it has failed and the heater never activates.
Testing the defrost timer (mechanical): Locate the timer (usually near the compressor at the rear bottom or behind the temperature control inside). Slowly advance the timer shaft clockwise with a flathead screwdriver until you hear a click. The compressor should stop and the defrost heater should activate. If the timer does not advance during normal operation, its motor has failed.
Step 5: Check the Temperature Control Thermostat
The cold control thermostat (on non-electronic models) is located behind the temperature adjustment knob inside the freezer. Turn the knob from lowest to highest setting and listen for a click. No click indicates a failed thermostat. Test with multimeter: rotate to coldest setting and check continuity across terminals. Should read closed (zero ohms) at coldest setting. The thermostat controls compressor cycling. On electronic Gallery models, this function is handled by the main control board and thermistor sensors instead.
Step 6: Test the Compressor Start Components
The compressor start relay and overload protector are attached directly to the compressor terminal pins at the rear bottom of the freezer. The start relay (a small black or white box that plugs onto the compressor pins) can be tested by removing it and shaking gently. If you hear a rattle, the internal contact has broken loose and the relay needs replacement. Test with multimeter between pins 1 and 2: should read 3-12 ohms (varies by model). The overload protector (usually round, attached adjacent to the relay) should read closed (zero ohms) when cool. If it reads open when the compressor is at room temperature, it has failed.
Step 7: Verify the Repair
After replacing the failed component, plug the freezer back in and monitor for 24 hours. The freezer should reach 0F within 4-8 hours depending on ambient temperature and food load. Listen for normal cycling: the compressor should run 30-45 minutes then rest 15-30 minutes in a typical 70F room. If the repair involved the defrost system, wait 8-12 hours and verify the evaporator is not re-icing prematurely.
Frigidaire Freezer Error Codes (Electronic Models)
| Code | Meaning | Component to Check |
|---|---|---|
| H (flashing) | High temperature alarm | Evaporator fan, defrost system, condenser coils |
| PF | Power failure | Reset after power restored, not a fault |
| SY CE | Communication error | Main control board connection |
| SY EF | Evaporator fan circuit | Fan motor or wiring harness |
| 5Y CF | Condenser fan circuit | Condenser fan motor |
Safety First — Know the Risks
undefined Our techs are licensed and insured — let them handle the risk.
Licensed & Insured · 90-Day Warranty · Same-Day Service
Common Frigidaire Freezer Parts (Cross-Reference)
| Component | Frigidaire Part Number | Electrolux Equivalent |
|---|---|---|
| Evaporator fan motor | 242077702 | Same (shared platform) |
| Defrost heater | 5303918301 | Same |
| Defrost thermostat | 5303918202 | Same |
| Start relay | 241707701 | Same |
| Defrost control board | 5303918476 | Same |
| Condenser fan motor | 240369702 | Same |
Troubleshooting Post-Repair Issues
- Freezer reaches temperature but cycles too frequently: condenser coils may need a second cleaning pass, or the door gasket is leaking warm air
- New evaporator fan runs but airflow seems weak: check for ice dam behind the rear panel that re-formed before the defrost system repair took effect. Manual defrost with hair dryer may be needed
- Compressor runs but never cycles off: possible low refrigerant charge from a sealed system leak. This requires professional service with refrigerant recovery equipment
- Defrost heater tested good but ice keeps building: the defrost drain may be frozen. Pour warm water down the drain tube at the bottom of the evaporator housing
The Real Cost of DIY
Average DIY attempt: $150-400 in tools you may use once, plus the risk of further damage. Our diagnostic visit costs $0 — we find the problem and give you an honest quote.
Licensed & Insured · 90-Day Warranty · Same-Day Service
When to Call a Professional
Contact a professional if:
- The compressor does not start after replacing the start relay and overload protector. This typically indicates a seized compressor requiring recovery and replacement
- You suspect a refrigerant leak (oily residue on tubing, hissing sound, freezer never reaches temperature despite all components testing good)
- The sealed system needs recharging (requires EPA 608 certification and specialized equipment)
- The main electronic control board on Gallery models needs diagnosis beyond basic continuity testing
- The freezer is built into cabinetry and requires disconnection of water lines or custom panels for access
Same-Day Appliance Repair
Fixed or It's Free
$89 → $0 Service Call & Diagnosis — offer ends May 25
Cost Comparison: DIY vs Professional
| DIY | Professional | |
|---|---|---|
| Parts | $15-$80 (most repairs) | $15-$80 |
| Labor | $0 | $150-$350 |
| Time | 1-1.5h | 1h |
| Risk | Low with power disconnected | Warranty included |
Don't Void Your Warranty
Opening your appliance yourself may void the manufacturer warranty. Our repair comes with a 90-day guarantee, and we document everything for warranty compliance.
Licensed & Insured · 90-Day Warranty · Same-Day Service
Need Professional Help?
FAQ
Q: Why is my Frigidaire freezer not cold enough? A: The most common causes are dirty condenser coils (clean every 6 months), a failed evaporator fan (food stays frozen near the coils but warms elsewhere), or a defrost system malfunction causing ice to block the evaporator. Start by cleaning the condenser coils, which resolves about 40% of Frigidaire freezer warming issues.
Q: How do I manually defrost my Frigidaire freezer? A: Unplug the freezer and leave the door open for 8-12 hours with towels on the floor to catch meltwater. For faster results, place pans of hot water inside and close the door, replacing them every 30 minutes. Never use sharp tools to chip ice as you may puncture the evaporator tubing.
Q: Are Frigidaire freezer parts compatible with Electrolux? A: Yes. Frigidaire is manufactured by Electrolux, and the vast majority of internal components (motors, heaters, thermostats, control boards) carry identical part numbers and are physically interchangeable between Frigidaire and Electrolux branded units.
Q: How long should a Frigidaire freezer compressor run? A: In normal conditions (70F room, moderate food load), the compressor should run 30-45 minutes then rest 15-30 minutes. Running constantly suggests dirty condenser coils, a failing door gasket, or low refrigerant. Running less than 10 minutes before shutting off (short cycling) indicates an overheating issue.
Need a certified technician? Book same-day repair →