How to Remove the Freezer Drawer on an LG Refrigerator
LG French Door refrigerators use a telescoping rail system for freezer drawers that differs significantly from competitors. The drawer glides on ball-bearing tracks with a specific release mechanism that prevents accidental removal during normal use. Whether you need to access the evaporator coils behind the freezer panel, clean accumulated ice from the drain trough, or replace a worn drawer gasket, understanding LG's rail lock system prevents damage to the tracks and surrounding panels.
This guide covers LG French Door models including the InstaView Door-in-Door series, standard French Door units, and side-by-side models with pull-out freezer compartments. The rail release mechanism is consistent across most LG refrigerators manufactured since 2016, though the number of fasteners varies between model lines.
Before You Start
- Tools needed: Phillips #2 screwdriver, flat-head screwdriver (for rail release tabs on older models), flashlight, soft towels for floor protection
- Parts needed: None required (removal procedure only)
- Time required: 10-15 minutes
- Difficulty: Beginner
- Safety warning: Unplug the refrigerator or turn off the circuit breaker. Wait 5 minutes. Remove all food and ice from the freezer drawer to reduce weight and prevent spills.
Do You Have the Right Tools?
Refrigerant gauges ($200+), vacuum pump ($250), leak detector ($150), and EPA-certified recovery equipment. Our technician arrives with $15K+ in professional tools — your diagnostic is free.
Licensed & Insured · 90-Day Warranty · Same-Day Service
Step-by-Step Instructions
Step 1: Empty the Freezer Drawer Completely
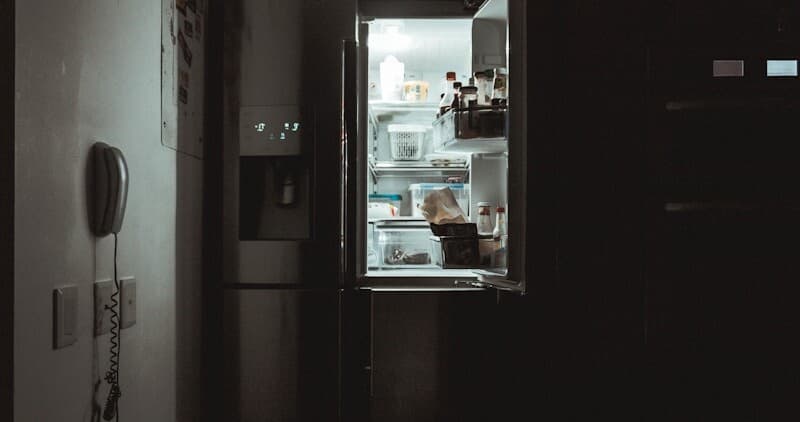
Remove all food items and the ice bin from the freezer drawer. On LG models with Craft Ice, remove the round ice maker bin separately by lifting it straight up off its mounting tabs. The standard ice bin slides forward and lifts out. Place towels on the floor in front of the refrigerator to catch any ice melt or condensation that drips during drawer removal.
Step 2: Pull the Drawer to Full Extension
Grip both sides of the freezer drawer and pull it toward you firmly until it reaches the full-extension stop. LG's telescoping rails have a primary stop that prevents the drawer from sliding off the tracks during normal use. You will feel a definite resistance point where the drawer locks at maximum extension. Do not force past this stop yet.
Step 3: Locate the Rail Release Tabs
With the drawer at full extension, look at the left and right rail assemblies where they connect to the drawer frame. On most LG French Door models (LRMVS3006S, LRFXS2503S, LFXS26973S, and similar), you will find colored plastic release tabs on each rail. These tabs are typically blue or white and sit on the rail track about 2 inches from where the drawer bracket attaches. On InstaView models, the release mechanism is a push-down lever integrated into the top of each rail.
Step 4: Disengage the Rail Locks Simultaneously
Press both rail release tabs inward (toward the center of the drawer) simultaneously while pulling the drawer forward. On lever-style releases found in InstaView models, press both levers downward while pulling. The drawer should slide past the primary stop with minimal resistance once both locks are disengaged. If only one side releases, the drawer will bind at an angle. Push it back in slightly, reset both tabs, and try again with even pressure on both sides.
Step 5: Support the Drawer Weight as It Clears the Rails
As the drawer clears the rails, its full weight transfers to your hands. LG freezer drawers weigh 15-25 pounds empty depending on the model. The drawer frame is wider than it appears from the front, so ensure you have clear floor space behind you. Tilt the front of the drawer slightly upward as it exits the cabinet to clear the lower rail stops without scratching the interior panels.
Step 6: Inspect the Rails and Drawer Gasket
With the drawer removed, inspect the telescoping rails for debris, ice buildup, or damaged ball bearings. LG's rail system uses sealed bearings that rarely fail, but accumulated frost between rail segments causes rough operation. Check the drawer gasket around the perimeter of the drawer frame for tears, hardening, or gaps that allow warm air infiltration and excessive frost buildup.
Step 7: Clean the Freezer Cavity
With unobstructed access to the freezer interior, clean the drain trough at the bottom rear of the compartment. On LG refrigerators, this drain connects to the evaporation tray near the Linear Compressor at the bottom rear of the unit. A clogged drain causes water pooling and ice sheets forming under the drawer. Use warm water to melt any ice blocking the drain hole, and clear it with a turkey baster or flexible tube.
Step 8: Reinstall the Drawer
Align the drawer brackets with the extended rail tracks. The brackets have guide channels that must engage the rail rollers. Slide the drawer in slowly until you feel it catch the ball-bearing track, then push firmly until the release tabs click back into their locked position. You should hear a distinct snap from each side confirming the locks are engaged. Pull the drawer back to full extension to verify smooth operation before reloading food.
Troubleshooting Common Issues
If you encounter problems during freezer drawer removal on your LG refrigerator, try these solutions:
- If the drawer will not reach full extension, check for ice buildup on the rail tracks inside the cabinet. Melt any frost with a hair dryer on low heat aimed at the rail tracks for 2-3 minutes, then retry. This is common in humid climates or when the door gasket is compromised
- If the release tabs feel frozen or immovable, avoid forcing them with tools. Apply gentle heat with a hair dryer to the rail assembly for 30 seconds. Frost between the tab mechanism and rail channel freezes the release in place, especially after power outages
- If the drawer binds at an angle when pulling past the stop, one rail has released but the other has not. Push the drawer back to the primary stop position, confirm both release tabs are accessible and functional, then press both simultaneously with firm even pressure
- If the rails themselves feel rough or sticky after drawer removal, apply a thin coat of food-grade silicone lubricant to the ball-bearing tracks. LG's sealed bearings are maintenance-free but the track surfaces benefit from occasional lubrication, especially after cleaning
- Use LG's ThinQ Smart Diagnosis if you notice error codes on the display after reassembly. Hold your phone near the speaker grille while the unit plays diagnostic tones, and the app identifies any temperature sensor or fan motor issues that may have been exposed during your work
Safety First — Know the Risks
Refrigerant (R-134a/R-600a) requires EPA certification to handle. Improper discharge is a federal violation and health hazard. Our techs are licensed and insured — let them handle the risk.
Licensed & Insured · 90-Day Warranty · Same-Day Service
When to Call a Professional
Sometimes freezer drawer issues indicate deeper problems with your LG refrigerator that require professional repair:
- If the drawer rails are bent or the ball bearings are seized, the entire rail assembly requires replacement. This involves removing interior panels and accessing mounting points behind the freezer walls
- If you discover heavy frost or ice sheets behind the rear freezer panel after drawer removal, this indicates a failed defrost heater or defrost timer. The evaporator coil behind that panel needs professional attention
- If the Linear Compressor makes loud knocking sounds once the drawer is reinstalled, the unit may have shifted during your work. LG Linear Compressors produce a characteristic knock that differs from rotary compressors, but excessively loud or rapid knocking warrants professional diagnosis
- If the drawer no longer seals properly after reinstallation and you cannot identify gasket damage, the cabinet alignment may have shifted. Professional recalibration of the hinge points ensures proper seal compression
- If error codes persist on the display after Smart Diagnosis and power cycling, contact LG authorized service. The 10-year Linear Compressor warranty may cover compressor-related issues detected during your maintenance
Same-Day Appliance Repair
Fixed or It's Free
$89 → $0 Service Call & Diagnosis — offer ends May 25
Cost Comparison: DIY vs Professional
| DIY | Professional | |
|---|---|---|
| Parts | $0 (removal only) | $0-$45 (gasket if needed) |
| Labor | $0 | $120-$200 |
| Time | 15 min | 30 min (includes diagnosis) |
| Risk | Minimal if tabs engaged properly | Warranty preserved |
The Real Cost of DIY
Average DIY attempt: $150-400 in tools you may use once, plus the risk of further damage. Our diagnostic visit costs $0 — we find the problem and give you an honest quote.
Licensed & Insured · 90-Day Warranty · Same-Day Service
Need Professional Help?
FAQ
Q: Can I remove the freezer drawer on my LG InstaView refrigerator without tools? A: Yes, most LG French Door and InstaView models use tool-free release tabs or levers on the rail assembly. You simply pull to full extension and press the release mechanisms while sliding the drawer forward. Older models before 2015 may require a flat-head screwdriver to depress recessed release clips.
Q: Why does my LG freezer drawer stick and not slide smoothly? A: The most common cause is frost buildup on the telescoping rail tracks, especially in humid environments or when the door gasket has gaps. Remove the drawer completely, melt any ice on the rails with a hair dryer, and apply food-grade silicone lubricant to the tracks. Also verify the drawer is not overloaded beyond LG's recommended weight limit.
Q: How often should I remove and clean the LG freezer drawer? A: LG recommends cleaning the freezer compartment every 3-6 months. Removing the drawer provides access to the drain trough and rear panel where frost tends to accumulate. Regular cleaning prevents the ice buildup that eventually blocks the drain and causes water pooling beneath the drawer.
Q: Will removing the freezer drawer void my LG warranty? A: No. The freezer drawer is designed for user removal for cleaning purposes. LG's user manual includes drawer removal instructions. However, removing interior panels behind the drawer to access the evaporator coils or making modifications to the rail system may affect warranty coverage. The 10-year Linear Compressor warranty remains valid regardless of drawer removal.
Need a certified technician? Book same-day repair →

